Archives 2025

my life my past lucian’s regret pdf

My Life, My Past: Exploring Lucians Regret

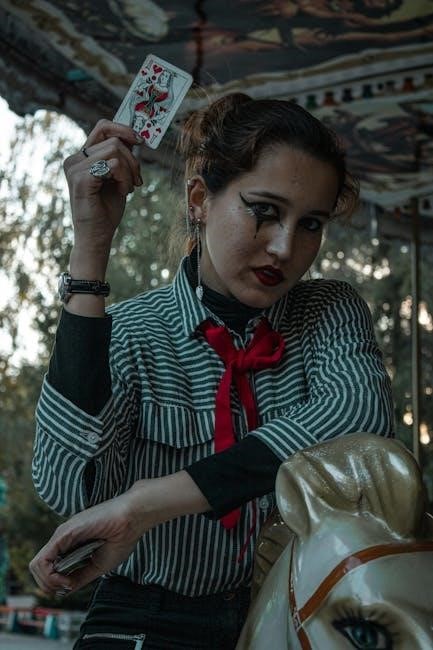
Aurora’s early chapters detail a life before Lucian Grey, focusing on her pre-destined, politically motivated marriage to the Alpha for pack alliance and protection․

Overview of the Unknown Wolf Series

The Unknown Wolf Series, penned by TracyLian, plunges readers into a dark and complex paranormal romance world, with “Lucians Regret” initiating the saga․ This series explores themes of forced mate bonds, abusive pack dynamics, and the struggle for freedom within a rigid societal structure․ The narrative centers around Aurora, a female Alpha, and her tumultuous relationship with Lucian Grey, a powerful and flawed Alpha․

Readers seeking access to the story often search for a “Lucians Regret PDF” online, though ethical and legal considerations surrounding such downloads are crucial․ The series is known for its intense emotional depth and controversial depiction of abuse, sparking significant discussion among readers regarding character motivations and narrative choices․ It’s a captivating, yet challenging read․

The Core Narrative of Lucians Regret

“Lucians Regret” unfolds as a compelling, yet disturbing, tale of Aurora’s forced marriage to Alpha Lucian Grey, driven by a desperate need for a protective alliance between packs․ The narrative quickly descends into a cycle of abuse and emotional turmoil, as Lucian’s character flaws and infidelity become central to the plot․ Aurora, a strong female Alpha, endures constant torture and pain within the confines of her new life․

The story explores her potential for rebellion and the arduous journey towards seeking freedom from this oppressive situation․ Many readers searching for a “Lucians Regret PDF” are drawn to the dark themes and complex character dynamics, despite the controversial content․

Aurora’s Life Before Lucian Grey

Before becoming entangled with Alpha Lucian Grey, Aurora’s existence was defined by her lineage as a female Alpha and the looming responsibility for her pack’s survival․ The initial chapters of “Lucians Regret” meticulously detail her life, establishing a stark contrast to the torment she later endures․ Her world is one of duty and expectation, culminating in the devastating decree of her arranged marriage․

This union isn’t born of affection, but a calculated political move to secure an alliance with the Blood Moon Pack․ Readers seeking a “Lucians Regret PDF” discover a heroine stripped of agency, facing a future dictated by circumstance․

Lucian Grey is introduced as the powerful Alpha of the Blood Moon Pack, a figure commanding respect and instilling fear․ Initial impressions, gleaned from those searching for a “Lucians Regret PDF”, paint a picture of a dominant and ruthless leader․ He embodies the traditional werewolf archetype, prioritizing pack strength and political maneuvering above all else․

His character is immediately problematic, foreshadowing the abusive dynamic that defines his relationship with Aurora․ Readers quickly discover Lucian views the forced marriage not as a partnership, but as a strategic acquisition, setting the stage for emotional and physical turmoil․ He is a flawed Alpha, driven by control․

Key Themes in Lucians Regret

“Lucians Regret” explores dark themes: forced bonds, abusive pack dynamics, infidelity, and marriage as a political tool, creating a complex and disturbing narrative․

Forced Mate Bonds and Their Consequences

The narrative heavily features a forced mate bond, a central conflict driving Aurora’s suffering․ This isn’t a romantic connection built on choice, but a cruel imposition dictated by pack politics and survival․ Lucian’s claim over Aurora isn’t about love; it’s about securing an alliance, disregarding her agency and desires․

This forced bond immediately establishes a power imbalance, setting the stage for the abuse and control that follow․ The consequences are devastating for Aurora, stripping her of autonomy and subjecting her to emotional and physical torment․ The story highlights how such bonds, devoid of consent, can become instruments of oppression and pain, rather than connection and fulfillment․

Readers have noted the disturbing portrayal of this dynamic, criticizing the lack of Aurora’s resistance initially and the normalization of such coercion within the pack structure․

Abuse and Torture within the Pack Dynamics

A significant and highly criticized aspect of “Lucians Regret” is its depiction of pervasive abuse and torture within the werewolf pack․ Lucian consistently subjects Aurora to both emotional and physical harm, often with little intervention from other pack members․ This isn’t presented as an isolated incident, but as ingrained within the pack’s power structure․

The novel details constant cheating and infidelity on Lucian’s part, adding to Aurora’s emotional distress․ This behavior is seemingly accepted, highlighting a disturbing normalization of toxic masculinity and control․ Readers express discomfort with the graphic nature of the abuse and its prolonged depiction, questioning its necessity for the plot․

The story portrays a pack culture where the Alpha’s actions are rarely challenged, fostering an environment of fear and silence․

Cheating and Infidelity in the Relationship

A central and deeply troubling element within “Lucians Regret” is the relentless pattern of cheating and infidelity exhibited by Lucian Grey․ Throughout the narrative, he openly engages in relationships with other women, causing significant emotional pain and humiliation for Aurora․ This isn’t a subtle undertone, but a consistently highlighted aspect of their dynamic․

Readers have voiced strong criticism regarding this portrayal, finding it repetitive and unnecessarily graphic․ The constant betrayal contributes to the overall toxic atmosphere of the relationship and reinforces Lucian’s character as abusive and lacking in respect․ It’s presented as a power play, further diminishing Aurora’s agency․

The novel seemingly normalizes this behavior within the pack structure, adding to the disturbing elements of the story․

Alliance Through Marriage: A Political Motive

The foundation of Aurora’s marriage to Lucian Grey isn’t rooted in love or attraction, but rather a calculated political maneuver; Her pack requires an alliance with the powerful Blood Moon Pack for protection, and offering Aurora as a bride is deemed a necessary sacrifice․ This arrangement is explicitly stated, highlighting the lack of agency Aurora possesses in her own fate․

Her father’s decision underscores the harsh realities of pack dynamics, where individual happiness is secondary to the survival and security of the collective․ Lucian accepts the arrangement, viewing Aurora as a valuable asset to solidify his power and influence․

This political motivation sets the stage for the abusive and controlling relationship that unfolds․

Character Analysis

Aurora and Lucian are central figures, with readers expressing strong reactions to Lucian’s flaws and the depiction of abuse within their complex dynamic․

Aurora: The Female Alpha and Her Struggles

Aurora’s character is defined by her inherent strength as a female Alpha, thrust into a brutal reality where her power offers little protection against the manipulative Lucian Grey․ The narrative highlights a life pre-determined by pack needs, forcing her into a marriage devoid of affection and filled with torment․

Her struggles aren’t simply emotional; she endures consistent abuse and witnesses infidelity, challenging her core beliefs and resilience․ Despite being an Alpha, she’s stripped of agency, becoming a pawn in a political game․ Readers observe her internal conflict as she navigates this oppressive situation, yearning for freedom and grappling with the consequences of a forced mate bond․

The initial chapters establish her past, setting the stage for understanding the depth of her pain and the potential for rebellion against the established power dynamics․

Lucian Grey: Exploring His Character Flaws

Lucian Grey is presented as a deeply flawed Alpha, whose actions drive much of the conflict within the narrative․ Online reactions consistently express strong disapproval of his character, citing his consistent cheating and the emotional, and physical, abuse inflicted upon Aurora․ He embodies toxic masculinity and utilizes his power to control and dominate․

His motivations stem from a desire for control and maintaining pack dominance, justifying his cruel behavior through political necessity․ The story doesn’t shy away from depicting his flaws, showcasing a character lacking empathy and accountability․ Readers find his actions reprehensible, fueling discussions about the novel’s depiction of abuse․

He represents the dark side of Alpha dominance, a stark contrast to the potential for strength and leadership․

Supporting Characters and Their Roles

While Aurora and Lucian dominate the narrative, supporting characters play crucial roles in shaping the story’s dynamics․ Aurora’s family facilitates her forced marriage to Lucian, prioritizing pack safety over her happiness, highlighting the political pressures at play․ Other pack members often enable Lucian’s behavior, either through fear or loyalty, illustrating the complexities of pack hierarchy․

These characters demonstrate the systemic issues within the werewolf society, where abuse and control are normalized․ Their actions, or inactions, contribute to Aurora’s isolation and suffering․ They serve as a backdrop, emphasizing the severity of her situation and the challenges she faces in seeking freedom․

Their presence adds depth and realism to the world․

Plot Points and Story Progression

The story begins with Aurora’s forced marriage to Lucian, quickly escalating into a cycle of abuse and emotional turmoil, driving her desire for liberation․

The Initial Meeting and Forced Marriage

Aurora’s introduction to Lucian Grey is far from romantic; it’s a cold, calculated arrangement dictated by pack politics and survival․ She is essentially offered as a sacrifice, a daughter given to the Blood Moon Pack to forge an alliance and safeguard her own family’s future․

The narrative emphasizes the lack of agency Aurora possesses in this pivotal moment․ There’s no courtship, no mutual attraction – only a grim acceptance of her fate․ The forced marriage immediately establishes a power imbalance and foreshadows the torment to come․ This initial encounter sets the stage for the abusive dynamic that defines much of the story, highlighting the brutal realities of werewolf pack structures and the sacrifices made in the name of power․

Escalation of Abuse and Emotional Turmoil

Following the forced marriage, Aurora’s life descends into a harrowing cycle of abuse at the hands of Lucian Grey․ Readers report the depiction is extreme, encompassing not only physical torment but also relentless emotional manipulation and psychological control․ The narrative details constant cheating and infidelity on Lucian’s part, compounding Aurora’s suffering and eroding her self-worth․

This escalation isn’t portrayed as isolated incidents, but as a systematic dismantling of Aurora’s spirit․ The story explores the devastating impact of this abuse, leaving her isolated, traumatized, and struggling to maintain any semblance of hope․ The novel delves into the complexities of surviving within a toxic and oppressive relationship, showcasing the profound emotional turmoil Aurora endures․

Potential for Rebellion and Seeking Freedom

Despite the overwhelming abuse, the narrative hints at a growing potential for Aurora to rebel against Lucian’s control․ As a female Alpha herself, a dormant strength lies within her, slowly awakening amidst the turmoil․ Readers speculate about her eventual fight for freedom, fueled by the constant torment and betrayal she experiences․

The story suggests Aurora may seek allies or discover hidden resources to challenge the established power dynamics within the pack․ This potential for rebellion offers a glimmer of hope amidst the darkness, hinting at a possible turning point in her fate․ The question remains whether she will find the courage and opportunity to break free from Lucian’s grasp and reclaim her life․

Availability and Access

“Lucians Regret” PDF versions are sought online, but accessing them raises legality and ethical concerns regarding copyright infringement and unauthorized distribution․

Finding Lucians Regret PDF Online

Numerous websites claim to offer “Lucians Regret” in PDF format, often appearing through search results related to the “Unknown Wolf Series” and author TracyLian․ However, locating a legitimate, free PDF download proves challenging, with many links leading to suspicious sites or broken downloads․ Readers frequently encounter advertisements and potential malware risks while searching․

Several online forums and book-sharing communities discuss the availability of the PDF, but caution against downloading from unverified sources․ Some users report finding the complete series – encompassing books 1-3 – compiled into a single PDF file, while others suggest exploring digital libraries or online bookstores for authorized ebook versions․ It’s crucial to prioritize safe browsing practices and consider the legal implications before attempting to download any copyrighted material․

Legality and Ethical Considerations of PDF Downloads

Downloading “Lucians Regret” as a PDF from unauthorized sources raises significant legal and ethical concerns․ Copyright law protects TracyLian’s work, and distributing or obtaining it through illegal channels constitutes copyright infringement․ This can lead to legal repercussions for both the downloader and the distributor․

Ethically, supporting authors by purchasing their work ensures they can continue creating content․ Free, unauthorized PDFs undermine this system, potentially harming the author’s livelihood․ While the desire for accessible reading material is understandable, respecting intellectual property rights is paramount․ Opting for legitimate purchasing options – ebooks or physical copies – demonstrates support for the author and the publishing industry․

Alternative Reading Platforms and Formats

Beyond seeking a “Lucians Regret” PDF, readers have several legitimate avenues to enjoy TracyLian’s work․ Popular ebook platforms like Kindle, Kobo, and Apple Books offer digital versions for purchase, providing a convenient reading experience on various devices․ These platforms often feature adjustable font sizes and built-in dictionaries․

Additionally, physical copies of the book are available through online retailers and bookstores․ Exploring reading apps that offer subscription services can also provide access to a wider range of books, potentially including this title․ Choosing these legal formats supports the author and ensures a quality reading experience, free from the risks associated with unauthorized downloads․

Reader Reactions and Criticisms

Readers express strong opinions, with some disliking Lucian’s character intensely due to abusive behaviors and infidelity depicted throughout the “Lucians Regret” narrative․

Common Complaints Regarding Lucian’s Character

Numerous readers voice significant dissatisfaction with Lucian Grey’s portrayal, consistently labeling him as deplorable and unlikeable․ The core of the criticism centers around his consistent abusive behavior towards Aurora, which many find difficult to reconcile with a romantic lead․

Specifically, complaints highlight his constant cheating and infidelity, actions that are not presented as redeemable flaws but rather as normalized within the pack dynamics․ Some readers express discomfort with the novel seemingly condoning, or at least not sufficiently condemning, these harmful actions․

The lack of substantial character development addressing his flaws further exacerbates the issue, leaving many feeling that Lucian remains a reprehensible figure throughout the story, despite the narrative’s attempts to build tension and romance․

Discussion of the Abuse Depiction in the Novel

The depiction of abuse within “Lucian’s Regret” sparks considerable debate among readers․ Many express concern over the graphic nature of the emotional and physical torment inflicted upon Aurora, questioning its necessity within the narrative․ Critics argue the abuse is excessively detailed and potentially triggering, serving more to shock than to meaningfully explore its consequences․

Conversely, some defend the author’s choice, suggesting it reflects the brutal realities of power dynamics within the werewolf pack structure․ However, this perspective is often countered by concerns that the novel doesn’t adequately address the trauma experienced by Aurora, or offer sufficient condemnation of Lucian’s actions․

The lack of a clear anti-abuse message remains a central point of contention, leading to accusations of romanticizing harmful behaviors․

Overall Sentiment and Book Recommendations

Overall, reader sentiment towards “Lucian’s Regret” is deeply divided․ While praised for its compelling writing style and intricate plot, the controversial depiction of abuse significantly impacts its reception․ Many readers express strong dislike for Lucian’s character and the normalization of his harmful actions, despite acknowledging the author’s skill․

For those seeking similar paranormal romance with less problematic themes, recommendations often include Caroline Above’s “My Professor Is My Alpha Mate”․ Other suggestions lean towards stories with healthier relationship dynamics and stronger female leads․ Readers craving complex werewolf lore might also enjoy series focusing on pack politics without excessive abuse․

Ultimately, “Lucian’s Regret” remains a polarizing read․

Connections to Other Works

“Lucians Regret” shares themes with paranormal romance, drawing on werewolf mythology and echoing elements found in works like Caroline Above’s popular series․

Similarities to Other Paranormal Romance Novels

“Lucians Regret” aligns with common tropes within the paranormal romance genre, notably the forced mate bond and the power dynamics inherent in werewolf pack structures․ The narrative echoes themes found in numerous stories featuring alpha males and strong female leads navigating complex relationships․

Like many books in this subgenre, it explores themes of destiny, forbidden love, and overcoming adversity․ The initial animosity and eventual connection between Aurora and Lucian mirrors the classic enemies-to-lovers arc frequently seen in paranormal romance․ The political maneuvering and alliance-building through marriage are also prevalent plot devices․

However, the novel distinguishes itself through its intense depiction of abuse and emotional turmoil, a darker element that sets it apart from lighter, more whimsical paranormal romances․

Influence of Werewolf Lore and Mythology

“Lucians Regret” draws heavily from established werewolf lore, incorporating elements like alpha/beta hierarchies, the significance of the full moon, and the concept of a life mate bond․ The pack dynamics, with their emphasis on loyalty and obedience, reflect traditional werewolf mythology․

The novel utilizes the idea of werewolves as powerful, often dangerous creatures, capable of shifting between human and wolf forms․ The forced mate bond, a central plot point, is a common trope rooted in the idea of destined pairings within werewolf communities․

While the story takes creative liberties, it remains grounded in the fundamental principles of werewolf mythology, providing a familiar framework for readers of the genre․

Comparison to Caroline Above’s “My Professor Is My Alpha Mate”

Both “Lucians Regret” and Caroline Above’s “My Professor Is My Alpha Mate” fall within the paranormal romance genre, featuring strong alpha male leads and female protagonists navigating complex relationships․ However, key differences exist․ Above’s work generally presents a more consensual dynamic, focusing on attraction and eventual acceptance․

“Lucians Regret” distinguishes itself through its explicit depiction of abuse and forced mating, a significantly darker theme․ While both explore the power dynamics inherent in alpha/mate relationships, TracyLian’s novel delves into the harmful consequences of unchecked power and control․

The level of emotional turmoil and trauma experienced by the female lead is considerably more intense in “Lucians Regret”, setting it apart from the lighter tone often found in Above’s work․

bill of rights pdf worksheet

Bill of Rights PDF Worksheet: A Comprehensive Plan

Utilizing Bill of Rights PDFs offers a dynamic educational approach, encompassing worksheets for matching scenarios to amendments and analyzing daily life impacts․

These resources facilitate understanding of crucial rights, like due process and freedom of speech, through student activities and assessment strategies․

PDF integration into lesson plans enhances comprehension of this living document, fostering civic engagement and a deeper appreciation for constitutional principles․

Embarking on a journey through the Bill of Rights requires accessible tools, and PDF worksheets serve as excellent starting points for students of all ages․

These documents aren’t merely historical artifacts; they are the bedrock of American freedoms, actively shaping daily life and legal proceedings․

Worksheets focusing on the Bill of Rights encourage active learning, moving beyond rote memorization to genuine understanding of constitutional principles․

Activities like matching scenarios to specific amendments – such as the right to bear arms or protection against unreasonable search – solidify comprehension․

Furthermore, analyzing the impact of these rights on everyday situations fosters critical thinking and civic responsibility․

PDF formats allow for easy distribution, printing, and integration into diverse lesson plans, making constitutional education more engaging and effective․

The foundational text, as highlighted in resources, emphasizes the Bill of Rights as a “living document,” constantly interpreted and applied in modern contexts․

Understanding the historical context and ratification process, alongside the amendments themselves, is crucial for appreciating their enduring relevance․

Ultimately, these worksheets empower students to become informed and active participants in a democratic society․

What is a Bill of Rights?

A Bill of Rights is a list of fundamental rights and freedoms guaranteed to the people by the government, serving as a crucial safeguard against potential overreach․

PDF worksheets centered on this concept provide a structured way to explore these protections, clarifying their meaning and application in contemporary society․

These aren’t simply abstract legal concepts; they directly impact citizens’ lives, from freedom of speech to the right to a fair trial․

Worksheet activities, such as describing amendment rights in one’s own words, promote deeper understanding beyond legal jargon․

The foundational document, as noted, was designed to be a “living document,” meaning its interpretations evolve with societal changes․

PDF resources often present scenarios requiring students to identify which amendment applies, reinforcing practical application of these rights․

Understanding the core principles – like due process, protection against self-incrimination, and the right to a jury trial – is paramount․

Moreover, worksheets can explore the balance between individual liberties and the needs of a functioning society․

Ultimately, a Bill of Rights ensures a just and equitable legal system, and worksheets are a valuable tool for educating citizens about their inherent freedoms․

Historical Context of the Bill of Rights

The Bill of Rights emerged from a period of intense debate following the American Revolution, born from fears of a powerful central government mirroring British rule․

PDF worksheets examining this history highlight the Anti-Federalists’ concerns, who demanded explicit protections for individual liberties before ratifying the Constitution․

Initially, many Founding Fathers believed a formal bill of rights was unnecessary, arguing the Constitution’s limited powers inherently protected freedoms․

However, public pressure and the promise of amendments secured ratification, leading to the drafting of the first ten amendments in 1791․

Worksheet activities can explore the influence of Enlightenment thinkers like Locke and Montesquieu on these foundational principles․

Understanding the historical context is crucial; these rights weren’t granted arbitrarily but were hard-won concessions․

PDF resources often present excerpts from historical documents, allowing students to analyze the original intent of the framers․

Analyzing the ratification process itself – a complex negotiation between states – reveals the compromises made to achieve unity․

Ultimately, the Bill of Rights represents a commitment to safeguarding individual liberties against governmental intrusion, a legacy vividly illustrated through educational materials․

The Ratification Process

The journey from proposed amendments to the enshrined Bill of Rights wasn’t swift; ratification required approval by three-fourths of the states – a significant hurdle․

PDF worksheets detailing this process reveal the fierce debates within each state legislature, pitting Federalists against Anti-Federalists․

States like Virginia and New York initially hesitated, demanding stronger guarantees of individual liberties before consenting to the Constitution․

Worksheet exercises can map the order of state ratification, highlighting regional differences in support and opposition․

The promise of a Bill of Rights proved pivotal in swaying reluctant states, demonstrating the power of compromise in a fledgling democracy․

PDF resources often include excerpts from ratification debates, offering primary source insights into the arguments presented․

Analyzing the concerns of the Anti-Federalists – fears of centralized power and potential tyranny – provides valuable context․

Understanding the ratification process underscores the Bill of Rights as not merely a gift, but a negotiated safeguard․

Educational materials can explore the role of key figures like James Madison in championing the amendments and securing their passage․

Detailed Examination of the Amendments

PDF worksheets dissect each amendment, exploring freedoms of religion, speech, and the right to bear arms, fostering critical thinking and legal comprehension․

These resources illuminate protections against unreasonable searches and self-incrimination, vital for understanding individual liberties․

First Amendment: Freedoms of Religion, Speech, Press, Assembly, and Petition

PDF worksheets dedicated to the First Amendment provide a focused exploration of these fundamental rights, often presenting scenarios requiring students to identify potential violations;

Activities might involve analyzing hypothetical cases concerning free speech limitations, such as symbolic speech or hate speech, prompting critical discussion․

Worksheets can also delve into the establishment clause and free exercise clause of religion, asking students to differentiate between government endorsement and protection of religious practice․

Furthermore, exercises could examine the role of a free press in a democratic society, and the rights associated with peaceful assembly and petitioning the government for redress of grievances․

These resources often include matching exercises, short answer questions, and case study analyses, reinforcing understanding of the scope and limitations of these crucial freedoms․

Students learn to apply these principles to contemporary issues, fostering informed civic engagement and a deeper appreciation for constitutional protections․

Second Amendment: Right to Bear Arms

PDF worksheets focusing on the Second Amendment typically present the core text – “A well regulated Militia, being necessary to the security of a free State, the right of the people to keep and bear Arms, shall not be infringed․”

Activities often center around interpreting the amendment’s phrasing, particularly the “well-regulated Militia” clause, and its implications for individual gun ownership․

Worksheets may include scenarios involving gun control legislation, prompting students to analyze whether specific laws infringe upon Second Amendment rights․

Students are challenged to research landmark Supreme Court cases, such as District of Columbia v․ Heller, and summarize their key holdings regarding the scope of the right to bear arms․

These resources frequently incorporate debates about responsible gun ownership, public safety, and the balance between individual rights and collective security․

Critical thinking exercises encourage students to form informed opinions on complex issues surrounding firearms regulation and constitutional interpretation․

Third Amendment: Quartering of Soldiers

Bill of Rights PDF worksheets dedicated to the Third Amendment highlight its historical context – a direct response to British practices before the American Revolution․

The amendment states that no soldier shall be quartered in any house without the consent of the owner, nor in time of war, but by law․

Worksheet activities often involve analyzing why the Founding Fathers considered this protection so vital, linking it to concepts of privacy and property rights․

Students explore scenarios, though rare in modern times, where the government might attempt to quarter soldiers, and debate the amendment’s relevance today․

Exercises may ask students to compare the Third Amendment to similar protections found in other legal systems or historical documents․

Discussion prompts encourage consideration of whether the amendment’s protections extend to other forms of government intrusion into private homes․

These resources emphasize the amendment’s role in safeguarding individual liberty against potential government overreach, even in times of national crisis․

Fourth Amendment: Protection Against Unreasonable Search and Seizure

Bill of Rights PDF worksheets focusing on the Fourth Amendment delve into the crucial concept of privacy and governmental limitations․

The amendment protects individuals from unreasonable searches and seizures, requiring warrants based on probable cause, supported by oath or affirmation․

Worksheet exercises often present hypothetical scenarios – traffic stops, school searches, home investigations – prompting students to analyze if Fourth Amendment rights are violated․

Students learn about the “exclusionary rule,” where evidence obtained illegally cannot be used in court, and its implications for law enforcement․

Activities may involve examining landmark Supreme Court cases that have shaped interpretations of the Fourth Amendment, like Mapp v․ Ohio․

PDFs often include discussions on the balance between security and liberty, particularly in the context of modern surveillance technologies․

These resources aim to foster understanding of how the Fourth Amendment safeguards individual freedoms in a constantly evolving legal landscape․

Fifth Amendment: Rights of the Accused – Due Process, Self-Incrimination, Double Jeopardy

Bill of Rights PDF worksheets dedicated to the Fifth Amendment explore fundamental protections for those accused of crimes․

Central to this amendment is the concept of due process – fair legal procedures – ensuring individuals aren’t deprived of life, liberty, or property without it․

Worksheets frequently address the right against self-incrimination (“pleading the fifth”), preventing compelled testimony that could be self-damning․

Students analyze scenarios involving police interrogations, Miranda rights, and the potential consequences of waiving these protections․

The principle of double jeopardy – being tried twice for the same crime – is also a key focus, alongside grand jury indictments for capital crimes․

PDF materials often present case studies, like Miranda v․ Arizona, illustrating how these rights function in practice․

These resources cultivate an understanding of the safeguards designed to protect individuals from governmental overreach within the legal system․

Sixth Amendment: Right to a Speedy and Public Trial

Bill of Rights PDF worksheets focusing on the Sixth Amendment emphasize the constitutional guarantee of a swift and open judicial process․

These resources delve into the rights of the accused, ensuring they aren’t subjected to prolonged detention without facing charges․

Worksheets often present hypothetical cases, prompting students to analyze whether a defendant’s right to a speedy trial has been violated․

A crucial element explored is the right to counsel – the provision of legal representation, even for those unable to afford it․

Students examine the importance of a public trial, promoting transparency and accountability within the justice system;

PDF materials may include excerpts from landmark cases clarifying the scope of these rights and the consequences of their denial․

Activities could involve role-playing scenarios, simulating courtroom proceedings, and debating the balance between efficiency and individual rights․

Seventh Amendment: Right to a Jury Trial in Civil Cases

Bill of Rights PDF worksheets dedicated to the Seventh Amendment clarify the right to a jury trial in federal civil cases where the amount in controversy exceeds a specific threshold․

These materials distinguish between criminal and civil proceedings, highlighting the unique protections afforded in each context․

Worksheets often present scenarios involving disputes over property, contracts, or personal injury, prompting students to determine if a jury trial is warranted․

A key focus is understanding the concept of “common law” and how it relates to the right to have facts determined by a jury․

Students analyze the historical context of the amendment, tracing its origins to concerns about judicial overreach and the desire for citizen participation․

PDF resources may include simplified explanations of legal terminology and examples of cases where the Seventh Amendment has been invoked․

Activities could involve mock trials, debates about the role of juries, and research into the evolution of civil procedure․

Eighth Amendment: Protection Against Cruel and Unusual Punishment

Bill of Rights PDF worksheets focusing on the Eighth Amendment explore the prohibition of cruel and unusual punishments, a concept often debated in contemporary society․

These resources present historical examples of punishments deemed unacceptable, contrasting them with modern sentencing practices․

Worksheets frequently include case studies involving challenges to the death penalty, excessive bail amounts, and prison conditions․

A central theme is the evolving standard of decency that informs the interpretation of “cruel and unusual․”

Students analyze arguments for and against various forms of punishment, considering factors like proportionality and human dignity․

PDF materials may offer definitions of key terms like “torture” and “inhumane treatment,” prompting critical thinking about ethical boundaries․

Activities could involve mock trials, debates on capital punishment, and research into international human rights standards․

Ninth Amendment: Non-Enumerated Rights Retained by the People

Bill of Rights PDF worksheets dedicated to the Ninth Amendment emphasize that the listing of specific rights in the Constitution doesn’t mean other rights not specifically listed are not also protected․

These resources often present scenarios requiring students to identify rights not explicitly mentioned, such as the right to privacy or the right to travel․

Worksheets frequently explore the historical context, explaining the framers’ intent to safeguard against government overreach beyond the enumerated powers․

A key focus is understanding that the Ninth Amendment acts as a safety net for fundamental rights not specifically addressed in the first eight amendments․

Students analyze court cases that have interpreted the Ninth Amendment, like Griswold v․ Connecticut, concerning marital privacy․

PDF materials may include thought-provoking questions about emerging rights in the digital age, like data privacy and online freedom․

Activities could involve debates on the scope of unenumerated rights and their protection under the law․

Tenth Amendment: Powers Reserved to the States

Bill of Rights PDF worksheets focusing on the Tenth Amendment clarify the principle of federalism, highlighting powers not delegated to the federal government, nor prohibited to the states, are reserved to the states respectively, or to the people․

These materials often present examples of state powers, such as education, intrastate commerce, and local law enforcement, contrasting them with federal powers․

Worksheets frequently include exercises where students categorize powers as federal, state, or concurrent, reinforcing their understanding of the division of authority․

A core concept explored is the balance of power between the national government and state governments, preventing over-centralization․

Students analyze historical and contemporary examples of Tenth Amendment disputes, like debates over healthcare or environmental regulations․

PDF resources may feature case studies illustrating the Supreme Court’s interpretation of the Tenth Amendment, such as United States v․ Lopez․

Activities could involve researching state laws and comparing them to federal laws on similar issues․

Bill of Rights Worksheets & Activities

Engaging Bill of Rights PDF worksheets offer diverse activities, including matching scenarios to amendments, describing rights, and analyzing real-world impacts on daily life․

Types of Bill of Rights Worksheets Available

A wide array of Bill of Rights worksheets cater to diverse learning styles and educational objectives․ Matching worksheets, for instance, challenge students to connect specific scenarios – like freedom of speech protests or unlawful searches – with the corresponding amendment protecting those rights․

Fill-in-the-blank exercises reinforce understanding of key phrases and concepts within each amendment, while short-answer questions prompt critical thinking about the practical implications of these rights․ More advanced worksheets delve into case studies, requiring students to analyze court decisions and apply the Bill of Rights to complex legal situations․

Furthermore, some PDFs incorporate visual aids, such as timelines or diagrams, to illustrate the historical context and evolution of these fundamental freedoms․ Grand Jury and due process focused worksheets are also available, exploring these specific legal protections․ These resources are designed to be adaptable, suitable for individual work, group discussions, or classroom debates․

Matching Scenarios to Amendments

This worksheet activity presents students with realistic scenarios and asks them to identify the specific amendment from the Bill of Rights that applies․ For example, a scenario describing a police search without a warrant would be matched with the Fourth Amendment, protecting against unreasonable search and seizure․

Similarly, a situation involving a defendant refusing to testify against themselves would connect to the Fifth Amendment’s self-incrimination clause․ These exercises reinforce comprehension by moving beyond abstract legal language and applying the amendments to everyday situations․

Worksheets often include a variety of scenarios, covering the spectrum of rights – from freedom of speech and religion (First Amendment) to the right to bear arms (Second Amendment) and protection against cruel and unusual punishment (Eighth Amendment)․ The goal is to develop students’ ability to recognize their constitutional rights in action and understand how these rights safeguard individual liberties․

Describing Amendment Rights in Own Words

This worksheet component challenges students to articulate the meaning of each amendment in their own language, moving beyond rote memorization of legal definitions․ Instead of simply restating the text, students must demonstrate a genuine understanding of the rights guaranteed․

For instance, rather than writing “Congress shall make no law…abridging the freedom of speech,” a student might write, “The government can’t stop me from expressing my opinions, even if they disagree with them․” This process encourages critical thinking and ensures students grasp the practical implications of each right․

Worksheets often provide sentence starters or guiding questions to assist students, but the emphasis is on independent expression․ By paraphrasing the amendments, students internalize the concepts and develop the ability to explain these fundamental rights to others, fostering civic literacy and responsible citizenship․

Analyzing the Impact on Daily Life

This section of the Bill of Rights PDF worksheet prompts students to connect abstract constitutional principles to concrete, everyday scenarios․ It moves beyond theoretical understanding, asking “How does this amendment affect me?” Students are encouraged to identify instances where their rights, or the rights of others, are either protected or potentially infringed upon․

For example, students might analyze how the First Amendment impacts their ability to protest peacefully, share opinions online, or practice their religion freely․ Or, they could consider how the Fourth Amendment safeguards them from unreasonable searches at school or by law enforcement․

Worksheet prompts often include hypothetical situations or real-world news events, requiring students to apply their knowledge and justify their reasoning․ This exercise cultivates critical thinking skills and demonstrates the relevance of the Bill of Rights in a modern context, fostering a sense of civic responsibility․

Grand Jury and Due Process Worksheet Activities

Worksheets focusing on the Fifth Amendment’s due process clause and the Grand Jury system present unique learning opportunities․ Activities often involve scenario-based questions, asking students to determine if a hypothetical legal proceeding adheres to due process standards․ For instance, a scenario might describe a case lacking proper legal counsel or a fair hearing․

Regarding Grand Juries, worksheets clarify their role as a protective measure against unwarranted prosecution․ Students analyze situations requiring a Grand Jury indictment, differentiating between capital crimes and lesser offenses․ They explore the concept of “probable cause” and its significance in initiating criminal proceedings․

These exercises frequently include fill-in-the-blank questions, matching exercises, and short-answer prompts, reinforcing key vocabulary and concepts․ The goal is to ensure students understand that due process isn’t merely a legal formality, but a fundamental right safeguarding individual liberties․

Using Bill of Rights PDFs in Education

PDF worksheets seamlessly integrate into lesson plans, offering student copies for focused study and assessment․ Resources abound for locating these valuable tools, supporting a dynamic learning experience․

Integrating PDFs into Lesson Plans

Effectively incorporating Bill of Rights PDF worksheets into lesson plans requires thoughtful consideration of learning objectives․ Begin by selecting PDFs that align with specific amendments or concepts you wish to explore, such as the First Amendment’s freedoms or the Fourth Amendment’s protections․

Structure activities around the worksheets, perhaps starting with a whole-class discussion of the amendment’s text, followed by individual or group completion of the PDF exercises․ These exercises might involve matching scenarios to amendments, describing rights in students’ own words, or analyzing the impact of these rights on daily life․

Consider using the worksheets as a springboard for debates or role-playing activities, encouraging students to apply their understanding of the Bill of Rights to real-world situations․ The “Grand Jury and Due Process” activities can be particularly engaging, prompting critical thinking about the legal system․ Remember to provide clear instructions and ample time for completion, fostering a supportive learning environment․

Student Worksheet Copy Instructions

To maximize learning, ensure students receive clear instructions for completing Bill of Rights PDF worksheets․ Emphasize the importance of reading each scenario carefully and considering which amendment best applies, as seen in matching exercises․

Instruct students to answer questions in their own words, demonstrating a genuine understanding of the rights involved․ Encourage them to provide specific examples of how these rights impact their daily lives, fostering critical analysis․

Remind students to work independently, unless otherwise specified, to assess their individual comprehension․ If group work is assigned, emphasize collaborative discussion and shared responsibility․

Highlight the need for neat and legible handwriting or typed responses, facilitating easy assessment․ Finally, collect completed worksheets promptly to provide timely feedback and reinforce learning․ The goal is to move beyond rote memorization towards a practical understanding of constitutional principles․

Assessment Strategies with Worksheets

Bill of Rights PDF worksheets offer versatile assessment opportunities․ Matching scenarios to amendments provides a quick check of foundational knowledge, revealing comprehension gaps immediately․

Evaluate student responses where they describe amendment rights in their own words, assessing their ability to articulate complex concepts․ Look for accurate definitions and insightful explanations․

Analyze responses to questions about the impact on daily life; strong answers will demonstrate a connection between abstract rights and concrete experiences․ This reveals critical thinking skills․

Consider incorporating a rubric for consistent grading, focusing on accuracy, clarity, and completeness․ Worksheet completion can contribute to a larger unit grade, alongside class participation and potentially a final exam․

Utilize worksheet results to inform future instruction, addressing areas where students struggle and reinforcing concepts that demonstrate strong understanding․

Resources for Finding Bill of Rights PDFs

Numerous online platforms offer readily available Bill of Rights PDF worksheets․ Government websites, such as those of the National Archives and the Library of Congress, provide official documents and educational materials․

Educational resource sites like Teachers Pay Teachers host a wide variety of worksheets created by educators, often tailored to specific grade levels and learning objectives․ Many are free or available at a low cost․

Search engines using keywords like “Bill of Rights worksheet PDF” will yield numerous results, but always verify the source’s credibility before using the materials in a classroom setting․

Consider utilizing legal education organizations’ websites; they frequently offer comprehensive resources, including worksheets and lesson plans, designed to promote civic understanding․

Remember to preview any downloaded PDF to ensure it aligns with your curriculum and learning goals, and to check for any copyright restrictions before distributing it to students․

The Bill of Rights as a Living Document

The Bill of Rights isn’t a static relic of the past; it’s a “living document” whose interpretations evolve with societal changes․ Worksheets focusing on contemporary issues demonstrate this dynamic nature․

Analyzing current events through the lens of the Bill of Rights – using PDF-based activities – encourages critical thinking about how these fundamental rights apply today․

For example, debates surrounding digital privacy and free speech online necessitate re-examining First and Fourth Amendment protections in a modern context․

Worksheets can prompt students to consider how landmark Supreme Court cases have shaped our understanding of these rights over time, showcasing the document’s adaptability․

By engaging with these evolving interpretations through PDF resources, students grasp that the Bill of Rights remains relevant and vital in safeguarding individual liberties in the 21st century․

a manual of laboratory and diagnostic tests

Diagnostic testing relies on comprehensive manuals, offering nurses safe and informed care during patient preparation and analysis of results.

This wealth of information, though often unstructured, supports clinics, laboratories, and healthcare providers in delivering quality patient care.

The Role of the Clinical Laboratory

Clinical laboratories are pivotal in modern healthcare, providing crucial data for diagnosis, monitoring, and treatment decisions. They function as essential components, utilizing a vast array of laboratory tests – encompassing blood, urine, and cerebrospinal fluid analyses – detailed within comprehensive manuals.

These manuals guide professionals in performing tests accurately and safely, ensuring reliable results. The lab’s role extends beyond simply executing procedures; it involves quality control, data management, and adherence to guidelines from organizations like AACC and ADA. Despite the abundance of information, structuring and standardizing this data remains a significant challenge for clinics and healthcare systems, impacting effective patient care.

Historical Development of Diagnostic Testing

The evolution of diagnostic testing has been remarkable, progressing from rudimentary observations to sophisticated molecular analyses. Early methods relied heavily on basic clinical observation, gradually incorporating simple chemical and microscopic examinations, documented in evolving manuals.

The 20th and 21st centuries witnessed explosive growth, fueled by advancements in technology – exemplified by the rapid development of COVID-19 diagnostics in early 2020. Today, comprehensive manuals are essential for navigating this complexity, guiding professionals through a landscape of increasingly specialized laboratory tests, while addressing ongoing challenges in data quality and standardization.

Hematological Tests

Manuals detail crucial hematological assessments, including complete blood counts and coagulation profiles, vital for diagnosing bleeding disorders like hemophilia.

Complete Blood Count (CBC) and Interpretation

Manuals emphasize the Complete Blood Count (CBC) as a foundational hematological assessment, providing critical insights into overall health. This test evaluates red blood cells, white blood cells, and platelets, each component offering unique diagnostic clues.

Interpretation requires understanding normal ranges and recognizing deviations indicative of various conditions. For instance, elevated white blood cell counts suggest infection or inflammation, while low red blood cell counts may signal anemia. Platelet levels are crucial for assessing clotting ability.

Detailed manuals guide clinicians through accurate CBC interpretation, ensuring appropriate patient care and further diagnostic testing when necessary, contributing to effective disease management.

Coagulation Tests: Prothrombin Time (PT) and Activated Partial Thromboplastin Time (aPTT)

Manuals detail Prothrombin Time (PT) and Activated Partial Thromboplastin Time (aPTT) as essential coagulation assessments, evaluating different stages of the clotting cascade. PT measures the extrinsic pathway, while aPTT assesses the intrinsic pathway, providing a comprehensive view of hemostasis.

These tests are vital in diagnosing bleeding disorders like hemophilia, monitoring anticoagulant therapy (e.g., warfarin), and identifying liver disease affecting clotting factor production. Prolonged PT or aPTT indicates potential deficiencies or interference.

Clinical manuals emphasize standardized procedures and accurate interpretation for reliable results, guiding appropriate clinical interventions.

Hemophilia Diagnosis: Factor VIII and IX Assays

Manuals for laboratory diagnostics highlight Factor VIII and IX assays as crucial for confirming hemophilia diagnoses. These tests specifically measure the activity levels of these clotting factors, proteins essential for proper blood coagulation.

Hemophilia, a bleeding disorder, arises from deficiencies in either Factor VIII (Hemophilia A) or Factor IX (Hemophilia B). Quantitative assays determine the severity of the deficiency, guiding treatment strategies.

Detailed protocols within manuals ensure accurate and reliable results, aiding clinicians in differentiating hemophilia types and tailoring personalized patient care plans.

Chemical Pathology Tests

Manuals detail chemical pathology tests, including metabolic and liver function assessments, crucial for evaluating overall health and identifying disease states.

Basic Metabolic Panel (BMP): Glucose, Electrolytes, and Renal Function

Manuals emphasize the Basic Metabolic Panel (BMP) as a group of tests providing crucial insights into a patient’s overall metabolic state. This panel typically assesses glucose levels, vital for diabetes diagnosis and monitoring, alongside electrolyte concentrations like sodium, potassium, and chloride, essential for fluid balance.

Furthermore, the BMP evaluates renal function through measurements of blood urea nitrogen (BUN) and creatinine, indicators of kidney health. Comprehensive manuals guide clinicians in interpreting these results, aiding in the diagnosis of conditions ranging from dehydration and kidney disease to diabetes and adrenal disorders, ensuring accurate patient care.

Liver Function Tests (LFTs): Assessing Hepatic Health

Manuals detail Liver Function Tests (LFTs) as a critical component in evaluating hepatic health, encompassing several key measurements. These tests assess enzymes like alanine aminotransferase (ALT) and aspartate aminotransferase (AST), indicators of liver cell damage. Bilirubin levels, both total and direct, are also measured to evaluate the liver’s ability to process waste.

Albumin and total protein levels provide insights into the liver’s synthetic function. Clinical manuals emphasize proper interpretation of LFT results, aiding in the diagnosis of conditions like hepatitis, cirrhosis, and bile duct obstruction, ultimately guiding appropriate patient management and treatment strategies.

Lipid Profile: Cholesterol, Triglycerides, and Cardiovascular Risk

Manuals outline a Lipid Profile as a cornerstone in assessing cardiovascular risk, encompassing total cholesterol, HDL-cholesterol (high-density lipoprotein), LDL-cholesterol (low-density lipoprotein), and triglycerides. These measurements, detailed in diagnostic guides, help determine an individual’s susceptibility to heart disease and stroke.

Rising health consciousness fuels demand for regular body profiling, including lipid panels. Clinical laboratories utilize standardized procedures, as described in these manuals, to ensure accurate results. Interpretation guides assist clinicians in implementing preventative measures and tailoring treatment plans based on individual lipid levels.

Infectious Disease Diagnostics

Manuals detail rapid antigen and PCR methods for influenza testing, alongside evolving COVID-19 strategies, and blood cultures for bacteremia identification.

Influenza Testing: Rapid Antigen and PCR Methods

Manuals for influenza diagnostics detail both rapid antigen and polymerase chain reaction (PCR) methodologies, crucial for timely identification of the virus. While most infections present as self-limited febrile illnesses, accurate and swift diagnosis guides appropriate clinical management.

Rapid antigen tests offer quick results at the point of care, aiding in immediate treatment decisions. However, PCR methods, known for their higher sensitivity and specificity, are often employed for confirmation or when rapid tests yield ambiguous results.

These manuals emphasize proper specimen collection, handling, and interpretation of test outcomes, ensuring reliable and consistent results for effective patient care during yearly epidemics.

COVID-19 Diagnostics: Evolution of Testing Strategies

Manuals detailing COVID-19 diagnostics chronicle a rapid evolution, beginning with tests developed by the CDC in early 2020. Initial strategies focused on PCR-based methods for accurate detection of the SARS-CoV-2 virus, requiring specialized laboratory infrastructure.

As the pandemic progressed, antigen tests emerged, offering faster turnaround times, though with potentially reduced sensitivity. Current manuals now encompass multiplex assays and serological testing, reflecting a broadened diagnostic landscape.

These resources emphasize standardized protocols for specimen collection, processing, and result interpretation, vital for reliable data and informed public health responses.

Blood Culture: Identifying Bacteremia and Sepsis

Manuals for laboratory and diagnostic testing detail rigorous protocols for blood culture, crucial for identifying bacteremia and sepsis – life-threatening conditions. These guides emphasize aseptic technique during collection to prevent contamination, a frequent source of false-positive results.

Detailed procedures outline appropriate blood volume collection, incubation periods, and subculture methods for optimal pathogen recovery.

Furthermore, manuals cover interpretation of results, including Gram staining, biochemical testing, and antimicrobial susceptibility testing, guiding clinicians in targeted antibiotic therapy.

Endocrinology Tests

Manuals detail endocrinology tests like HbA1c and TFTs, essential for diabetes and thyroid function diagnosis, ensuring accurate results and patient care.

Diabetes Diagnosis: HbA1c and Glucose Tolerance Tests

Manuals for laboratory and diagnostic testing emphasize the critical role of HbA1c assays in long-term glycemic control assessment, providing an average blood glucose level over 2-3 months.

These guidelines, from organizations like the AACC and ADA, detail standardized procedures for HbA1c measurement, ensuring consistency and comparability across laboratories.

Furthermore, the Glucose Tolerance Test (GTT) remains a vital diagnostic tool, requiring careful patient preparation and precise timing of blood glucose measurements as outlined in these manuals.

Proper interpretation of GTT results, alongside HbA1c values, is crucial for accurate diabetes diagnosis and effective management strategies, all supported by detailed procedural guidance.

Thyroid Function Tests (TFTs): TSH, T3, and T4

Manuals dedicated to laboratory and diagnostic testing highlight the importance of Thyroid Function Tests (TFTs) – TSH, T3, and T4 – in evaluating thyroid gland function.

These resources detail standardized methodologies for each test, emphasizing pre-analytical factors like patient preparation and sample handling to ensure accurate results.

Proper interpretation of TFT results, guided by these manuals, requires understanding the interplay between TSH as a regulatory hormone and the thyroid hormones T3 and T4.

Clinical laboratories rely on these guidelines for quality control and to provide clinicians with reliable data for diagnosing and managing thyroid disorders effectively.

Cancer Diagnostics

Manuals detail companion diagnostics that guide clinicians in tailoring treatment, utilizing laboratory tests for personalized cancer care approaches.

Early Breast Cancer Detection: Biomarkers and Imaging

Manuals for laboratory and diagnostic tests emphasize early breast cancer detection as identifying cancer not spread beyond the breast or armpit lymph nodes.

Locally advanced early breast cancer requires careful assessment, and diagnostic tools play a crucial role. Biomarker analysis, detailed within these manuals, aids in characterizing the tumor’s behavior.

Imaging techniques, alongside laboratory findings, are essential for staging and treatment planning. Comprehensive manuals guide healthcare professionals through the interpretation of these results, ensuring accurate diagnosis and personalized patient care strategies.

Companion Diagnostics: Guiding Personalized Treatment

Manuals of laboratory and diagnostic tests highlight companion diagnostics as tools that guide clinicians in tailoring treatment plans to individual patients.

These tests, detailed within comprehensive guides, identify specific biomarkers that predict a patient’s response to particular therapies, optimizing treatment efficacy.

The information presented in these manuals emphasizes the importance of accurate laboratory analysis and interpretation for informed clinical decision-making, ultimately leading to more personalized and effective cancer care strategies.

Urine Analysis

Manuals detail routine urine examinations and microscopic analysis, covering common laboratory tests found within comprehensive guides for effective patient care.

Urinalysis: Routine Examination and Microscopic Analysis

Manuals dedicated to laboratory and diagnostic testing emphasize the crucial role of urinalysis in evaluating patient health. Routine examination encompasses visual assessment, chemical dipstick analysis – detecting components like protein, glucose, and blood – and microscopic analysis.

Microscopic examination identifies cellular elements, casts, and crystals, providing insights into renal and urinary tract conditions. These tests, detailed in nursing manuals, are fundamental for diagnosing infections, kidney disease, and metabolic disorders. Accurate interpretation, guided by standardized procedures, ensures reliable results for effective patient management and informed clinical decisions.

Specific Gravity and Osmolality: Assessing Renal Concentration

Manuals for laboratory and diagnostic procedures highlight specific gravity and osmolality as key indicators of renal concentrating ability. Specific gravity measures urine density, reflecting the kidneys’ capacity to conserve water, while osmolality directly assesses solute concentration.

These tests, detailed in comprehensive guides, are vital for evaluating fluid balance, diagnosing conditions like diabetes insipidus, and monitoring renal function. Accurate measurement, guided by standardized protocols, aids in differentiating between various causes of altered urine concentration, supporting effective patient care and informed clinical decision-making.

Manuals and Guidelines in Diagnostic Testing

Nursing manuals provide safe, effective care for patients undergoing diagnostic tests, while AACC and ADA guidelines standardize diabetes laboratory measures.

Nursing Manuals for Diagnostic Test Preparation and Patient Care

Now in its Eighth Edition, this leading comprehensive manual significantly aids nurses in delivering safe, effective, and thoroughly informed care for patients undergoing various diagnostic procedures. These resources detail crucial pre-test patient preparation protocols, ensuring accurate and reliable results.

The manuals cover essential aspects like explaining the test to the patient, addressing anxieties, and managing potential complications. They also outline proper specimen collection techniques and post-test care instructions, promoting optimal patient outcomes and minimizing risks.

Furthermore, these guides emphasize the importance of adhering to established safety standards and maintaining meticulous documentation throughout the entire process.

AACC and ADA Guidelines for Diabetes Laboratory Measures

New guidelines from the American Association of Clinical Chemistry (AACC) and the American Diabetes Association (ADA) meticulously address laboratory measures vital for both the diagnosis and ongoing management of diabetes. This collaborative document provides standardized recommendations for HbA1c testing, glucose tolerance tests, and other key assessments.

These guidelines aim to enhance the accuracy and consistency of diabetes diagnoses, ensuring patients receive appropriate and timely care; They also emphasize the importance of quality control within the laboratory setting, promoting reliable results and minimizing analytical errors.

Adherence to these standards is crucial for optimal patient outcomes.

Future Trends in Laboratory Diagnostics

Laboratory-developed tests (LDT) regulation and data management present challenges, demanding robust quality control and innovative approaches for improved diagnostics.

Laboratory-Developed Tests (LDT) Regulation

Regulation of laboratory-developed tests (LDTs) is a rapidly evolving landscape within diagnostic medicine. Historically, LDTs – tests created and used within a single laboratory – faced less stringent oversight than commercially manufactured tests. However, increasing complexity and potential for patient harm have prompted calls for greater regulatory scrutiny.

Current discussions center on balancing innovation with patient safety. The FDA’s approach to LDT regulation is a subject of ongoing debate, with clinical laboratories advocating for flexibility to meet unique patient needs. Genzen (2019) highlights the clinical laboratory perspective on this complex issue, emphasizing the need for a risk-based framework that doesn’t stifle diagnostic development.

Challenges in Data Management and Quality Control

Diagnostic testing generates vast amounts of data, presenting significant challenges in management and quality control. The unstructured and uneven quality of this information hinders effective utilization by clinics and laboratories. Robust data management systems are crucial for ensuring accuracy, reliability, and timely reporting of results.

Maintaining stringent quality control measures is paramount. This includes regular calibration of instruments, proficiency testing, and adherence to established guidelines from organizations like AACC and ADA. Addressing these challenges is vital for maximizing the clinical utility of laboratory diagnostics and improving patient outcomes.

pocket guide to public speaking

Public speaking, a vital skill, isn’t solely for the naturally gifted. Researchers suggest anyone can improve through practice and preparation, enhancing presentations and confidence.

Effective communication involves knowing your audience, organizing thoughts, and delivering a compelling message—skills honed with dedication and focused effort.

From classrooms to conferences, mastering public speaking unlocks opportunities, allowing you to share ideas, inspire others, and achieve professional growth.

Why Public Speaking Matters

Public speaking transcends mere presentation; it’s a cornerstone of leadership, influence, and career advancement. The ability to articulate ideas clearly and persuasively is invaluable in nearly every profession, fostering collaboration and driving innovation.

Conferences and symposia offer platforms to disseminate research and engage with peers, yet fear often hinders participation. Overcoming this fear unlocks opportunities for professional visibility and impact.

Effective communication builds trust, strengthens relationships, and facilitates understanding. Whether presenting to a classroom, a boardroom, or a large audience, your voice matters.

Mastering public speaking empowers you to advocate for your ideas, inspire action, and connect with others on a deeper level. It’s a skill that enhances not only your professional life but also your personal growth, fostering confidence and self-expression. Don’t underestimate the power of a well-delivered message!

Ultimately, it’s about sharing your unique perspective and contributing meaningfully to the world around you.

Overcoming the Fear of Public Speaking

Glossophobia, the fear of public speaking, is remarkably common, affecting individuals across all walks of life; Recognizing that nervousness is normal is the first step towards managing it. It’s a physiological response, not a sign of inadequacy.

Preparation is paramount. Thoroughly researching your topic and practicing your speech builds confidence and reduces anxiety. Writing out your speech, and then practicing it repeatedly, can be incredibly beneficial.

Impromptu speeches are excellent exercises for building quick-thinking skills and reducing reliance on rigid scripts. Start small, with less formal presentations, gradually increasing the stakes.

Focus on your message and your audience, rather than your own anxieties. Remember why you’re speaking and the value you bring. Visualize success and embrace the opportunity to connect with others.

Be yourself, and remember that authenticity resonates with audiences. A genuine connection is far more impactful than a flawless performance.

Preparation is Key

Success in public speaking hinges on diligent preparation. Understanding your audience, crafting a clear message, and structuring your speech are essential components.

Effective organization ensures a compelling and memorable presentation, maximizing impact and audience engagement through thoughtful planning.

Prioritize thoroughness; a well-prepared speech builds confidence and minimizes anxiety, leading to a more polished delivery.

Understanding Your Audience

Knowing your audience is paramount to effective public speaking. Before crafting your speech, dedicate time to analyze who you’ll be addressing. Consider their existing knowledge level on the topic – avoid jargon if they are newcomers, and delve deeper if they are experts.

Demographics matter. Age, cultural background, and professional affiliations all influence how your message is received. Tailor your examples and language to resonate with their experiences. What are their expectations? Are they there to be informed, entertained, or persuaded?

Anticipate their perspectives and potential concerns. Addressing these proactively demonstrates respect and builds trust. A speech that connects with the audience on a personal level is far more impactful than one delivered in isolation. Think about what they want to hear, not just what you want to say.

Research can be invaluable. If possible, gather information about previous events or presentations to gauge audience preferences. Understanding their needs allows you to craft a message that truly resonates, fostering a meaningful connection and maximizing your speech’s effectiveness.

Defining Your Message

Clearly defining your message is the cornerstone of a successful speech. What single, overarching idea do you want your audience to take away? This core message should guide every aspect of your presentation, from the introduction to the conclusion.

Boil it down to a concise statement – a “thesis” for your speech. This ensures focus and prevents rambling. Everything you say should support and reinforce this central theme. Avoid trying to cover too much ground; depth is often more impactful than breadth.

Consider your purpose: are you informing, persuading, or entertaining? Your message should align with this objective. A persuasive speech requires a clear call to action, while an informative speech prioritizes clarity and accuracy.

Refine your message through outlining. Ensure each point directly contributes to the central theme. A well-defined message not only enhances clarity for your audience but also provides you with a strong foundation for confident delivery.

Structuring Your Speech

A well-structured speech enhances clarity and audience engagement. Think of it as a journey for your listeners – it needs a clear beginning, middle, and end. A classic structure involves an introduction, body, and conclusion.

The introduction should grab attention, state your message, and preview your main points. The body develops these points with supporting evidence and examples. Finally, the conclusion summarizes your key takeaways and leaves a lasting impression.

Organize your body paragraphs logically – chronologically, spatially, or by importance. Use transitions to smoothly connect ideas and guide the audience through your argument. Signposting (“first,” “second,” “finally”) can also be helpful.

Remember the power of outlining. A detailed outline ensures a coherent flow and prevents you from losing track of your train of thought. A strong structure builds confidence and maximizes impact.

Your introduction is crucial; it sets the tone and captures your audience’s attention immediately. Start strong – a relevant anecdote, a surprising statistic, or a thought-provoking question can work wonders. Avoid rambling or apologizing for nervousness.

Clearly state your topic and its relevance to the audience. Explain why they should care about what you’re about to say. A strong thesis statement provides focus and direction. Preview your main points, giving listeners a roadmap of your speech.

Keep it concise – aim for a brief but impactful introduction. Don’t reveal all your information upfront; leave some mystery to pique their interest. Practice your opening lines until they feel natural and confident.

A well-crafted introduction builds credibility and establishes a connection with your audience, setting the stage for a successful presentation. Start strong, and you’re halfway there!

Developing Strong Body Paragraphs

Body paragraphs form the core of your speech, supporting your thesis with evidence and detail; Each paragraph should focus on a single main point, clearly stated in a topic sentence. Develop this point with supporting facts, statistics, examples, or anecdotes.

Ensure logical flow between paragraphs, using transitions to guide your audience. Words like “however,” “therefore,” and “in addition” create coherence. Avoid jumping between ideas without connection.

Keep it concise and focused; avoid unnecessary jargon or tangents. Relate your points back to the audience’s interests and needs. Visual aids can enhance understanding, but don’t let them overshadow your message.

Strong body paragraphs demonstrate your knowledge and build a persuasive argument. Structure them logically, support your claims, and keep your audience engaged. Clarity and relevance are key!

Crafting a Memorable Conclusion

A strong conclusion doesn’t simply summarize; it resonates. Reiterate your main message, but do so with fresh language and impact. Avoid merely repeating your introduction – elevate it.

Consider a call to action, inspiring your audience to think, feel, or do something. This could be a challenge, a question, or a suggestion for further exploration. Leave them with a lasting impression.

End with a powerful statement – a quote, a story, or a thought-provoking idea. This final element should tie everything together and reinforce your central theme. Avoid introducing new information.

Practice your conclusion as diligently as the rest of your speech. A confident and compelling ending solidifies your message and leaves a positive, memorable experience for your audience.

Delivery Techniques

Effective delivery hinges on vocal projection, pace, and engaging body language. Utilize visual aids strategically to enhance, not distract, from your core message.

Confidence stems from practice; maintain eye contact and modulate your tone for maximum impact and audience connection.

Vocal Projection and Pace

Vocal projection is paramount; ensure everyone in the room can comfortably hear you without straining. This doesn’t necessarily mean shouting, but rather utilizing diaphragmatic breathing to support your voice and amplify its reach. Practice speaking from your core, not just your throat, to avoid fatigue.

Pace is equally crucial. Speaking too quickly can overwhelm your audience, while a sluggish pace risks losing their attention. Vary your speed to emphasize key points and create a more dynamic delivery. Strategic pauses are powerful tools – they allow the audience to absorb information and create anticipation.

Record yourself practicing to identify areas for improvement. Pay attention to monotone delivery; inject enthusiasm and vary your inflection. A natural, conversational tone is often more engaging than a rigidly formal one. Remember, your voice is a powerful instrument; learn to wield it effectively to captivate and connect with your listeners.

Nonverbal Communication: Body Language

Body language significantly impacts your message, often conveying more than words themselves. Maintain eye contact with various individuals throughout the audience – this fosters connection and demonstrates confidence. Avoid staring fixedly at one spot or reading directly from notes.

Posture is key. Stand tall with your shoulders relaxed, avoiding slouching or fidgeting. Use natural hand gestures to emphasize points, but refrain from excessive movements that can distract. Be mindful of your facial expressions; they should align with the tone of your speech.

Movement can be effective, but purposeful. Avoid pacing aimlessly. Use steps to transition between ideas or to engage different sections of the audience. Mirroring your audience’s body language subtly can build rapport. Remember, authentic and congruent nonverbal cues enhance credibility and engagement.

Using Visual Aids Effectively

Visual aids, when used correctly, amplify your message and enhance audience understanding. Keep slides concise, employing minimal text and impactful imagery. Avoid overwhelming the audience with excessive information on a single slide; less is often more.

Charts and graphs should be clear, labeled, and easy to interpret. Ensure they directly support your spoken points, rather than simply repeating them. High-quality images and videos can add visual interest, but ensure they are relevant and contribute to the overall message.

Practice integrating visual aids seamlessly into your presentation. Don’t read directly from the slides; use them as prompts and visual reinforcement. Maintain eye contact with the audience, not the screen. Ensure visibility for everyone in the room, and always have a backup plan in case of technical difficulties.

Practice and Refinement

Rehearsal builds confidence and fluency. Seek constructive feedback from trusted sources. Acknowledge and manage nervousness through preparation and deep breathing techniques for a polished delivery.

Rehearsing Your Speech

Effective rehearsal transcends simply reading your speech aloud. It’s about internalizing the material, becoming comfortable with the flow, and anticipating potential stumbling blocks. Begin by practicing in a quiet space, focusing on clarity and pacing. Gradually introduce distractions – standing, moving around, and even simulating an audience – to build adaptability.

Time yourself during rehearsals to ensure your speech fits within the allotted timeframe. Don’t be afraid to record yourself; reviewing the recording can reveal areas for improvement in your delivery, such as filler words or awkward pauses.

Practice with visual aids, integrating them seamlessly into your presentation. Remember, rehearsal isn’t about memorizing every word, but about knowing your key points and being able to articulate them naturally. The goal is to feel prepared, not robotic. Consistent practice transforms nervousness into confidence, allowing you to connect with your audience authentically.

Seeking Feedback

Constructive criticism is invaluable for refining your public speaking skills. Share your speech with trusted friends, colleagues, or mentors and specifically request honest feedback. Ask them to evaluate not only the content but also your delivery – pace, body language, and vocal projection.

Don’t just ask “How was it?” Instead, pose targeted questions: “Was the message clear?”, “Did the introduction grab your attention?”, or “Were there any points that felt confusing?”. Be open to hearing things you may not want to hear; feedback is meant to help you grow.

Consider joining a public speaking group, like Toastmasters, where you can practice in a supportive environment and receive regular evaluations. Remember to actively listen to the feedback, take notes, and identify patterns in the suggestions. Implement the advice that resonates with you and aligns with your goals, transforming critique into improvement.

Handling Nervousness During the Speech

Nervousness is perfectly normal, even for experienced speakers! Acknowledge it, don’t fight it. Deep, controlled breathing exercises before and during your speech can significantly calm your nerves. Focus on your breath to center yourself and slow your heart rate.

Visualize success. Imagine yourself delivering a confident and engaging speech. This mental rehearsal can boost your self-assurance. Remember your opening lines thoroughly; a strong start builds momentum.

If you stumble, don’t dwell on it. Pause, take a breath, and continue. The audience is often more forgiving than you think. Channel your nervous energy into enthusiasm. Focus on connecting with your audience and delivering your message, rather than fixating on your anxiety. Remember preparation builds confidence, and practice makes progress!

Engaging Your Audience

Storytelling and appropriate humor captivate listeners, making your message memorable. Connect emotionally, fostering a rapport that keeps the audience invested in your presentation.

Relatable anecdotes and lighthearted moments enhance understanding and create a more enjoyable experience for everyone involved.

Storytelling Techniques

Harnessing the power of narrative is crucial for audience engagement. Stories aren’t merely entertainment; they’re powerful tools for illustrating points, evoking emotion, and making complex ideas relatable. A well-crafted story creates a connection, transforming passive listeners into active participants.

Begin with a compelling opening that immediately grabs attention; Develop characters and a clear plot, even in brief anecdotes. Focus on sensory details – what did things look, sound, smell, taste, or feel like? This immerses the audience in the experience.

Personal stories often resonate deeply, showcasing vulnerability and authenticity. However, ensure they directly support your message and aren’t simply digressions. Structure your stories with a clear beginning, rising action, climax, and resolution.

Don’t be afraid to use pauses for dramatic effect. Vary your vocal tone and pace to emphasize key moments. Remember, the goal isn’t just to tell a story, but to show it, allowing the audience to experience it alongside you. A captivating narrative transforms a presentation from informative to unforgettable.

Using Humor Appropriately

Integrating humor can significantly enhance a presentation, fostering rapport and making your message more memorable. However, it requires careful consideration and a keen understanding of your audience and the context.

Self-deprecating humor is often a safe and effective choice, demonstrating humility and relatability. Avoid jokes that are offensive, controversial, or rely on stereotypes. Ensure your humor aligns with your overall message and doesn’t detract from your credibility.

Timing is crucial. A well-placed anecdote or witty observation can break the tension and re-engage the audience. Don’t force humor; if it doesn’t feel natural, it’s best to omit it.

Observe audience reactions. If a joke falls flat, gracefully move on. A genuine smile and a lighthearted tone are often more effective than a contrived attempt at humor. Remember, the goal is to connect with your audience, not to become a comedian. Subtlety and relevance are key to successful comedic integration.

Q&A Session Mastery

Anticipate questions, preparing thoughtful responses to potential challenges. Listen carefully, repeat the question for clarity, and answer concisely, maintaining composure and confidence.

Handle difficult inquiries with grace, acknowledging concerns and offering well-reasoned explanations, turning challenges into opportunities for further engagement.

Anticipating Potential Questions

Proactive preparation is crucial for a successful Q&A session. Before your presentation, brainstorm potential questions your audience might pose. Consider their background, interests, and possible areas of concern related to your topic. Think critically about potential challenges to your arguments or data presented.

Develop concise and informative answers to these anticipated questions. Don’t just rehearse the answers verbatim; understand the underlying concepts so you can adapt your responses to different phrasing. Categorize questions – factual, opinion-based, challenging – and prepare accordingly.

Consider “what if” scenarios. What if someone asks about a limitation of your research? What if they challenge your conclusions? Having thought through these possibilities beforehand will reduce anxiety and allow you to respond thoughtfully. IESE Business School suggests preparing for tough questions is key. Remember, anticipating questions demonstrates respect for your audience and strengthens your credibility.

Don’t be afraid to admit you don’t know the answer. It’s better to be honest than to fabricate information. Offer to follow up with a more detailed response later.

Responding to Difficult Questions

Difficult questions are inevitable. Remain calm and composed; avoid defensiveness. Acknowledge the questioner’s point, even if you disagree. Begin your response by restating the question to ensure understanding and to buy yourself a moment to formulate a thoughtful answer.

Address the core of the question directly and honestly. If the question is based on a misunderstanding, politely clarify the facts. If it’s a legitimate challenge, acknowledge the validity of the concern and explain your reasoning.

Don’t be afraid to say “I don’t know,” but offer to find the answer and follow up. Avoid rambling or evasive responses. Keep your answers concise and focused. IESE Business School emphasizes handling questions effectively builds trust.

If faced with a hostile question, maintain professionalism. Respond respectfully, focusing on the issue, not the person. Redirect the conversation if necessary, and don’t get drawn into an argument. Remember, your goal is to inform and engage, not to win a debate.

l shaped desk assembly instructions pdf

Understanding L-Shaped Desk Assembly: An Overview

Successfully assembling your L-shaped desk requires careful attention!
Many retailers and manufacturers offer downloadable assembly instructions in PDF format,
often accessible via their websites or platforms like Amazon.

These PDF manuals detail each step, from parts identification to final checks,
ensuring a smooth and efficient installation process. Prioritize reading the entire manual beforehand!

Importance of the Assembly Manual

The assembly manual is absolutely crucial for a successful L-shaped desk build.
It provides a step-by-step guide, preventing errors and frustration.
Often available as a PDF download from the retailer or manufacturer’s website,
it details parts lists, installation points, and crucial safety precautions.

Carefully reading the entire manual before starting is paramount.
Following the instructions thoroughly ensures proper alignment and stability.
Ignoring the manual can lead to misaligned panels, missing parts, or a wobbly desk –
avoid these issues by prioritizing the PDF instructions!

Tools Required for Assembly

Successfully assembling your L-shaped desk necessitates specific tools.
While the PDF assembly instructions may list exact requirements,
generally you’ll need a Phillips head screwdriver, a flathead screwdriver,
and potentially an Allen wrench (often included).

A rubber mallet can aid in gently connecting panels,
and a level is vital for ensuring a stable, even surface.
Power drills with adjustable clutch settings can expedite the process,
but use caution to avoid over-tightening. Refer to your manual for specifics!

Preparing for Assembly

Before starting, download the PDF assembly instructions!
Carefully unpack all components and verify against the parts list.
A clear workspace prevents damage and streamlines installation.

Inventory of Parts

Crucially, before commencing assembly, meticulously compare all physical components with the detailed parts list found within the PDF assembly instructions.
This proactive step, often emphasized in user manuals, prevents mid-assembly frustration due to missing pieces.

Identify each screw, panel, leg, and shelf – noting quantities and specific identifiers.
The PDF typically includes diagrams for easy recognition.
Confirming a complete inventory upfront saves significant time and potential delays, ensuring a smoother installation experience.

Workspace Preparation

Adequate workspace preparation is vital for a successful L-shaped desk assembly. Referencing the PDF assembly instructions, clear a spacious area, protecting your flooring with a drop cloth or cardboard.
Ensure ample room to maneuver around the components during each installation step.

Good lighting is essential for accurately following the PDF diagrams.
Gather all necessary tools beforehand, as outlined in the manual, to avoid interruptions.
A well-prepared space minimizes errors and promotes a more efficient assembly process.

Base Structure Assembly

Begin by carefully following the PDF manual’s base assembly diagrams.
Connect the frame components, ensuring proper alignment before tightening screws,
as detailed in the installation guide.

Attaching the Legs to the Base Frame

Referencing your L-shaped desk’s PDF assembly manual is crucial here. Typically, this involves aligning the legs with pre-drilled holes on the base frame.
Secure them using the provided screws, but avoid fully tightening initially.

The installation guide often emphasizes checking for squareness before final tightening.
Ensure each leg is firmly attached and level; slight adjustments may be needed.
Follow the manual’s illustrations closely, as leg orientation can vary between models.
Confirm stability before proceeding to the next assembly stage.

Connecting the Base Panels

Consult your L-shaped desk’s PDF manual for specific panel connection methods. Usually, this involves aligning the base panels and utilizing cam locks or screws.
Insert cam locks and rotate to secure, or carefully screw the panels together, avoiding over-tightening.

The installation guide will detail the correct order and orientation of the panels. Ensure a flush and stable connection; misaligned panels can cause issues later. Refer to diagrams for proper placement and confirm stability before moving forward.

Side Panel Installation

PDF manuals guide attaching side panels to the base, emphasizing stability. Follow diagrams closely, using screws or cam locks for a secure fit.

Ensure proper alignment before tightening, referencing the installation instructions.

Attaching Side Panels to the Base

Consult the PDF manual for precise guidance on attaching side panels to the base frame. Typically, this involves aligning the panels with pre-drilled holes and securing them using screws or cam locks. Carefully follow the diagrams to ensure correct orientation and prevent misalignment.

Prior to fully tightening, verify that the side panels are flush with the base and that all edges align properly. The installation instructions often highlight specific screw types or tightening sequences for optimal stability. Double-check the manual for any warnings regarding force or pressure during this step.

Ensuring Stability of Side Panels

Refer to the PDF manual for techniques to maximize side panel stability. Often, this involves tightening all connecting screws in a specific sequence, preventing wobbling. Inspect for any gaps between the panels and the base, indicating a loose connection.

Cam locks, if present, require careful tightening to ensure a secure fit. The installation guide may suggest using corner braces or additional supports for enhanced rigidity, especially for larger L-shaped desks. Regularly re-tighten screws after initial use.

Shelf Installation

PDF manuals illustrate shelf types – fixed versus adjustable – and their installation. Follow diagrams closely, ensuring proper bracket placement and secure fastening for stability.

Carefully align shelves before tightening screws, referencing the assembly instructions for correct positioning.

Types of Shelves (Fixed vs. Adjustable)

Assembly manuals, often available as PDF downloads, clearly differentiate between fixed and adjustable shelves. Fixed shelves are permanently attached, typically screwed directly into the desk’s side panels, offering robust stability.

Adjustable shelves, conversely, utilize shelf pins inserted into pre-drilled holes, allowing for customizable height configurations. The PDF installation guides will detail the specific hardware required for each type.

Understanding this distinction is crucial for correct assembly, as using incorrect hardware or methods can compromise the desk’s structural integrity. Always consult the manual!

Installing Fixed Shelves

PDF assembly manuals emphasize precise alignment when installing fixed shelves. Typically, these shelves attach directly to the side panels using screws – ensure correct screw length to avoid piercing through the panel.

The installation process, detailed in the manual, often involves pre-drilling pilot holes for easier screw insertion and to prevent wood splitting. Securely tighten each screw, but avoid over-tightening, which could damage the material.

Refer to diagrams within the PDF for proper shelf placement and orientation for optimal stability.

Installing Adjustable Shelves

PDF assembly manuals illustrate how adjustable shelves utilize shelf supports or pins inserted into pre-drilled holes along the side panels. Carefully insert these supports, ensuring they are level and securely seated before placing the shelf.

The manual will specify the weight capacity for each shelf; avoid exceeding this limit. Adjusting shelf height is usually straightforward, allowing customization based on your needs.

Diagrams in the PDF clearly show proper support placement for balanced weight distribution and stability.

Top Panel Attachment

PDF manuals guide aligning and securing top panels using screws, often emphasizing checking for uneven surfaces.
Proper alignment is crucial for stability, as detailed in the installation guide.

Aligning and Securing the Top Panels

Detailed PDF assembly instructions emphasize carefully aligning the top panels with the assembled base structure before securing them.
Typically, this involves positioning the panels flush with the edges and corners, ensuring a seamless fit.

The manual will specify the correct screw type and placement points for optimal stability.
It’s often recommended to loosely fasten all screws initially, then tighten them progressively in a diagonal pattern.
This prevents warping or misalignment during the final tightening stage, as outlined in the installation guide.

Pay close attention to any diagrams within the PDF for visual guidance.

Dealing with Uneven Surfaces

Assembly manuals in PDF format often address potential issues with uneven floors. Many L-shaped desks include adjustable leg levelers, detailed in the installation instructions.

These levelers allow for fine-tuning the desk’s height on each corner, compensating for minor floor imperfections. The PDF will illustrate how to rotate these levelers to achieve a stable, wobble-free surface.

If significant unevenness exists, shims may be recommended – consult the manual for appropriate materials and placement guidance.

Cable Management Solutions

PDF assembly manuals frequently highlight integrated cable trays and grommets.

These features, detailed in the installation guide, help organize cords, promoting a cleaner workspace and preventing tangled wires during desk assembly.

Integrated Cable Trays

Many L-shaped desk PDF manuals demonstrate the installation of integrated cable trays, typically mounted beneath the desk’s surface.

These trays provide a concealed pathway for routing power cords, network cables, and other wires, significantly reducing clutter. The assembly instructions often illustrate proper mounting techniques, ensuring secure attachment to the desk frame.

Effective use of these trays, as shown in the installation guide, contributes to a more organized and aesthetically pleasing workspace, enhancing overall productivity.

Cable Grommets and Ties

L-shaped desk assembly instructions PDF guides frequently detail the use of cable grommets and ties for superior cable management. Grommets, installed through desk surfaces, offer neat access points for cords.

The installation process, outlined in the manual, ensures a clean look and prevents cable fraying. Cable ties, often included or recommended, bundle wires together, further minimizing clutter.

Following these steps, as depicted in the assembly manual, creates a safer, more organized workspace, and protects cables from damage.

Troubleshooting Common Issues

Assembly manuals in PDF format often include troubleshooting sections! Common problems like missing parts, wobbles, or misalignment are addressed with clear solutions.

Refer to your installation guide for specific fixes and diagrams to resolve these issues efficiently.

Missing Parts

Discovering missing components during L-shaped desk assembly is frustrating, but your assembly manual’s PDF version is your first resource!
Carefully re-examine the parts list within the PDF to confirm what’s absent.

Most PDF manuals provide contact information for customer support or the retailer.
Utilize this to request replacement parts, referencing the part numbers from the installation guide.
Document everything – order numbers, dates, and communication – for a smoother resolution.

Don’t attempt to substitute parts, as this could compromise structural integrity.

Wobbly Desk

A wobbly L-shaped desk often indicates loose connections. Refer to your assembly manual’s PDF for a step-by-step review of all screw locations.
Systematically tighten every screw, but avoid over-tightening, which can strip threads.

The PDF installation guide may detail leveling adjustments.
Check if your desk has adjustable feet; these can compensate for uneven floors.
If the wobble persists, double-check the base structure assembly, referencing diagrams in the PDF.

Ensure all panels are correctly aligned.

Misaligned Panels

Misaligned panels during L-shaped desk assembly are common. Consult your assembly manual’s PDF for detailed diagrams illustrating correct panel alignment. Loosen the screws connecting the affected panels, allowing for adjustment.

Carefully reposition the panels, ensuring they fit flush against each other and the base structure, as shown in the PDF installation guide. Retighten the screws gradually and evenly.

If issues persist, review earlier assembly steps in the PDF to confirm proper base construction.

Finding Assembly Instructions Online

Locate your L-shaped desk’s assembly instructions as a PDF! Check the retailer’s website (like Amazon) or the manufacturer’s official site for downloads.

Checking the Retailer’s Website (Amazon, etc.)

Begin your search for the L-shaped desk assembly instructions PDF directly on the retailer’s website where you purchased the item. Amazon, for example, frequently provides downloadable manuals within the product details section.

Look for a tab labeled “Manuals,” “Guides,” or “Documentation.” If a direct PDF link isn’t visible, explore the “Help” or “Customer Support” areas. Retailers often host PDF versions to assist customers with installation. Unikito suggests contacting them online if you can’t find it!

Manufacturer’s Official Website

If the retailer’s website lacks the L-shaped desk assembly instructions PDF, head to the manufacturer’s official website. Locate the “Support,” “Downloads,” or “Resources” section. Search for your specific desk model number to filter results effectively.

Manufacturers typically provide comprehensive PDF manuals, including detailed diagrams and step-by-step guidance. Ensure you have the correct model number for an accurate search. Reading the entire manual before starting is crucial for a successful assembly!

PDF Manual Download & Access

Locating the PDF version of your L-shaped desk assembly instructions is often straightforward. Utilize a PDF reader to easily navigate and view the detailed diagrams!

Locating the PDF Version

Finding the PDF manual for your L-shaped desk typically begins with the retailer’s website, such as Amazon, where a download link is frequently provided on the product page. Alternatively, visit the manufacturer’s official website and search for your specific desk model.

If direct access proves difficult, don’t hesitate to contact the retailer or manufacturer’s customer support for assistance. They can often email you the PDF directly. Ensure you have your desk’s model number readily available to expedite the process and guarantee you receive the correct instructions!

Using PDF Reader Features

Maximize your PDF viewing experience with built-in features! Utilize the zoom function for detailed diagrams, and the search tool to quickly locate specific parts or steps within the L-shaped desk assembly instructions.

Many readers allow annotation – add notes or highlight crucial sections for clarity during installation. Consider using the ‘print’ option if you prefer a physical copy, ensuring you select the correct page scaling for readability. These features streamline the assembly process!

Safety Precautions During Assembly

Prioritize safety! Read the entire manual before starting. Proper lifting techniques are crucial, and protect both yourself and the furniture during installation.

Protecting Yourself and the Furniture

During assembly, wearing safety glasses is recommended to shield your eyes from potential debris. Protect your floors with a drop cloth or cardboard to prevent scratches.
Always lift with your legs, not your back, when moving heavier desk components – seek assistance if needed!

Carefully unpack all parts and avoid using sharp objects that could damage the finish. Refer to the PDF manual for specific warnings and cautions related to your L-shaped desk model. Protecting the furniture involves gentle handling and avoiding excessive force during screw tightening.

Proper Lifting Techniques

Lifting desk components safely is crucial to prevent injury. Always bend at your knees, keeping your back straight, and maintain a firm grip. Avoid twisting while lifting; pivot your feet instead.

For heavier panels, especially those of an L-shaped desk, seek assistance from another person. The PDF manual may indicate which parts require two-person lifting. Remember to keep the load close to your body for better balance and control, minimizing strain.

Post-Assembly Checks

Final checks, detailed in the PDF manual, are vital! Tighten all screws and ensure the desk is perfectly level for stability and safe use.

Tightening All Screws

Crucially, after completing the assembly guided by your L-shaped desk assembly instructions PDF, systematically revisit every screw. The manual emphasizes this step for structural integrity. Use the appropriate tool – often an Allen wrench or screwdriver – and apply firm, even pressure.

Don’t overtighten, as this can strip the screw holes! Check screws connecting the base, side panels, and top surfaces. A loose screw compromises stability and can lead to wobbling. Refer to diagrams within the PDF for screw locations.

Leveling the Desk

Following your L-shaped desk assembly instructions PDF, achieving a level surface is vital. Uneven floors cause instability and wobble. Many desks include adjustable feet; rotate these to raise or lower corners until the desk sits firmly without rocking.

Use a spirit level placed on the desktop to verify levelness in multiple directions. If adjustable feet aren’t sufficient, consider using shims underneath the legs. The PDF manual may illustrate this process for optimal stability.

Warranty Information & Support

Refer to your L-shaped desk’s assembly instructions PDF for warranty details.
Registration is often required to activate coverage, and contact information for customer support is provided.

Registering Your Desk

Locating the registration link is often found within the L-shaped desk’s assembly instructions PDF or on the manufacturer’s official website.
Registering your desk promptly is crucial for validating your warranty and ensuring access to dedicated customer support.

This process typically involves providing proof of purchase and completing a short online form.
Keep your registration confirmation for future reference, as it serves as documentation of your warranty activation.
Failure to register may limit your warranty benefits.

Contacting Customer Support

If the L-shaped desk assembly instructions PDF proves insufficient, don’t hesitate to reach out to customer support.
Many manufacturers provide contact details – email, phone, or online chat – within the manual itself or on their website.

Be prepared to provide your desk’s model number and purchase date.
Clearly articulate your issue, referencing specific steps from the PDF if possible.
Prompt and effective support can resolve assembly challenges quickly and efficiently.

ffxi clothcraft guide

Clothcraft in FFXI is a versatile crafting skill that creates essential items like lightweight armor, capes, and fletchings. It supports both adventurers and the crafting community, fostering prosperity in Vana’diel.

What is Clothcraft?

Clothcraft is a crafting skill in Final Fantasy XI that specializes in creating items from natural threads and fibers. It allows players to craft lightweight armor, capes, and fletchings, which are essential for magic-wielding classes and ranged weapons. This craft relies heavily on materials like wind crystals, beehive chips, and honey, often obtained through battling specific enemies. Clothcraft is known for its high cost and complexity, making it challenging to level up, especially beyond level 60. Despite the difficulty, mastering it offers significant rewards, including the ability to craft rare and high-demand items. It is a vital skill for both personal use and contributing to the in-game economy.

Importance of Clothcraft in FFXI

Clothcraft plays a vital role in FFXI, providing essential items for adventurers and fostering economic growth. It supports magic-wielding classes with lightweight armor and capes, while fletchings aid ranged attackers. High-demand items like these make Clothcraft a cornerstone of crafting, enabling players to contribute meaningfully to the economy. Despite its high cost and difficulty, mastering Clothcraft is rewarding, offering unique gear and profit opportunities. It also encourages community interaction, as crafters supply goods to other players. This craft is indispensable for both personal progression and supporting others, making it a cornerstone of FFXI’s crafting system and economy.

Benefits of Mastering Clothcraft

Mastering Clothcraft in FFXI offers numerous benefits, including the ability to craft high-demand items like capes and fletchings, which are essential for many classes; Crafters can create unique gear that enhances gameplay, providing a competitive edge. Additionally, skilled Clothcrafters can generate significant profits by selling their goods on the in-game market. The craft also supports other professions by supplying materials and equipment, fostering interdependence within the community. While leveling Clothcraft can be costly, the long-term rewards make it a valuable investment for dedicated players seeking to contribute to both their own success and the broader economy of Vana’diel.

Getting Started with Clothcraft

Embark on your Clothcraft journey by unlocking the craft, gathering essential tools, and understanding the synthesis process to create valuable items for yourself and others in Vana’diel.

How to Unlock Clothcraft

To unlock Clothcraft, reach level 1 and speak to the guild representative in the Republic of Bastok. This initial step grants access to the craft, allowing you to begin creating essential items like threads and fabrics. Ensure you have the necessary tools, such as a spinning wheel and elementary sewing needles, to start your crafting journey. This marks the beginning of your adventure in Clothcraft, enabling you to contribute to the world of Vana’diel through your creations.

Initial Setup and Tools

Starting Clothcraft requires essential tools like a spinning wheel and elementary sewing needles. These can be purchased from guild vendors or crafted using other skills. Ensure you have ample inventory space for materials and crafted items. Initial setup costs are moderate, but expenses rise as you progress. Organize your inventory to efficiently manage threads, crystals, and other resources. Consider investing in a crafting kit to enhance your early crafting experience. Proper tool maintenance and organization are key to a smooth start in Clothcraft, helping you focus on skill progression and item creation without unnecessary delays or expenses.

Understanding the Basics of Synthesis

Synthesis is the core of Clothcraft, combining materials to create items. It requires a spinning wheel and basic tools. Success depends on material quality, skill level, and crystal selection. Crystals align with elements, enhancing synthesis outcomes. Higher-quality materials increase item stats and success rates. Beginners should start with simple recipes, focusing on proper material ratios. Practice improves skill, reducing material waste. Keep an eye on durability and crafting timers. Experimenting with crystal combinations can yield unexpected results. Mastering synthesis basics is crucial for advancing in Clothcraft and creating high-demand items efficiently. Always prioritize material quality and crystal alignment for optimal outcomes.

Materials and Resources

Clothcraft relies on materials like wind crystals, beehive chips, and honey, obtained from enemies like bumblebees in Sarutabaruta; These resources are essential for crafting lightweight armor and capes.

Essential Materials for Clothcraft

Clothcraft requires specific materials to craft items effectively. Wind crystals, beehive chips, and honey are fundamental, often obtained from enemies like bumblebees in Sarutabaruta. Additional materials include flax, cotton, and silk, which become essential as you progress. These resources are used in various synthesis recipes to create lightweight armor, capes, and fletchings. Ensuring a steady supply of these materials is crucial for advancing your crafting skills and producing high-quality items. Proper material management helps minimize costs and optimize synthesis success rates, making it a cornerstone of mastering Clothcraft in FFXI.

Where to Obtain Materials

Obtaining materials for Clothcraft involves exploring various zones and defeating specific enemies. Sarutabaruta is a prime location for farming wind crystals, beehive chips, and honey by defeating bumblebees. Other zones like Tahrongi Canyon and Al Zahbi offer resources such as flax and cotton. Additionally, materials can be purchased from vendor NPCs or crafted using other skills. Farming during active times and participating in events can yield rare materials. The Auction House is also a convenient, though often costly, option for acquiring essential resources. Efficient material gathering is key to advancing your Clothcraft skills and crafting high-quality items.

Role of Crystals in Clothcraft

Crystals are fundamental in Clothcraft, serving as primary materials for synthesis. Wind crystals, often obtained by defeating bumblebees in Sarutabaruta, are essential for crafting lightweight armor and capes. Other crystals, like earth and water, are used in specific recipes. Crystals determine the elemental properties of crafted items, influencing their stats and usability. Farming enemies or purchasing from vendors are common methods to acquire crystals. They are indispensable for advancing in Clothcraft, as most recipes require them. Understanding crystal types and their sources is crucial for efficient crafting and creating high-quality items for magic-wielding classes and other adventurers.

Levelling Up Your Clothcraft

Levelling Clothcraft in FFXI requires patience and resources. Early stages focus on crafting basics, while higher levels demand rare materials and precise synthesis techniques to master.

Level 1-10: Early Game Strategy

Starting with Clothcraft, focus on crafting low-level items like wind crystals, beehive chips, and honey by defeating bumblebees in Sarutabaruta. These materials are essential for early synthesis. Craft simple items such as cloth and yarn to build your skill foundation. Avoid expensive materials initially, as they can lead to significant gil loss. Prioritize recipes with high success rates to minimize waste. Use this phase to accumulate basic resources and familiarize yourself with synthesis mechanics. Keep your inventory organized and sell unwanted items to maintain gil flow. This early stage sets the groundwork for efficient progression in Clothcraft.

Level 10-40: Mid-Game Progression

At levels 10-40, focus on crafting items like cotton and flax threads, which are in high demand. These materials can be obtained from monsters like ladybugs and puks. Craft hemp and ramie to progress efficiently, as these synths provide consistent skill-ups. Avoid crafting expensive items until you reach higher levels, as they often result in gil loss. Use Adv. Support to minimize material waste and ensure higher success rates. Sell unwanted items to maintain gil flow, as this phase can be costly. Prioritize recipes with an 8-10 level gap to optimize progression. This mid-game phase is crucial for building a strong foundation in Clothcraft.

Level 40-60: Advanced Techniques

From level 40 to 60, focus on refining your skills with high-demand materials like marrow and goat leathers. Crafting expert recipes becomes more accessible, allowing for the creation of rare items. Use Adv. Support to minimize material waste and ensure higher success rates. This phase emphasizes efficiency, as crafting losses can be significant. Prioritize recipes with consistent skill-ups, such as hemp and ramie crafts, to maintain progress. Experiment with high-quality materials to improve item stats, but avoid over-investing in expensive synths until necessary. This stage is critical for mastering advanced techniques and preparing for the challenges of high-level crafting.

Level 60-100: Expert Crafting

Reaching level 60 marks the transition to expert crafting, where precision and resource management are crucial. Focus on crafting high-tier items like rare capes and specialized armor. Utilize high-quality materials and expert recipes to maximize success rates and minimize losses. Advanced Support becomes indispensable for complex syntheses. Experiment with breaking high-level items to gain skill-ups efficiently. This phase requires significant gil investment, so prioritize cost-effective recipes. Crafting rare or unique items can yield high profits, making mastery rewarding. Consistency and patience are key to reaching the coveted level 100, where you’ll join the ranks of Vana’diel’s elite crafters.

Synthesis Techniques and Tips

Mastering synthesis requires optimizing success rates, using high-quality materials, and managing resources efficiently. Utilize the right equipment and crystals to enhance crafting outcomes and minimize failures.

Optimizing Synthesis Success Rates

Optimizing synthesis success rates in Clothcraft requires careful planning and resource management. Using high-quality materials and crystals, such as wind crystals and beehive chips, significantly improves outcomes. Ensuring your skill level aligns with the recipe difficulty is crucial, as mismatches can lead to frequent failures. Additionally, investing in advanced support abilities and crafting equipment enhances success rates. Experimenting with different crystal combinations and maintaining a well-stocked inventory of essential materials can also reduce synthesis failures. Regularly practicing and staying updated with the latest crafting guides helps refine techniques, ensuring efficient and successful crafting sessions.

Using the Right Equipment for Crafting

Using the right equipment for Clothcraft is essential for maximizing efficiency and success. Crafting gloves and tools, such as high-quality sewing needles, can significantly improve synthesis outcomes. Additionally, wearing gear that boosts crafting skills or provides additional inventory space can streamline the process. Investing in advanced support abilities and ensuring your equipment is well-maintained also plays a crucial role. Properly equipping yourself not only enhances your crafting experience but also reduces the likelihood of failures, making the process more enjoyable and profitable. Always prioritize upgrading your tools and gear as you progress in your Clothcraft journey.

Managing Resources Efficiently

Managing resources efficiently is crucial for successful Clothcraft. Always track your inventory to avoid waste and ensure you have enough materials for synthesis. Prioritize using crystals wisely, as they are essential for crafting. Plan ahead by stockpiling materials and crafting in bulk to minimize costs. Utilize guides to identify the most cost-effective synths for leveling up. Keep track of market demand to craft items that sell well, reducing financial losses. Remember, Clothcraft can be expensive, so balancing resource use and profit is key. Efficient management ensures you progress smoothly while maintaining a healthy inventory and gil reserves for advanced crafting.

Advanced Clothcraft Topics

Mastering expert recipes, crafting high-demand items, and optimizing profit are key to advancing in Clothcraft. These techniques enhance your crafting business and reputation in Vana’diel.

Crafting Expert Recipes

Crafting expert recipes in Clothcraft requires precision and high-quality materials. These recipes often yield rare or unique items, such as enchanted capes or specialized fletchings, which are in high demand. To master expert recipes, crafters must invest in rare materials and crystals, ensuring optimal synthesis success. Many expert recipes are unlocked at higher skill levels, making them accessible only to seasoned crafters. The process can be costly, but the rewards, both in terms of profit and reputation, are significant. Crafting expert recipes is a testament to skill and dedication, making it a cornerstone of advanced Clothcraft.

Creating High-Demand Items

Crafting high-demand items in Clothcraft is crucial for both profit and player satisfaction. Focus on creating capes, fletchings, and lightweight armor, which are essential for magic users and ranged classes. These items are consistently sought after due to their utility in combat and crafting. Rare materials and crystals play a significant role in producing high-quality versions of these items. Understanding market trends and timing your crafts can maximize profitability. Additionally, crafting items that are in short supply but high demand, such as enchanted capes, can set you apart as a skilled crafter. Quality and proper synthesis techniques ensure your items meet player expectations and sell quickly.

Crafting for Profit

Crafting for profit in Clothcraft requires a strategic approach to create high-demand items efficiently. Focus on crafting capes, fletchings, and lightweight armor, which are consistently sought after by players. Rare materials and crystals can elevate your creations, making them more valuable. Understanding market trends and timing your crafts can maximize profitability. Additionally, crafting items with low material costs but high demand, such as enchanted capes, can yield significant returns. Balancing material expenses with profit margins is key to sustainable income. By monitoring market trends and focusing on quality, you can establish yourself as a reliable crafter, enhancing your reputation and financial success in Vana’diel.

Challenges and Common Mistakes

Clothcraft’s high material costs and synthesis failures can be financially draining. Common mistakes include poor material management and insufficient skill-ups, leading to wasted resources and stalled progress.

Common Mistakes to Avoid

Clothcrafters often overlook the importance of material quality and proper synthesis techniques, leading to frequent failures. Neglecting to stockpile essential crystals and threads can halt progress. Many crafters also underestimate the cost of high-level synths, resulting in significant gil loss. Additionally, rushing through skill-ups without Adv. Support can lead to inefficient leveling. Crafting without the right equipment, such as crafting tools and gear, reduces success rates. Overlooking market demand when crafting items can also lead to unsold stock. Avoiding these mistakes requires careful planning, resource management, and a focus on optimization to ensure steady progress and profitability in Clothcraft.

Overcoming Crafting Challenges

Crafting challenges in Clothcraft can be daunting, but with the right strategies, they become manageable. Budgeting gil is crucial, as high-level synths can be costly. Stockpiling materials like crystals and threads ensures uninterrupted progress. Utilizing Adv. Support and crafting gear boosts success rates and efficiency. Joining the FFXI crafting community provides valuable insights and tips from experienced crafters. Regularly checking market demand helps avoid crafting unsellable items. Patience and persistence are key, as skill-ups require time and effort. By staying organized and resourceful, crafters can overcome obstacles and achieve mastery in Clothcraft, turning challenges into opportunities for growth and profit.

Resources and Community Support

Online forums like Reddit’s r/ffxi and crafting guides offer valuable insights. The Final Fantasy XI wiki provides detailed crafting information. Community support and expert tips help crafters succeed.

Recommended Guides and Forums

Several online resources are available to help crafters master Clothcraft. Reddit communities like r/ffxi and r/ffxiv offer valuable discussions and tips. The Final Fantasy XI wiki provides detailed crafting guides, including those by experienced crafters like Aranar and Abosherpa. These guides cover everything from leveling strategies to expert recipes. Additionally, forums like the FFXI AH forums and Gamer Escapes share insights on cost-effective crafting and high-demand items. Engaging with these communities can significantly enhance your crafting journey and provide solutions to common challenges. Explore these resources to refine your skills and stay updated on the latest crafting trends in Vana’diel.

Joining the FFXI Crafting Community

Engaging with the FFXI crafting community is essential for mastering Clothcraft. Joining forums like r/ffxi and r/ffxiv on Reddit provides access to expert advice, while platforms like Gamer Escapes and the FFXI AH forums offer detailed guides and strategies. These communities are hubs for sharing tips, resources, and experiences, helping crafters of all levels improve their skills. Participating in discussions allows you to learn from seasoned players, discover new techniques, and stay updated on crafting trends. Building connections within the community can also open opportunities for collaboration and resource sharing, making your crafting journey more enjoyable and rewarding. Active engagement fosters growth and camaraderie among crafters in Vana’diel.

Clothcraft in FFXI is a rewarding craft that offers both creative expression and practical benefits. With dedication and the right strategies, mastering it can greatly enhance your gameplay experience.

Final Thoughts on Clothcraft

Clothcraft in FFXI is a rewarding yet challenging craft that requires patience and strategy. It offers a unique way to contribute to the game’s economy and community. By mastering Clothcraft, players can create high-demand items, support their adventuring needs, and even turn a profit. The journey from level 1 to 100 is filled with opportunities to learn and grow, making it a fulfilling experience for dedicated crafters. With the right resources and a bit of persistence, anyone can excel in this craft and leave their mark on Vana’diel.

Encouragement for Aspiring Crafters

Embarking on the Clothcraft journey in FFXI can be daunting, but it’s incredibly rewarding. Don’t be discouraged by initial failures or high costs—every synthesis is a step forward. Joining the crafting community and seeking guidance from experienced players can provide valuable insights and tips. With persistence and dedication, you’ll unlock the full potential of Clothcraft, creating items that are in high demand and earning a reputation as a skilled crafter. Remember, every crafted item tells a story of effort and passion, contributing to the vibrant world of Vana’diel.

About the Author

The author is a seasoned FFXI player with extensive experience in Clothcraft, having guided numerous adventurers through the complexities of crafting; Their expertise stems from years of in-game practice, community engagement, and a passion for optimizing crafting strategies. By sharing insights and tips, the author aims to simplify the journey for aspiring crafters, ensuring they can master Clothcraft efficiently. This guide reflects their dedication to fostering growth within the FFXI crafting community, offering practical advice and expert knowledge to help players achieve their full potential in the world of Vana’diel.

dirty dozen and clean 15 pdf

The Dirty Dozen and Clean 15 lists, published annually by the Environmental Working Group (EWG), guide consumers on pesticide contamination in produce, helping them make informed choices for healthier, more sustainable diets.

Overview of the Dirty Dozen and Clean 15 Lists

The Dirty Dozen and Clean 15 lists rank fruits and vegetables based on pesticide contamination levels. The Dirty Dozen highlights produce with the highest residues, while the Clean 15 lists those with the lowest. Published annually by the Environmental Working Group (EWG), these rankings help consumers make informed choices to reduce pesticide exposure. The lists are based on extensive testing and analysis of pesticide levels in nonorganic produce. By understanding these rankings, shoppers can prioritize organic options for highly contaminated items and opt for conventional choices when contamination is minimal, promoting healthier and more sustainable diets.

Importance of Understanding Pesticide Contamination in Produce

Understanding pesticide contamination in produce is crucial for reducing exposure to harmful chemicals. The Dirty Dozen and Clean 15 lists provide insights into which fruits and vegetables are most and least contaminated. This knowledge helps consumers make informed decisions to minimize pesticide intake, particularly for vulnerable populations like children and pregnant individuals. By prioritizing organic options for highly contaminated items, shoppers can reduce health risks while supporting sustainable farming practices that promote environmental and human well-being.

The Dirty Dozen: Fruits and Vegetables with High Pesticide Contamination

The Dirty Dozen highlights produce with the highest pesticide residues, as identified by the EWG. Spinach tops the 2025 list, followed by strawberries and grapes, urging consumers to opt for organic options.

Top Contaminated Produce in the 2025 Dirty Dozen List

In 2025, spinach leads the Dirty Dozen list as the most contaminated produce, followed by strawberries, grapes, and pears. New entries like blackberries and sweet corn also rank high due to pesticide residues. The EWG’s analysis considers both pesticide concentration and toxicity, emphasizing the importance of choosing organic options for these items to minimize exposure. This list serves as a critical guide for consumers aiming to reduce their intake of harmful chemicals through informed grocery choices.

Spinach: The Most Contaminated Fruit or Vegetable in 2025

Spinach tops the 2025 Dirty Dozen list as the most contaminated produce, with alarming levels of pesticide residues. Testing revealed multiple pesticides on spinach samples, raising significant health concerns. The Environmental Working Group (EWG) highlights that consuming non-organic spinach regularly could expose individuals to a cocktail of harmful chemicals. This makes it crucial for consumers to opt for organic spinach to minimize pesticide intake. The findings underscore the importance of awareness and informed choices to reduce exposure to toxic substances in daily diets.

Other Notable Entries in the Dirty Dozen List

Beyond spinach, other produce on the 2025 Dirty Dozen list includes strawberries, blackberries, and sweet corn, with concerning pesticide levels. Blackberries and sweet corn are newcomers, highlighting growing contamination trends. Pears and grapes also rank high, with residues detected in nearly all samples. The EWG emphasizes that these findings underscore the importance of choosing organic options for these items to reduce pesticide exposure. Consumers are urged to prioritize organic purchases for these contaminated fruits and vegetables to safeguard their health and minimize environmental impact.

The Clean 15: Fruits and Vegetables with Low Pesticide Contamination

The Clean 15 list highlights produce with minimal pesticide residues, offering consumers a guide to safer, non-organic options. Avocados top the list as the cleanest fruit in 2025.

Top Clean Produce in the 2025 Clean 15 List

The 2025 Clean 15 list identifies produce with the lowest pesticide residues, offering consumers safer non-organic options. Avocados lead as the cleanest fruit, with minimal contamination. Sweet corn, pineapple, and frozen sweet peas also rank high, showing negligible pesticide traces. These fruits and vegetables are ideal for those seeking to reduce pesticide exposure without necessarily buying organic. The list is compiled by the EWG, ensuring transparency and helping shoppers make informed decisions for a healthier diet.

Avocados: The Cleanest Fruit in 2025

Avocados topped the 2025 Clean 15 list as the cleanest fruit, with minimal pesticide exposure. The EWG’s testing revealed that fewer than 2% of avocado samples contained detectable pesticide residues, making them a safe non-organic choice. Their thick skin protects the edible flesh from contamination, ensuring a healthy and nutritious option for consumers. This makes avocados an excellent addition to a balanced diet, offering both versatility and peace of mind for those prioritizing reduced pesticide intake without opting for organic produce.

Other Notable Entries in the Clean 15 List

Beyond avocados, the 2025 Clean 15 list highlights other produce with minimal pesticide residues. Sweet corn and pineapple are standout entries, with over 90% of samples showing no detectable pesticides. Kiwi and cabbage also rank highly, offering consumers affordable, non-organic options with low contamination risks. These fruits and vegetables are not only nutritious but also provide peace of mind for those seeking to minimize pesticide exposure without solely relying on organic choices.

Methodology Behind the Dirty Dozen and Clean 15 Rankings

EWG annually tests thousands of fruit and vegetable samples, analyzing pesticide residues and toxicity. Rankings are based on contamination levels, helping consumers prioritize organic choices effectively.

How the Environmental Working Group (EWG) Conducts Its Research

The EWG annually tests thousands of fruit and vegetable samples for pesticide residues, focusing on concentration and toxicity. Data is collected from USDA and FDA reports, ensuring accuracy. Samples are analyzed for over 200 pesticides, and results are ranked to determine contamination levels. The EWG considers both the amount of pesticides and their potential harm to human health. This rigorous process helps consumers identify which produce items are safest to buy conventionally and which should be purchased organic to minimize exposure.

Factors Considered in Pesticide Contamination Analysis

The EWG’s analysis considers pesticide concentration, toxicity, and the number of different pesticides found on produce. They also evaluate the percentage of samples contaminated and the effectiveness of washing or peeling in reducing residues. This comprehensive approach ensures the rankings reflect both the level and potential harm of pesticide exposure, helping consumers prioritize which fruits and vegetables to buy organic to minimize health risks.

Trends in Pesticide Use and Contamination

Recent trends show increasing pesticide toxicity in produce, with newcomers like blackberries and sweet corn joining the Dirty Dozen list, highlighting the growing need for organic choices.

Changes in the Dirty Dozen and Clean 15 Lists Over the Years

Over the years, the Dirty Dozen and Clean 15 lists have seen notable changes, reflecting shifts in pesticide use and testing methodologies. In 2025, spinach topped the Dirty Dozen, while avocados remained the cleanest in the Clean 15. New entries like blackberries and sweet corn joined the Dirty Dozen, highlighting growing pesticide concerns. These annual updates underscore the importance of staying informed about produce contamination to make healthier choices and support sustainable farming practices.

Newcomers to the Dirty Dozen List in 2025

In 2025, the Dirty Dozen list saw significant updates, with blackberries and sweet corn making their debut. These additions reflect the Environmental Working Group’s (EWG) enhanced criteria, which now consider both pesticide concentration and toxicity. The inclusion of these items highlights growing concerns over pesticide exposure. Consumers are encouraged to opt for organic options when purchasing these newcomers to minimize potential health risks associated with pesticide residues.

Health Implications of Pesticide Exposure

Pesticide residues on produce may pose health risks, including potential links to chronic diseases and developmental issues, especially in children and during pregnancy, emphasizing the need for awareness.

How Pesticide Residues Affect Human Health

Pesticide residues on fruits and vegetables can pose health risks, particularly for vulnerable populations like children and pregnant individuals. Exposure to these chemicals has been linked to potential developmental issues and chronic diseases.

The Dirty Dozen list highlights produce with higher contamination levels, urging consumers to opt for organic options to minimize exposure and protect long-term health. Awareness of these risks empowers individuals to make informed dietary choices.

Special Considerations for Vulnerable Populations

Children, pregnant women, and the elderly are particularly vulnerable to pesticide exposure due to their developing bodies or weaker immune systems. Even low levels of pesticide residues can pose risks to their health and development.

These groups should prioritize purchasing organic options for produce listed on the Dirty Dozen to minimize exposure. Additionally, thorough washing of fruits and vegetables, even those on the Clean 15 list, is recommended to further reduce pesticide residue intake.

Expert Opinions and Recommendations

Health experts emphasize the importance of the Dirty Dozen and Clean 15 lists, urging consumers to choose organic for high-contamination items and conventional for low-risk produce.

What Health Experts Say About the Dirty Dozen and Clean 15

Health experts widely endorse the Dirty Dozen and Clean 15 lists, emphasizing their role in reducing pesticide exposure. They highlight the importance of choosing organic for items like spinach and strawberries, which top the contamination list. The EWG’s 2025 report reveals new entries, such as blackberries and sweet corn, urging consumers to opt for organic versions due to higher toxicity risks. Experts also stress the benefits of the Clean 15, like avocados, which show minimal pesticide residues, making conventional options a safe choice.

By following these guidelines, consumers can make informed decisions to protect their health and the environment, aligning with expert recommendations for a safer diet.

Practical Tips for Reducing Pesticide Exposure

To minimize pesticide exposure, prioritize buying organic for fruits and vegetables on the Dirty Dozen list, such as spinach and strawberries. For produce on the Clean 15, like avocados, conventional options are generally safe. Wash all fruits and vegetables thoroughly, even if you plan to peel them, using cool tap water or a vinegar rinse. Scrub firm-skinned produce like apples and potatoes to remove surface residues. Supporting sustainable farming practices by choosing organic when possible can also help reduce overall pesticide use in agriculture.

Environmental Impact of Pesticide Use

Pesticide use disrupts ecosystems, harms biodiversity, and contaminates soil and water. Reducing pesticide reliance through sustainable farming practices can mitigate these environmental impacts and promote ecological balance.

How Pesticides Affect Ecosystems and Biodiversity

Pesticides disrupt ecosystems by contaminating soil, water, and air, leading to bioaccumulation in wildlife. This harms biodiversity, particularly pollinators like bees, and affects beneficial insects. The loss of these species weakens ecosystem services, including pollination and pest control. Pesticide runoff also impacts aquatic life, causing declines in fish populations and altering food chains. Such environmental damage underscores the need for sustainable farming practices to reduce chemical use and protect biodiversity, aligning with the principles of the Dirty Dozen and Clean 15 lists.

Sustainable Farming Practices to Reduce Pesticide Use

Sustainable farming practices, such as crop rotation, organic farming, and integrated pest management, significantly reduce pesticide use. These methods promote soil health, biodiversity, and natural pest control. Organic farming avoids synthetic chemicals, relying instead on natural fertilizers and biological pest deterrents. Cover cropping and agroforestry also enhance ecosystem services, reducing the need for pesticides. By adopting these practices, farmers can produce cleaner, healthier food while protecting ecosystems and biodiversity, aligning with the goals of the Dirty Dozen and Clean 15 lists to minimize chemical contamination in produce.

Using the Dirty Dozen and Clean 15 Guide

Use the Dirty Dozen and Clean 15 guide to make informed shopping decisions. Check the lists before grocery shopping to prioritize organic for high-contamination items and save on low-contamination produce, reducing pesticide exposure and supporting sustainable farming practices.

How to Incorporate the Guide into Your Shopping Routine

Start by referencing the Dirty Dozen and Clean 15 guide before grocery shopping. Prioritize buying organic for fruits and vegetables on the Dirty Dozen list, while opting for conventional options from the Clean 15. Check for updates annually, as rankings may change. When shopping, keep the list handy or use a mobile app for quick reference. This simple practice helps reduce pesticide exposure and supports sustainable farming practices, promoting a healthier diet and environment.

Benefits of Choosing Organic for the Dirty Dozen

Choosing organic for the Dirty Dozen significantly reduces pesticide exposure, as these fruits and vegetables often have the highest contamination levels. Organic farming avoids synthetic pesticides, lowering health risks, especially for vulnerable populations like children and pregnant women. By opting for organic, consumers support sustainable agriculture, reducing environmental pollution and protecting biodiversity. This choice aligns with promoting healthier diets and ecosystems, making it a practical step toward a more sustainable lifestyle.

The Dirty Dozen and Clean 15 lists empower consumers to make informed choices, reducing pesticide exposure and promoting healthier, sustainable diets while supporting eco-friendly farming practices.

Key Takeaways from the Dirty Dozen and Clean 15 Lists

The Dirty Dozen and Clean 15 lists highlight produce with high and low pesticide contamination, respectively. Spinach tops the 2025 Dirty Dozen, while avocados lead the Clean 15. New entries like blackberries and sweet corn emphasize shifting pesticide trends. The EWG’s research now considers both pesticide concentration and toxicity, offering consumers clearer guidance. By prioritizing organic for the Dirty Dozen and opting for Clean 15 items, shoppers can reduce exposure and support sustainable farming. These lists empower informed decisions for a healthier, eco-friendly diet.

Encouraging a Healthier and More Sustainable Diet

Adopting the Dirty Dozen and Clean 15 lists promotes healthier eating by minimizing pesticide exposure and supports eco-friendly farming. Choosing organic for high-contamination items like spinach and strawberries, while opting for Clean 15 produce like avocados, reduces chemical intake. This approach aligns with sustainable practices, benefiting both personal health and the environment. By making informed choices, consumers can foster a diet that prioritizes wellness and environmental stewardship, encouraging a cleaner, greener food system for future generations.

aashto pavement design guide

The AASHTO Guide for Design of Pavement Structures is a comprehensive resource for designing new and rehabilitated pavements. Widely adopted by state highway agencies, it provides procedures for flexible and rigid pavements, drainage, and economic evaluations, ensuring durable and cost-effective infrastructure.

Flexible Pavement Design

The AASHTO Guide provides methods for designing flexible pavements, focusing on layer thickness and material properties. It includes sensitivity graphs and recalibration of layer coefficients, ensuring optimal structural performance under various traffic and environmental conditions, supported by advanced design tools.

AASHTO 1993 Method for Flexible Pavements

The AASHTO 1993 method is a widely used approach for designing flexible pavements, emphasizing structural integrity and long-term performance. It incorporates traffic load repetitions, material properties, and environmental factors to determine layer thicknesses. The method uses the Structural Number (SN) to relate design life and traffic loads, ensuring pavements can withstand expected axle loads without excessive deformation. Key inputs include the Equivalent Single Axle Load (ESAL), subgrade resilience, and layer coefficients. The guide also provides sensitivity graphs to analyze how changes in inputs affect design outcomes, aiding engineers in optimizing pavement structures. Additionally, it allows for recalibration of layer coefficients based on local conditions, enhancing accuracy. This method is supported by software tools, making it efficient for practitioners to implement. Overall, the AASHTO 1993 method remains a cornerstone in flexible pavement design, balancing theoretical rigor with practical application.

Sensitivity Graphs for Flexible Pavement Design

Sensitivity graphs are essential tools in the AASHTO 1993 method for flexible pavement design, enabling engineers to analyze how changes in input parameters affect design outcomes. These graphs visually represent the relationship between variables such as layer thickness, material properties, and traffic loads, helping to identify critical factors influencing pavement performance. By examining sensitivity graphs, designers can assess the impact of variations in subgrade resilience, layer coefficients, and drainage conditions on the overall structural design. This allows for optimization of pavement layers, ensuring cost-effectiveness without compromising durability. The graphs also aid in understanding the relative importance of different inputs, guiding engineers to focus on parameters with the most significant effects. Additionally, sensitivity analysis supports the recalibration of layer coefficients for local conditions, enhancing the accuracy of designs. Overall, sensitivity graphs are invaluable for refining flexible pavement designs and making informed decisions during the planning phase.

Layer Coefficient Recalibration in Flexible Pavements

Layer coefficient recalibration is a critical process in flexible pavement design to ensure the accuracy of structural designs. The AASHTO 1993 Guide provides layer coefficients for various materials, but these may need adjustment based on local conditions. Recalibration involves comparing field performance data with design predictions to refine coefficients for asphalt, granular, and subgrade layers. This process is essential for improving the reliability of pavement designs, as material behavior can vary significantly due to regional differences in drainage, climate, and construction practices. The National Center for Asphalt Technology (NCAT) has provided guidance on recalibrating asphalt layer coefficients, emphasizing the importance of field validation. Engineers use sensitivity analyses to identify which coefficients have the most significant impact on design outcomes. Recalibration ensures that pavements are neither overdesigned nor underdesigned, optimizing costs and performance. Regular updates to layer coefficients also incorporate advancements in material science and construction techniques, keeping designs aligned with current best practices. This iterative process is vital for maintaining the long-term durability and functionality of flexible pavements.

Rigid Pavement Design

Rigid pavement design focuses on Portland cement concrete (PCC) slabs, emphasizing joint spacing, reinforcement, and drainage. The AASHTO Guide provides methods for determining slab thickness based on traffic loads and material properties, ensuring long-term durability and performance.

Joint Design in Rigid Pavements

Joint design in rigid pavements is a critical component of AASHTO’s pavement design guide, focusing on Portland cement concrete (PCC) slabs. Proper joint spacing, type, and detailing ensure structural integrity and long-term performance. The guide emphasizes transverse and longitudinal joints to accommodate thermal expansion and contraction, preventing cracking and distress. Transverse joints are typically spaced between 12 to 30 feet, while longitudinal joints divide the slab into lanes. Joint sealants are essential to prevent water infiltration and maintain durability. The AASHTO guide provides recommendations for joint spacing based on slab thickness, traffic loads, and environmental conditions. Drainage through joints is also addressed to avoid water accumulation beneath the slab. Regular maintenance of joints is crucial to extend pavement life. The design process ensures that joints are constructed to withstand repetitive traffic loading and environmental stresses, making them a vital aspect of rigid pavement design.

Structural Considerations for Rigid Pavements

Structural considerations for rigid pavements in the AASHTO design guide focus on ensuring long-term durability and performance under traffic loads. The design is based on the Equivalent Single Axle Loads (ESALs) that the pavement is expected to carry over its design life. The thickness of the Portland cement concrete (PCC) slab is a critical factor, determined by traffic volume, subgrade strength, and environmental conditions. Drainage is also a key consideration, with the drainage coefficient (m) modifying layer coefficients to account for water’s impact on pavement life. The guide provides tables and equations to calculate required slab thickness and subbase requirements. Material properties, such as concrete compressive strength and modulus of elasticity, are essential for accurate design. Additionally, the guide addresses subgrade preparation and the use of geosynthetics to improve stability. Software tools, like those developed for AASHTO procedures, aid engineers in performing complex calculations. By balancing structural integrity with cost-effectiveness, the AASHTO guide ensures that rigid pavements meet performance expectations while minimizing maintenance needs over time.

Rehabilitation of Existing Pavements

The AASHTO guide provides comprehensive strategies for rehabilitating existing pavements, focusing on extending service life while minimizing costs. It covers rehabilitation concepts, field data collection, and overlay methods, ensuring effective solutions for maintaining pavement performance and safety.

Rehabilitation Concepts and Strategies

Rehabilitation of existing pavements is a critical aspect of maintaining infrastructure integrity. The AASHTO guide outlines various strategies to extend pavement life, including preventive maintenance and corrective repairs. Preventive maintenance involves addressing minor issues before they escalate, such as sealing cracks or applying surface treatments. Corrective repairs focus on addressing more severe damage, like pothole patching or partial depth repairs. The guide emphasizes the importance of balancing cost and effectiveness, ensuring that rehabilitation efforts are both economical and sustainable. It also provides methodologies for assessing pavement condition through field data collection, which is essential for determining the most appropriate rehabilitation approach. By integrating these concepts, engineers can develop tailored strategies that preserve pavement functionality and safety while minimizing long-term maintenance costs. The AASHTO guide serves as a valuable resource, offering practical solutions for enhancing the performance and extending the service life of existing pavements.

Field Data Collection for Rehabilitation

Field data collection is a critical step in the rehabilitation of existing pavements, as it provides essential information for assessing current conditions and determining appropriate repair strategies. The AASHTO guide emphasizes the importance of gathering accurate data, including traffic loads, pavement condition surveys, and material properties. Traffic data, such as axle load distributions and volumes, helps engineers understand the structural demands on the pavement. Pavement condition surveys involve visual inspections to identify distresses like cracking, rutting, and surface degradation, which are quantified using indices like the Pavement Condition Index (PCI). Additionally, non-destructive testing methods, such as the falling weight deflectometer (FWD), are used to measure pavement stiffness and layer moduli, providing insights into the structural capacity of the pavement. This data is then analyzed to prioritize rehabilitation needs and select the most effective repair methods. Accurate field data ensures that rehabilitation efforts are targeted and cost-effective, ultimately extending the service life of the pavement. By integrating advanced testing techniques with traditional survey methods, engineers can make informed decisions that balance performance and budget constraints.

Overlay Methods in Pavement Rehabilitation

Overlay methods are widely used in pavement rehabilitation to restore the structural integrity and surface condition of existing pavements. The AASHTO guide provides detailed procedures for designing overlays, which involve placing a new layer of material over the existing pavement. There are two primary types of overlays: hot-mix asphalt (HMA) overlays and portland cement concrete (PCC) overlays. HMA overlays are the most common, offering flexibility and durability, while PCC overlays are typically used for rigid pavements requiring high strength and long-term performance.

The design process involves determining the overlay thickness based on factors such as traffic loads, existing pavement condition, and desired service life. The AASHTO guide recommends using non-destructive testing, such as the falling weight deflectometer (FWD), to assess the structural capacity of the existing pavement. Proper bond strength between the overlay and the existing pavement is critical to ensure long-term performance. Drainage conditions and material properties must also be considered to prevent issues like stripping or delamination.

Overlay methods are cost-effective and can significantly extend the life of pavements, making them a preferred rehabilitation strategy for transportation agencies.

Drainage Considerations in Pavement Design

Drainage is a critical factor in pavement design, as it directly impacts the structural integrity and longevity of the pavement. The AASHTO Guide for Design of Pavement Structures emphasizes the importance of proper drainage to prevent water infiltration, which can lead to structural damage and premature deterioration. The guide introduces the concept of a drainage coefficient, denoted as ( m ), which modifies the layer coefficients based on the drainage conditions of the pavement. This coefficient is determined by the design engineer and reflects the effectiveness of drainage systems in preventing water accumulation beneath the pavement layers.

Effective drainage design involves ensuring that water is directed away from the pavement structure through proper slope, cross-sectional geometry, and subsurface drainage systems. Poor drainage can lead to reduced pavement performance, increased maintenance costs, and safety hazards such as hydroplaning. The AASHTO guide provides recommendations for designing drainage systems, including the use of underdrains and edge drains, to maintain a stable and dry pavement foundation. By addressing drainage considerations, engineers can design pavements that are more durable, safer, and cost-effective over their service life.

Economic Evaluation of Pavement Design Strategies

Economic evaluation is a cornerstone of the AASHTO Pavement Design Guide, ensuring that pavement design strategies are cost-effective and sustainable. The guide provides methodologies to assess the economic implications of various design alternatives, enabling engineers to balance initial construction costs with long-term maintenance and rehabilitation expenses. Life-cycle cost analysis (LCCA) is a key tool recommended by AASHTO, allowing decision-makers to evaluate the total cost of ownership over the pavement’s service life.

The AASHTO guide emphasizes the importance of considering factors such as material costs, traffic loading, and environmental conditions when performing economic evaluations. It also highlights the need to account for user costs, such as delays and vehicle operating expenses caused by pavement deterioration. By integrating economic analysis into the design process, engineers can identify the most cost-effective solutions that meet performance requirements while minimizing public expenditures.

Software tools and design aids provided by AASHTO facilitate detailed economic comparisons, enabling engineers to optimize pavement designs for both new construction and rehabilitation projects. This ensures that resources are allocated efficiently, delivering durable and safe infrastructure that supports economic growth and community needs.

Reliability in Pavement Design

Reliability in pavement design is a critical concept addressed in the AASHTO Pavement Design Guide, ensuring that pavements perform as expected over their design life. The guide incorporates reliability analysis to account for uncertainties in material properties, traffic loads, and environmental conditions. This approach allows engineers to design pavements with a specified level of confidence, minimizing the risk of premature failure.

The AASHTO 1993 Guide introduced reliability-based methods, enabling designers to select target reliability levels based on project-specific requirements. For example, high-volume roads may require higher reliability levels compared to low-volume roads. The guide provides procedures to incorporate reliability into both flexible and rigid pavement designs, ensuring that the selected design meets performance criteria while accounting for variability in inputs. By integrating reliability analysis, the AASHTO Guide promotes the development of durable, safe, and cost-effective pavements that satisfy long-term transportation needs. This approach has become a cornerstone of modern pavement design practices, enhancing the overall quality and performance of transportation infrastructure.

Structural Design Considerations

Structural design considerations in the AASHTO Pavement Design Guide focus on ensuring pavements can withstand traffic loads, environmental conditions, and material degradation over their design life. The guide emphasizes the importance of accurate layer coefficient values, which represent the structural contribution of each pavement layer. These coefficients are critical for determining the required thickness of asphalt, concrete, and granular layers to achieve the desired performance.

The design process incorporates traffic repetitions, expressed as Equivalent Single Axle Loads (ESALs), to estimate the cumulative stress on the pavement. Material properties, such as elastic modulus and Poisson’s ratio, are also considered to evaluate the structural response. Drainage is another key factor, as poor drainage can reduce the effectiveness of the pavement structure by weakening the subgrade and layers.

The AASHTO 1993 Guide provides methods to account for these variables, ensuring that the designed pavement meets performance criteria. It also includes provisions for recalibrating layer coefficients based on field performance data, allowing for more accurate designs. By addressing these structural considerations, the guide helps engineers develop pavements that are durable, safe, and cost-effective.

Design for Low-Volume Roads

The AASHTO Pavement Design Guide provides specific considerations for designing low-volume roads, which are characterized by limited traffic loads and often constrained budgets. These roads require cost-effective solutions that balance structural integrity with reduced maintenance needs. The guide offers simplified design methods tailored to low-volume conditions, focusing on materials and construction techniques that are practical for smaller projects.

For low-volume roads, the guide emphasizes the use of local materials and flexible pavement structures, which are more economical and easier to construct. It also includes provisions for thinner pavement layers, as the traffic loads are significantly lower than those on high-volume highways. Additionally, the guide addresses drainage considerations to prevent premature deterioration, even in areas with lower traffic.

The AASHTO Guide ensures that low-volume roads are designed to meet specific performance criteria while minimizing costs. This approach helps maintain accessibility and safety in rural and remote areas, where such roads are critical for connectivity. By providing adaptable design solutions, the guide supports the construction of durable, low-maintenance pavements suitable for these unique conditions.

Mechanistic-Empirical Design Procedures

The AASHTO Pavement Design Guide incorporates mechanistic-empirical design procedures, which combine theoretical mechanics with empirical data to predict pavement performance. This approach provides a more accurate and reliable method for designing pavements compared to traditional empirical methods. By integrating material properties, traffic loading, and environmental factors, the guide enables engineers to simulate pavement behavior under various conditions.

The mechanistic-empirical approach is particularly useful for optimizing pavement structures by considering the interaction of multiple layers and their respective properties. It also allows for the evaluation of long-term performance, helping to identify potential distresses such as cracking, rutting, and fatigue. The guide provides tools and models to predict these distresses based on material characteristics and traffic data.

One of the key advantages of this method is its adaptability to different pavement types, including flexible and rigid structures. Engineers can use these procedures to design pavements that meet specific performance criteria while minimizing costs. The AASHTO Guide also offers updated models and coefficients to enhance the accuracy of mechanistic-empirical analyses, ensuring that designs are both durable and efficient. This approach represents a significant advancement in pavement engineering, offering a balanced blend of scientific rigor and practical application.

Field Data Collection and Analysis

Field data collection and analysis are critical components of the AASHTO Pavement Design Guide, ensuring that designs are based on real-world conditions and material properties. This process involves gathering accurate information about existing pavements, including structural layers, material characteristics, and distress levels. Data such as pavement thickness, soil properties, and traffic loading are essential for reliable design outcomes.

The guide emphasizes the importance of systematic field data collection to support rehabilitation and new construction projects. Techniques like non-destructive testing (e.g., falling weight deflectometer) and coring are commonly used to assess pavement condition. This data is then analyzed to determine the structural capacity of the pavement and identify potential issues.

Key activities include measuring deflection, evaluating surface roughness, and assessing drainage conditions. These insights help engineers develop targeted solutions, such as overlays or reconstruction, ensuring that designs meet performance requirements. The AASHTO Guide provides standardized methods for data collection and interpretation, promoting consistency across projects. By integrating field data with design models, engineers can create pavements that are both durable and cost-effective, addressing current and future traffic demands. This approach ensures that designs are grounded in practical, verifiable information, leading to improved pavement performance and longevity.

Software Tools for Pavement Design

Software tools play a vital role in modern pavement design, enabling engineers to apply the AASHTO Guide’s methodologies efficiently. These tools streamline complex calculations, such as structural analysis and layer thickness determination, ensuring accurate and reliable results. One such tool is the AASHTO 1993 Design Guide-based software, which solves the basic design equation for flexible pavements and provides variable descriptions for better understanding.

Another example is the flexible pavement design software developed using AASHTO, Group Index, and CBR methods. This tool helps determine layer thickness and design life, making it invaluable for engineers. Additionally, user-friendly interfaces like the AASHTO Design Manual guide users through inputting critical data, such as axle type, structural number, and load magnitude, to generate precise designs.

These software tools not only enhance efficiency but also improve decision-making by offering comprehensive analysis and visualization of pavement performance. They are essential for implementing the AASHTO Guide’s recommendations effectively, ensuring that designs are both cost-effective and durable. By leveraging advanced software, engineers can optimize pavement structures for long-term reliability and safety.

oasis e guidance manual

Welcome to the Oasis E Guidance Manual, your comprehensive guide to understanding and utilizing the Oasis E system effectively․ This manual is designed to assist both new and experienced users in navigating and optimizing the features of Oasis E, ensuring you can make the most of its capabilities․ Whether you’re just starting out or looking to enhance your current workflow, this guide provides essential information to help you succeed․

Overview of the Oasis E System

The Oasis E system is a comprehensive software solution designed to streamline operations, enhance productivity, and provide advanced tools for data management and analysis․ It offers a user-friendly interface, robust features, and scalability to meet the needs of various organizations․ Oasis E supports seamless integration with other systems, ensuring efficient workflow and data consistency․ Its core functionalities include project management, reporting, and analytics, making it an essential tool for businesses seeking to optimize their processes․ With its modular design, Oasis E adapts to different industries, providing tailored solutions to address specific challenges․ This system is built to deliver reliability, security, and innovation, making it a trusted choice for modern organizations․

Purpose of the Guidance Manual

The purpose of the Oasis E Guidance Manual is to provide users with a clear, step-by-step guide to understanding and effectively utilizing the Oasis E system․ This manual serves as a central resource for both new and experienced users, offering detailed instructions, best practices, and troubleshooting tips․ It aims to ensure a smooth transition for those adapting to Oasis E while helping advanced users unlock its full potential․ By following this guide, users can maximize efficiency, streamline workflows, and make informed decisions․ The manual is designed to be user-friendly, ensuring that everyone can navigate and implement its recommendations with confidence and ease․

Target Audience

The Oasis E Guidance Manual is designed for a diverse range of users, including new adopters seeking to understand the system’s fundamentals and experienced users aiming to optimize their workflows․ It caters to system administrators, project managers, and end-users who interact with Oasis E regularly․ The manual also serves as a valuable resource for technical support teams and decision-makers involved in implementing or upgrading the system․ By addressing the needs of various roles, the guide ensures that everyone can leverage Oasis E’s capabilities effectively, regardless of their expertise level or specific responsibilities within their organization․

Getting Started with Oasis E

Welcome to the Oasis E system! This section will guide you through the initial steps to set up and begin using the platform effectively․ Let’s get started!

System Requirements

To ensure optimal performance, Oasis E requires specific hardware and software specifications․ A minimum of 4GB RAM and a dual-core processor is recommended․ Compatible operating systems include Windows 10, macOS High Sierra or later, and Linux distributions like Ubuntu․ For mobile access, iOS 14+ and Android 10+ are supported․ Ensure your browser is up-to-date, with Chrome, Firefox, or Safari recommended․ A stable internet connection is essential for cloud-based features․ Additional requirements may include Adobe Acrobat for PDF viewing and Microsoft Office for document editing․ Meeting these specifications ensures a seamless and efficient user experience with Oasis E․

Installation Process

The installation of Oasis E is a straightforward process․ Begin by downloading the installation package from the official website or the provided link․ Once downloaded, run the installer and follow the on-screen instructions․ Select the installation location and choose any additional components you wish to include․ Administrative privileges may be required to complete the installation․ Ensure your system meets the minimum requirements before proceeding․ The process typically takes a few minutes, depending on your system’s specifications․ Once installed, launch the application and proceed with the initial setup․ For detailed step-by-step guidance, refer to the installation wizard or the accompanying documentation․ A restart may be necessary to finalize the setup․

Initial Setup and Configuration

Welcome to the initial setup and configuration of Oasis E․ Upon launching the application for the first time, you will be guided through a setup wizard․ Begin by selecting your preferred language and timezone․ Next, configure your user profile by entering your name, email, and password․ You may also set up additional security measures such as two-factor authentication․ Define your workspace by selecting default settings for projects, data management, and notifications․ If you are connecting to a server, enter the necessary credentials․ The wizard will also prompt you to choose between a default or custom configuration․ Once completed, your Oasis E environment will be ready for use․ For further customization, refer to the advanced settings menu․

Navigating the Oasis E Interface

Welcome to the Oasis E interface, designed for intuitive navigation․ Explore the dashboard, menus, and customizable workspace to streamline your workflow efficiently with a user-friendly design․

Dashboard Overview

The Oasis E dashboard serves as your central hub for monitoring and managing tasks efficiently․ It provides a clear, organized layout with essential widgets and shortcuts, ensuring quick access to key features․ Customize the dashboard to display real-time data, recent activities, and priority tasks tailored to your workflow; The intuitive design allows users to navigate seamlessly between projects, track progress, and identify trends without unnecessary complexity․ By centralizing critical information, the dashboard enhances productivity and decision-making, making it an indispensable tool for both beginners and advanced users․ Explore its features to optimize your experience and streamline operations effectively․

Menu Navigation

The Oasis E menu navigation is designed to be intuitive and user-friendly, ensuring easy access to all features and tools․ Organized into clear categories, the menu allows users to quickly locate specific functions and modules․ Customization options enable users to tailor the menu to their workflow, adding shortcuts to frequently used features․ Accessibility features, such as keyboard navigation and screen reader compatibility, ensure all users can navigate seamlessly․ The menu’s logical structure and responsive design make it simple to explore and utilize the full potential of Oasis E, enhancing overall efficiency and user satisfaction․

Customizing Your Workspace

Oasis E allows users to personalize their workspace to suit individual preferences and workflows․ Customize layouts, themes, and shortcuts to streamline your experience․ Users can rearrange panels, hide unused features, and save preferred configurations for quick access․ Personalize color schemes and font sizes to enhance readability․ Additionally, create custom profiles for different tasks or projects, ensuring a tailored environment for each scenario․ Accessibility features, such as high-contrast modes, are also available․ By customizing your workspace, you can optimize productivity, reduce distractions, and create a more intuitive working environment․ These adjustments ensure Oasis E adapts to your needs, making your workflow more efficient and enjoyable․

Core Features of Oasis E

Oasis E offers essential tools for efficient workflow management, including data organization, task tracking, and analytical reporting, all designed to streamline operations and enhance productivity․

Data Management

The Oasis E system provides robust data management capabilities, enabling users to organize, store, and retrieve information efficiently․ Key features include data import/export tools, advanced search functionality, and automated data validation to ensure accuracy․ The platform supports multiple data formats and offers customizable data fields to meet specific organizational needs․ Additionally, Oasis E includes data backup and recovery options to safeguard against data loss․ User permissions can be set to control access, ensuring data security and compliance with regulatory standards․ These tools collectively enhance data integrity and streamline workflows, making Oasis E a reliable solution for managing complex datasets․

Project Management Tools

Oasis E offers a suite of project management tools designed to streamline workflows and enhance collaboration․ Users can create and manage projects with ease, assigning tasks, setting deadlines, and tracking progress in real time․ The platform includes Gantt charts and timelines for visualizing project schedules, as well as tools for resource allocation and dependency tracking․ Collaboration features allow team members to share updates, leave comments, and access shared documents․ Automated notifications ensure that stakeholders stay informed about project milestones and potential delays․ These tools enable teams to work more efficiently, ensuring projects are completed on time and within scope․

Reporting and Analytics

Oasis E provides robust reporting and analytics tools to help users gain insights into their data and operations․ The platform offers customizable report templates, allowing users to generate detailed reports on key metrics, performance indicators, and compliance audits․ Advanced analytics features enable users to visualize data through charts, graphs, and dashboards, making it easier to identify trends and patterns․ Real-time data processing ensures that reports are up-to-date, providing actionable insights for informed decision-making․ Users can also export reports in various formats for sharing or further analysis․ These tools empower organizations to monitor progress, optimize processes, and maintain compliance with regulatory standards effectively․

Advanced Features of Oasis E

Oasis E’s advanced features offer sophisticated tools to enhance productivity, streamline processes, and maintain data security, providing users with a powerful environment to manage complex tasks efficiently․

Automation Capabilities

Oasis E offers robust automation capabilities designed to streamline workflows and reduce manual tasks․ Users can automate repetitive processes, such as data entry, reporting, and task scheduling, saving time and improving efficiency․ The system allows for the creation of custom workflows tailored to specific needs, ensuring seamless integration with existing processes․ Automated notifications and alerts keep users informed of critical updates or issues, enabling proactive decision-making․ Additionally, Oasis E supports batch processing for large-scale operations, minimizing human intervention and reducing the risk of errors․ These automation tools empower users to focus on strategic tasks while the system handles routine activities efficiently․

Integration with Other Systems

Oasis E seamlessly integrates with a variety of third-party systems, enabling efficient data exchange and workflow synchronization․ The platform supports multiple integration methods, including APIs, CSV imports, and direct connectors for popular software solutions․ This capability allows users to consolidate data from disparate sources, ensuring a unified workflow․ Integration with tools like CRM systems, cloud storage, and productivity suites enhances collaboration and streamlines operations․ Oasis E also provides customizable integration templates to accommodate specific organizational needs․ By bridging gaps between systems, Oasis E fosters a connected environment that enhances productivity and reduces manual data entry, making it a versatile solution for modern workflows․

Security and Access Control

Security is a top priority in Oasis E, ensuring your data remains protected and accessible only to authorized users․ The system employs robust encryption for data at rest and in transit, safeguarding sensitive information from unauthorized access․ Multi-factor authentication adds an extra layer of security, verifying user identities before granting access․ Role-based access control allows administrators to define user permissions, ensuring individuals only access features and data relevant to their roles․ Audit trails track system activity, providing transparency and accountability․ Regular security updates and patches are automatically applied to maintain the highest level of protection․ Oasis E’s comprehensive security measures ensure your data is secure, compliant, and reliably accessible․

Best Practices for Using Oasis E

Adopt best practices to maximize efficiency and security in Oasis E․ Regularly update workflows, maintain data accuracy, and utilize built-in tools for optimal performance and compliance․

Optimizing Workflow Efficiency

Optimizing workflow efficiency in Oasis E involves streamlining processes to reduce bottlenecks and enhance productivity․ Start by automating repetitive tasks using the system’s automation tools, which can save time and minimize errors․ Organize tasks and projects with clear priorities and deadlines to ensure a structured approach․ Utilize the project management features to assign responsibilities and track progress in real-time․ Regularly review and adjust workflows to eliminate unnecessary steps and improve collaboration among team members․ Additionally, leverage the system’s reporting and analytics capabilities to identify inefficiencies and implement data-driven improvements․ By following these strategies, users can achieve a more efficient and effective workflow․

Data Backup and Recovery

Regular data backups are essential to safeguard your work in Oasis E․ The system offers automated backup options, allowing you to schedule backups at convenient intervals․ Ensure backups are stored securely, either locally or in the cloud, to protect against data loss․ In case of data loss, Oasis E provides robust recovery tools to restore your information quickly․ Familiarize yourself with the recovery process to minimize downtime․ Additionally, consider creating manual backups before making significant changes to your data․ By prioritizing backups and understanding recovery procedures, you can maintain data integrity and ensure business continuity․

Regular Software Updates

Regular software updates are crucial for maintaining the performance, security, and functionality of Oasis E․ The system often releases updates to fix bugs, enhance features, and improve compatibility․ To ensure you have the latest version, enable automatic updates in the settings menu․ This feature allows Oasis E to download and install updates without interrupting your workflow․ Additionally, manually checking for updates periodically is a good practice․ Always back up your data before applying updates to prevent any potential loss․ Ignoring updates may leave your system vulnerable to security risks or performance issues․ Stay updated to maximize the benefits of Oasis E․

Troubleshooting Common Issues

Troubleshooting common issues in Oasis E involves identifying the problem, understanding its cause, and applying appropriate solutions․ Refer to diagnostic tools and this manual for guidance․ If unresolved, contact support․

Identifying and Diagnosing Problems

Identifying and diagnosing problems in Oasis E begins with recognizing symptoms such as error messages, performance issues, or unexpected behavior․ Start by gathering detailed information about the issue, including when it occurs and any recent system changes․ Utilize Oasis E’s built-in diagnostic tools to analyze logs and system status․ Isolate the problem by testing individual components or workflows to determine the root cause․ Consult the manual or online resources for known issues and solutions․ Documenting the issue thoroughly will aid in resolving it efficiently, whether through self-resolution or by escalating to support․ Accurate diagnosis is key to effective troubleshooting․

Resolving Technical Errors

Resolving technical errors in Oasis E involves a systematic approach to identify and address the root cause․ Start by reviewing error messages and system logs to understand the issue․ Use the built-in diagnostic tools to analyze performance metrics and configuration settings․ Common issues may include connectivity problems, data inconsistencies, or software conflicts․ Apply troubleshooting steps such as restarting services, verifying user permissions, or reinstalling components․ If the error persists, consult the manual or online resources for specific solutions․ For complex issues, contact the support team with detailed error information to expedite resolution․ Timely error resolution ensures minimal disruption to your workflow․

Contacting Support

If you encounter issues that cannot be resolved through troubleshooting, contacting Oasis E support is the next step․ The support team is available to assist with technical difficulties, system errors, or any other concerns․ You can reach support via email, phone, or through the dedicated support portal on the Oasis E website․ When contacting support, provide detailed information about the issue, including error messages, screenshots, and steps taken before the problem occurred․ This helps the support team diagnose and resolve the issue efficiently․ Response times vary depending on the severity of the issue, but support aims to address all queries promptly to minimize downtime․

Oasis E and Compliance

Oasis E is designed to meet stringent compliance standards, ensuring data security and integrity while aligning with industry regulations and providing tools for maintaining adherence․

Regulatory Requirements

Oasis E is designed to comply with various regulatory standards, ensuring adherence to industry-specific requirements such as GDPR, HIPAA, and ISO certifications․ The system incorporates features like data encryption, access controls, and audit trails to meet these standards․ Users can rely on Oasis E to maintain compliance with legal and regulatory obligations, reducing the risk of non-conpliance․ The platform also provides tools to help organizations understand and implement necessary regulatory measures effectively․ By aligning with these requirements, Oasis E supports secure and lawful data management practices across industries․

Ensuring Data Compliance

Ensuring data compliance is a critical aspect of using Oasis E․ The system provides built-in tools to help organizations maintain adherence to data protection laws and industry standards․ Features such as data encryption, role-based access controls, and audit logging ensure that sensitive information is handled securely․ Oasis E also offers customizable settings to align with specific compliance needs, allowing users to define access levels and monitor data usage․ Regular system updates and compliance alerts further assist in maintaining data integrity․ By leveraging these features, users can ensure their data practices remain compliant with evolving regulations and standards․

Audit Trails and Reporting

Audit trails and reporting are essential for maintaining transparency and accountability within the Oasis E system․ The platform provides detailed logs of all user activities, allowing administrators to track changes, updates, and access events․ These logs are tamper-proof and time-stamped, ensuring data integrity․ Reporting tools enable users to generate comprehensive reports on system usage, data modifications, and user actions․ Customizable report templates and export options simplify compliance audits and internal reviews․ Regularly reviewing audit trails helps identify potential security breaches or unauthorized access․ This feature ensures organizations can demonstrate adherence to regulatory requirements and maintain a high level of operational transparency․

Training and Resources

The Oasis E Guidance Manual offers comprehensive training programs and extensive resources to help users master the system, including detailed guides, video tutorials, and interactive modules․

User Training Programs

The Oasis E Guidance Manual includes structured user training programs designed to help both new and experienced users master the system․ These programs feature hands-on sessions, interactive modules, and real-world examples to ensure practical understanding․ Training covers essential features, advanced tools, and best practices for optimizing workflows․ Users gain skills to streamline tasks, enhance productivity, and leverage Oasis E’s full potential․ The programs also provide access to training materials, webinars, and expert support to address specific needs․ Regular updates ensure users stay informed about new features and system enhancements, making the training a valuable resource for continuous learning and professional development․

Online Documentation

The Oasis E Guidance Manual is supported by extensive online documentation, providing users with instant access to detailed information and resources․ This documentation includes user guides, technical notes, and release notes, ensuring users can understand and utilize the system’s features effectively․ The online resources are regularly updated to reflect the latest updates and best practices․ Users can access tutorials, troubleshooting guides, and FAQs, all designed to enhance their experience with Oasis E․ The documentation is accessible 24/7 via the Oasis E portal, offering a convenient and comprehensive reference for all users․ This ensures that support is always available, empowering users to maximize the system’s potential․

Community Support and Forums

The Oasis E Guidance Manual is complemented by an active community support network and forums, where users can connect, share experiences, and resolve challenges․ These platforms foster collaboration, allowing users to interact with peers, ask questions, and gain insights from experienced professionals․ The forums are a valuable resource for troubleshooting, sharing tips, and staying updated on best practices․ Users can participate in discussions, access community-driven solutions, and benefit from collective knowledge․ Moderated by experts, the forums ensure a supportive and informative environment․ Engaging with the community enhances your Oasis E experience, providing a space to learn, grow, and contribute to the broader user base․

Thank you for completing the Oasis E Guidance Manual․ This guide aimed to enhance your understanding and utilization of the system effectively․ Explore its features and optimize your workflow․ Stay tuned for future updates and enhancements․

This manual provides a detailed overview of the Oasis E system, covering its features, setup, and best practices․ It is designed to help users navigate the interface, manage data, and utilize advanced tools effectively․ The guide emphasizes optimizing workflows, ensuring compliance, and maintaining system security․ Key sections include installation, customization, and troubleshooting, along with resources for training and support․ By following this manual, users can maximize the potential of Oasis E, streamline operations, and stay informed about updates․ Whether you’re a novice or an experienced user, this guide equips you with the knowledge to use Oasis E efficiently and confidently․

Future Updates and Enhancements

Oasis E is continuously evolving to meet the changing needs of its users․ Future updates will focus on enhancing user experience, improving performance, and adding new features․ These updates may include advancements in automation, expanded integration capabilities, and enhanced security measures․ The development team is committed to incorporating user feedback to ensure that Oasis E remains a cutting-edge solution․ Regular updates will be communicated through the system and detailed in release notes․ Users can expect seamless transitions to new versions, with minimal disruption to their workflows․ By staying updated, users will benefit from the latest innovations and improvements, ensuring they get the most out of the Oasis E system․

crochet magic ring pdf

The magic ring is a fundamental technique in crochet‚ ideal for creating neat‚ invisible joins when working in the round. Surprisingly easy for all skill levels‚ it revolutionizes projects like amigurumi and hats‚ offering versatility and a professional finish. Discover how this technique transforms your crochet experience with step-by-step guides and expert tips.

1.1 What is a Magic Ring in Crochet?

The magic ring‚ also known as a magic loop‚ is a versatile crochet technique used to create a nearly invisible join when starting a project worked in the round. It eliminates the need for a traditional starting chain‚ allowing for a neat and secure foundation. This method is particularly popular for amigurumi toys‚ hats‚ and granny squares‚ as it provides a professional finish. Surprisingly easy to master‚ the magic ring is a game-changer for crocheters of all skill levels‚ offering precision and flexibility. Whether you’re a beginner or an experienced crafter‚ this technique ensures a clean‚ polished start to your projects‚ making it an essential skill in your crochet toolkit.

1.2 Importance of the Magic Ring in Crochet Projects

The magic ring is a cornerstone technique in crochet‚ offering a clean and professional start to projects worked in the round. Its importance lies in its ability to eliminate bulky starting chains and create an invisible join‚ resulting in a polished finish. This method is particularly valuable for amigurumi toys‚ granny squares‚ and hats‚ where a seamless base is essential. It saves time and effort‚ allowing crocheters to focus on intricate stitch patterns without compromising the project’s aesthetics. The magic ring is also ideal for beginners‚ as it simplifies the process of starting a project‚ making it an indispensable skill for crocheters of all skill levels.

Benefits of Using the Magic Ring

The magic ring is a game-changer for crocheters‚ eliminating bulky starting chains and creating seamless‚ invisible joins. It enhances project appearance‚ simplifies working in the round‚ and suits all skill levels‚ making crochet more efficient and enjoyable.

2.1 Eliminates the Need for a Starting Chain

The magic ring technique removes the need for a traditional starting chain‚ creating a seamless and invisible join. This method is particularly useful for projects worked in the round‚ such as hats‚ amigurumi toys‚ and granny squares. By eliminating the starting chain‚ the magic ring provides a clean and professional finish‚ making it ideal for patterns requiring a circular base. It also saves time and avoids the bulkiness often associated with chain stitches. The magic ring is a game-changer for crocheters‚ offering a sleek and modern way to begin projects while maintaining even tension and a polished appearance from the very start.

2.2 Creates a Neat and Invisible Join

The magic ring is renowned for producing a neat and invisible join‚ making it a favorite among crocheters. Unlike traditional methods that leave a visible seam‚ the magic ring ensures a seamless transition between stitches. This feature is especially advantageous for projects like hats‚ scarves‚ and amigurumi toys‚ where a clean finish is desired. The invisible join not only enhances the aesthetic appeal of the work but also provides a professional touch. By eliminating bulky seams‚ the magic ring technique allows for a smooth‚ even surface that is both durable and visually appealing. This characteristic makes it a must-learn skill for crocheters aiming to create high-quality‚ polished projects.

2.3 Ideal for Projects Worked in the Round

The magic ring is particularly well-suited for projects worked in the round‚ such as hats‚ beanies‚ and amigurumi toys. Its ability to create a seamless starting point allows for smooth‚ even stitching without the bulk of a traditional starting chain. This makes it ideal for projects that require a circular foundation. The magic ring ensures that the first round of stitches lies flat and even‚ providing a solid base for the rest of the project. Whether you’re making a cozy beanie or a cute stuffed animal‚ the magic ring offers the perfect start‚ resulting in a professional and polished finish. This technique is a game-changer for anyone working on circular crochet projects.

Materials Needed for the Magic Ring

A crochet hook‚ yarn‚ tapestry needle‚ scissors‚ and stitch markers are essential. Choose the right hook size and yarn weight for your project to ensure even tension and a professional finish.

3.1 Crochet Hook Sizes and Types

Choosing the right crochet hook is crucial for achieving the perfect tension in your magic ring project. Hook sizes vary‚ and selecting the correct one ensures your stitches are neither too tight nor too loose. Aluminum‚ steel‚ or ergonomic hooks are popular choices‚ with each offering unique benefits. Aluminum hooks are lightweight and durable‚ while steel hooks provide excellent stitch control. Ergonomic hooks are designed for comfort during long crochet sessions. Always refer to the yarn label for recommended hook sizes to ensure compatibility. The right hook size and type will make creating a magic ring effortless and enjoyable‚ whether you’re a beginner or an experienced crocheter.

3.2 Yarn Choices for Magic Ring Projects

Choosing the right yarn is essential for successful magic ring projects. Selecting a yarn that complements your project’s purpose ensures the best results. Acrylic‚ cotton‚ and blends are popular choices due to their durability and softness. Acrylic yarns are versatile and work well for amigurumi toys‚ while cotton is ideal for items like dishcloths or market bags. Consider the weight of the yarn‚ as lighter weights create delicate fabric‚ whereas heavier weights offer structure. Always check the yarn label for recommended hook sizes to ensure compatibility. The color and texture of the yarn will also impact the final look of your project. Experiment with different yarn types to find the perfect match for your magic ring creations.

3.3 Additional Tools (Tapestry Needle‚ Scissors‚ etc.)

Beyond the crochet hook and yarn‚ several additional tools are essential for magic ring projects. A tapestry needle is indispensable for weaving in ends neatly‚ ensuring a professional finish. Scissors are necessary for cutting the yarn as needed. Stitch markers can help track the beginning of rounds or specific stitches‚ especially in complex patterns. A measuring tape or ruler is useful for checking the size of your work. Optional tools include a yarn needle for sewing seams and a small stitch dictionary for reference. These tools collectively enhance your crocheting experience‚ making it easier to manage your project and achieve the desired results. Always keep them handy to streamline your workflow.

Step-by-Step Guide to Creating a Magic Ring

Learn to create a magic ring with ease. This quick technique is perfect for beginners and advanced crocheters alike‚ offering a seamless start for projects worked in the round.

4.1 How to Pull Up the Initial Loops

To begin‚ hold the yarn in your non-dominant hand‚ create a small loop‚ and insert the crochet hook through the center. Gently pull up the initial loops‚ ensuring they are evenly spaced. This step is crucial for maintaining the integrity of the magic ring. Adjust the loop size as needed to achieve the desired tension. Once the loops are in place‚ secure the ring by crocheting into the first stitch. This technique ensures a seamless and invisible join‚ perfect for projects like amigurumi toys or hats. Keep the loops tight enough to prevent gaps but not so tight that the fabric becomes rigid. Practice makes perfect in mastering this foundational step.

4.2 Adjusting the Ring for Even Tension

After pulling up the initial loops‚ adjust the magic ring to ensure even tension. Gently pull the yarn to tighten or loosen the loops as needed. Too tight‚ and the ring may pucker; too loose‚ and it may gap. Use your fingers or the crochet hook to tweak the loops‚ ensuring they lie flat and evenly spaced. Proper tension is key to a professional finish. To maintain consistency‚ work in a smooth‚ steady motion‚ avoiding abrupt pulls. If the ring feels misshapen‚ carefully adjust the loops before securing them. Even tension ensures your project starts neatly and sets the stage for flawless stitching. Practice adjusting the ring to achieve the perfect balance for your crochet work.

4.3 Securing the Ring to Start Crocheting

To secure the magic ring‚ insert your crochet hook into the ring and pull up a loop of yarn. Then‚ create a slip stitch to tighten the ring‚ ensuring it is snug but not overly tight. Gently pull the yarn tail to close the ring evenly. Make sure the stitches are evenly spaced and the ring lies flat. If the ring feels too tight or too loose‚ adjust it before proceeding. Once secured‚ count your stitches to ensure accuracy. Properly securing the ring is essential for a smooth start to your crochet project. This step ensures a clean foundation‚ making it easier to work seamlessly in the round. A well-secured ring prevents gaps and ensures even tension for professional-looking results.

Common Mistakes When Using the Magic Ring

Common mistakes include making the ring too loose‚ leading to a sloppy join‚ or pulling it too tight‚ causing puckering. Both can disrupt the project’s appearance.

5.1 Making the Ring Too Loose

Making the magic ring too loose is a common mistake that can lead to a sloppy join or a visible hole in the center of your project. This often happens when too much yarn is used to create the initial loop‚ or when the tension is not adjusted properly. A loose ring can be particularly problematic for projects like amigurumi toys‚ where a tight‚ clean circle is essential for the desired shape. To avoid this‚ ensure the yarn is pulled snugly but not overly tight‚ and adjust the ring’s size before securing it. Using the correct hook size and yarn weight also helps maintain proper tension. If the ring feels too loose‚ gently pull the yarn tail to tighten it before starting your stitches.

5.2 Pulling the Ring Too Tight

Pulling the magic ring too tight is another common mistake that can lead to a misshapen or puckered fabric; When the ring is overly tightened‚ it can cause the stitches to become uneven or even impossible to crochet into‚ especially in projects worked in the round. This issue often arises when the crocheter over-tightens the yarn tail to secure the ring. To avoid this‚ ensure the ring is snug but still allows for easy stitching. If the ring feels too tight‚ gently loosen it by tugging on the yarn tail before starting your first round. Proper tension is key to achieving a smooth‚ professional finish in your crochet projects.

Advanced Techniques with the Magic Ring

Pulling the ring too tight can cause puckering or uneven stitches. Ensure it’s snug but not overly tight for smooth‚ professional results.

6.1 Working with Multiple Colors

When working with multiple colors using the magic ring‚ you can achieve vibrant‚ intricate designs. To switch colors‚ simply fasten off the current yarn and pull up the new color through the magic ring. This method allows for seamless color transitions without visible joins. For multi-color projects‚ carry the yarn behind your work and crochet over it to hide the strands. This technique is especially useful for amigurumi toys‚ granny squares‚ and other colorful patterns. Ensure to keep tension consistent when switching colors to maintain the shape of your project. Planning your color sequence in advance will help you achieve professional-looking results.

6.2 Incorporating Different Stitch Patterns

Incorporating various stitch patterns into your magic ring projects enhances creativity and texture. Common stitches like single crochet‚ half double crochet‚ and double crochet can be seamlessly integrated. For intricate designs‚ try adding shell stitches or V-stitches directly into the ring. The magic ring’s flexibility allows for smooth transitions between patterns. When combining stitches‚ ensure tension remains consistent to maintain the project’s shape. Experimenting with stitch variations can create unique fabrics‚ from dense and firm to loose and airy. This technique is ideal for creating complex designs‚ such as flowers or mandalas‚ without sacrificing the ring’s invisibility. Proper planning ensures a cohesive and visually appealing finished product.

Popular Projects That Use the Magic Ring

Popular projects include amigurumi toys‚ granny squares‚ crochet hats‚ and coasters. These projects thrive with the magic ring‚ offering a neat‚ invisible join and professional finish.

7;1 Amigurumi Toys

Amigurumi toys are one of the most popular projects that use the magic ring. These adorable stuffed animals or characters require a tight‚ invisible circle to start‚ making the magic ring the perfect technique. It eliminates bulk from the starting chain‚ allowing for a clean‚ professional finish. The magic ring is especially ideal for amigurumi because it creates a secure foundation for stuffing. Many crocheters use this method for toys like cute animals‚ dolls‚ and cartoon characters. The technique ensures that the bottom of the toy is seamless and sturdy‚ preventing gaps or looseness. It’s a must-try for anyone crafting amigurumi‚ offering both simplicity and precision.

7.2 Crochet Hats and Beanies

Crochet hats and beanies greatly benefit from the magic ring technique‚ which provides a seamless and invisible join at the crown. This method eliminates the need for a starting chain‚ reducing bulk and creating a polished appearance. The magic ring is especially advantageous for hats worked in the round‚ as it ensures a smooth‚ even start without visible seams. It allows for precise control over the initial stitches‚ making it easier to achieve the desired fit and avoid puckering. Whether crafting a simple beanie or a complex design‚ the magic ring enhances both the comfort and aesthetics of the finished product‚ making it a preferred choice for crocheters of all skill levels.

Tips for Working with the Magic Ring

Use consistent tension to maintain the ring’s shape‚ gently pull yarn to tighten‚ and ensure stitches are evenly spaced for a professional finish.

8.1 Keeping the Ring Invisible

To keep the magic ring invisible‚ ensure even tension while crocheting. Avoid pulling the yarn too tightly‚ as this can cause the ring to pucker or become visible. Use a tapestry needle to weave in ends neatly‚ preventing them from showing through the fabric. When working in rounds‚ maintain consistent stitch tension to avoid gaps or distortion. For amigurumi projects‚ stuff the item firmly before closing the ring to hide it completely. Practice on scrap yarn to refine your technique‚ ensuring the ring blends seamlessly into the fabric. Properly securing the ring with a slip stitch or invisible join will also help maintain its subtlety in the finished project.

8.2 Avoiding Gaps in the Stitch Pattern

Avoiding gaps in the stitch pattern when using the magic ring requires careful attention to tension and stitch placement. Ensure the initial loop is not too loose‚ as this can create visible spaces. Count your stitches regularly to maintain accuracy and prevent misalignment. Using the correct hook size for your yarn weight helps keep stitches even and tight. When closing the ring‚ pull the yarn gently but firmly to avoid leaving a hole. For projects like amigurumi‚ stuffing the piece before sealing the ring can help fill any small gaps. Practice consistent stitching to achieve a seamless and professional finish in your crochet projects.

Resources for Learning the Magic Ring

Discover free crochet magic ring PDF guides‚ video tutorials‚ and online classes to master the technique. These resources provide step-by-step instructions and visual demonstrations for all skill levels.

9.1 Free PDF Guides and Tutorials

Free crochet magic ring PDF guides are widely available online‚ offering detailed instructions for mastering the technique. These guides often include step-by-step photos‚ diagrams‚ and written instructions. Popular crochet websites like Moogly‚ The Crochet Crowd‚ and Crochet Geek provide downloadable PDFs. Many patterns for amigurumi toys‚ granny squares‚ and hats include magic ring tutorials. These resources are perfect for beginners‚ as they break down the process into manageable steps. Some PDFs also include tips for troubleshooting common mistakes. Simply search for “crochet magic ring PDF” on your favorite crochet site or platform like Etsy or Ravelry to find these helpful guides.

9.2 Video Demonstrations and Classes

Video demonstrations and online classes are excellent resources for mastering the crochet magic ring technique. Platforms like YouTube‚ Craftsy‚ and Creativebug offer tutorials led by experienced instructors. These videos provide clear‚ step-by-step guidance‚ making it easier to understand the process visually. Many classes include close-up shots and slow-motion sequences to help learners grasp intricate details. Additionally‚ some crochet communities on Facebook and Instagram share live sessions or recorded demos. These resources are particularly helpful for visual learners‚ as they allow you to pause‚ rewind‚ and practice alongside the instructor. Video tutorials often cover troubleshooting tips and variations‚ ensuring a comprehensive learning experience.

Troubleshooting Common Issues

Identify and resolve issues like uneven tension‚ misshapen rings‚ or loose joins. Adjust stitches‚ tighten‚ or redo loops for a polished finish. Practice ensures perfection.

10.1 Fixing a Misshapen Ring

If your magic ring becomes misshapen‚ gently tug the yarn to loosen it. Adjust the loops to ensure even tension and reshape the ring carefully. If it remains uneven‚ pull out the stitches and restart‚ focusing on consistent tightening. Use a tapestry needle to weave in ends neatly. Practice makes perfect‚ so don’t be discouraged. A misshapen ring can lead to gaps or a distorted base‚ so fixing it early is crucial. Keep the ring small and tight‚ but not overly so‚ to maintain a clean‚ professional finish. Proper adjustment ensures a sturdy foundation for your crochet project‚ avoiding future complications.

Mastery of the magic ring technique enhances crochet projects‚ offering a clean‚ professional finish. It’s a versatile and essential skill for crafters‚ ensuring seamless and polished results.

11.1 Final Thoughts on Mastering the Magic Ring

Mastery of the magic ring technique is a cornerstone of crochet‚ offering a clean and professional finish to projects. It’s a versatile method that enhances both functionality and aesthetics‚ making it indispensable for crafters. By eliminating the need for a starting chain and creating an invisible join‚ the magic ring elevates the quality of amigurumi toys‚ hats‚ and other circular projects. With practice‚ crocheters can achieve consistent tension and avoid common mistakes. Troubleshooting tips and resources‚ such as detailed PDF guides and video tutorials‚ are invaluable for refining this skill. Embrace the magic ring to unlock creative freedom and produce polished‚ professional results in every stitch.