Archives November 2025

l shaped desk assembly instructions pdf

Understanding L-Shaped Desk Assembly: An Overview

Successfully assembling your L-shaped desk requires careful attention!
Many retailers and manufacturers offer downloadable assembly instructions in PDF format,
often accessible via their websites or platforms like Amazon.

These PDF manuals detail each step, from parts identification to final checks,
ensuring a smooth and efficient installation process. Prioritize reading the entire manual beforehand!

Importance of the Assembly Manual

The assembly manual is absolutely crucial for a successful L-shaped desk build.
It provides a step-by-step guide, preventing errors and frustration.
Often available as a PDF download from the retailer or manufacturer’s website,
it details parts lists, installation points, and crucial safety precautions.

Carefully reading the entire manual before starting is paramount.
Following the instructions thoroughly ensures proper alignment and stability.
Ignoring the manual can lead to misaligned panels, missing parts, or a wobbly desk –
avoid these issues by prioritizing the PDF instructions!

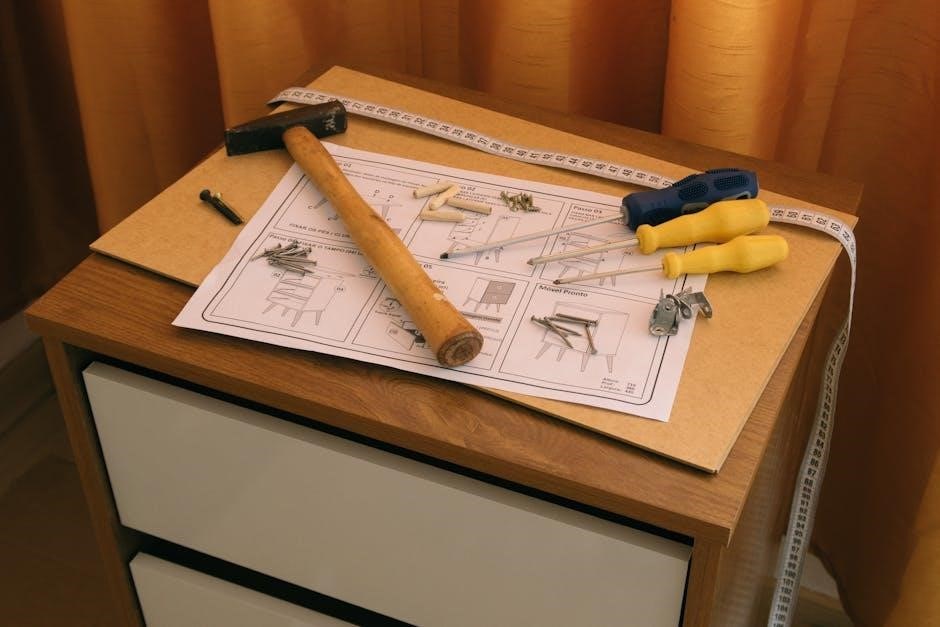
Tools Required for Assembly

Successfully assembling your L-shaped desk necessitates specific tools.
While the PDF assembly instructions may list exact requirements,
generally you’ll need a Phillips head screwdriver, a flathead screwdriver,
and potentially an Allen wrench (often included).

A rubber mallet can aid in gently connecting panels,
and a level is vital for ensuring a stable, even surface.
Power drills with adjustable clutch settings can expedite the process,
but use caution to avoid over-tightening. Refer to your manual for specifics!

Preparing for Assembly

Before starting, download the PDF assembly instructions!
Carefully unpack all components and verify against the parts list.
A clear workspace prevents damage and streamlines installation.

Inventory of Parts

Crucially, before commencing assembly, meticulously compare all physical components with the detailed parts list found within the PDF assembly instructions.
This proactive step, often emphasized in user manuals, prevents mid-assembly frustration due to missing pieces.

Identify each screw, panel, leg, and shelf – noting quantities and specific identifiers.
The PDF typically includes diagrams for easy recognition.
Confirming a complete inventory upfront saves significant time and potential delays, ensuring a smoother installation experience.

Workspace Preparation

Adequate workspace preparation is vital for a successful L-shaped desk assembly. Referencing the PDF assembly instructions, clear a spacious area, protecting your flooring with a drop cloth or cardboard.
Ensure ample room to maneuver around the components during each installation step.

Good lighting is essential for accurately following the PDF diagrams.
Gather all necessary tools beforehand, as outlined in the manual, to avoid interruptions.
A well-prepared space minimizes errors and promotes a more efficient assembly process.

Base Structure Assembly

Begin by carefully following the PDF manual’s base assembly diagrams.
Connect the frame components, ensuring proper alignment before tightening screws,
as detailed in the installation guide.

Attaching the Legs to the Base Frame

Referencing your L-shaped desk’s PDF assembly manual is crucial here. Typically, this involves aligning the legs with pre-drilled holes on the base frame.
Secure them using the provided screws, but avoid fully tightening initially.

The installation guide often emphasizes checking for squareness before final tightening.
Ensure each leg is firmly attached and level; slight adjustments may be needed.
Follow the manual’s illustrations closely, as leg orientation can vary between models.
Confirm stability before proceeding to the next assembly stage.

Connecting the Base Panels

Consult your L-shaped desk’s PDF manual for specific panel connection methods. Usually, this involves aligning the base panels and utilizing cam locks or screws.
Insert cam locks and rotate to secure, or carefully screw the panels together, avoiding over-tightening.

The installation guide will detail the correct order and orientation of the panels. Ensure a flush and stable connection; misaligned panels can cause issues later. Refer to diagrams for proper placement and confirm stability before moving forward.

Side Panel Installation

PDF manuals guide attaching side panels to the base, emphasizing stability. Follow diagrams closely, using screws or cam locks for a secure fit.

Ensure proper alignment before tightening, referencing the installation instructions.

Attaching Side Panels to the Base

Consult the PDF manual for precise guidance on attaching side panels to the base frame. Typically, this involves aligning the panels with pre-drilled holes and securing them using screws or cam locks. Carefully follow the diagrams to ensure correct orientation and prevent misalignment.

Prior to fully tightening, verify that the side panels are flush with the base and that all edges align properly. The installation instructions often highlight specific screw types or tightening sequences for optimal stability. Double-check the manual for any warnings regarding force or pressure during this step.

Ensuring Stability of Side Panels

Refer to the PDF manual for techniques to maximize side panel stability. Often, this involves tightening all connecting screws in a specific sequence, preventing wobbling. Inspect for any gaps between the panels and the base, indicating a loose connection.

Cam locks, if present, require careful tightening to ensure a secure fit. The installation guide may suggest using corner braces or additional supports for enhanced rigidity, especially for larger L-shaped desks. Regularly re-tighten screws after initial use.

Shelf Installation

PDF manuals illustrate shelf types – fixed versus adjustable – and their installation. Follow diagrams closely, ensuring proper bracket placement and secure fastening for stability.

Carefully align shelves before tightening screws, referencing the assembly instructions for correct positioning.

Types of Shelves (Fixed vs. Adjustable)

Assembly manuals, often available as PDF downloads, clearly differentiate between fixed and adjustable shelves. Fixed shelves are permanently attached, typically screwed directly into the desk’s side panels, offering robust stability.

Adjustable shelves, conversely, utilize shelf pins inserted into pre-drilled holes, allowing for customizable height configurations. The PDF installation guides will detail the specific hardware required for each type.

Understanding this distinction is crucial for correct assembly, as using incorrect hardware or methods can compromise the desk’s structural integrity. Always consult the manual!

Installing Fixed Shelves

PDF assembly manuals emphasize precise alignment when installing fixed shelves. Typically, these shelves attach directly to the side panels using screws – ensure correct screw length to avoid piercing through the panel.

The installation process, detailed in the manual, often involves pre-drilling pilot holes for easier screw insertion and to prevent wood splitting. Securely tighten each screw, but avoid over-tightening, which could damage the material.

Refer to diagrams within the PDF for proper shelf placement and orientation for optimal stability.

Installing Adjustable Shelves

PDF assembly manuals illustrate how adjustable shelves utilize shelf supports or pins inserted into pre-drilled holes along the side panels. Carefully insert these supports, ensuring they are level and securely seated before placing the shelf.

The manual will specify the weight capacity for each shelf; avoid exceeding this limit. Adjusting shelf height is usually straightforward, allowing customization based on your needs.

Diagrams in the PDF clearly show proper support placement for balanced weight distribution and stability.

Top Panel Attachment

PDF manuals guide aligning and securing top panels using screws, often emphasizing checking for uneven surfaces.
Proper alignment is crucial for stability, as detailed in the installation guide.

Aligning and Securing the Top Panels

Detailed PDF assembly instructions emphasize carefully aligning the top panels with the assembled base structure before securing them.
Typically, this involves positioning the panels flush with the edges and corners, ensuring a seamless fit.

The manual will specify the correct screw type and placement points for optimal stability.
It’s often recommended to loosely fasten all screws initially, then tighten them progressively in a diagonal pattern.
This prevents warping or misalignment during the final tightening stage, as outlined in the installation guide.

Pay close attention to any diagrams within the PDF for visual guidance.

Dealing with Uneven Surfaces

Assembly manuals in PDF format often address potential issues with uneven floors. Many L-shaped desks include adjustable leg levelers, detailed in the installation instructions.

These levelers allow for fine-tuning the desk’s height on each corner, compensating for minor floor imperfections. The PDF will illustrate how to rotate these levelers to achieve a stable, wobble-free surface.

If significant unevenness exists, shims may be recommended – consult the manual for appropriate materials and placement guidance.

Cable Management Solutions

PDF assembly manuals frequently highlight integrated cable trays and grommets.

These features, detailed in the installation guide, help organize cords, promoting a cleaner workspace and preventing tangled wires during desk assembly.

Integrated Cable Trays

Many L-shaped desk PDF manuals demonstrate the installation of integrated cable trays, typically mounted beneath the desk’s surface.

These trays provide a concealed pathway for routing power cords, network cables, and other wires, significantly reducing clutter. The assembly instructions often illustrate proper mounting techniques, ensuring secure attachment to the desk frame.

Effective use of these trays, as shown in the installation guide, contributes to a more organized and aesthetically pleasing workspace, enhancing overall productivity.

Cable Grommets and Ties

L-shaped desk assembly instructions PDF guides frequently detail the use of cable grommets and ties for superior cable management. Grommets, installed through desk surfaces, offer neat access points for cords.

The installation process, outlined in the manual, ensures a clean look and prevents cable fraying. Cable ties, often included or recommended, bundle wires together, further minimizing clutter.

Following these steps, as depicted in the assembly manual, creates a safer, more organized workspace, and protects cables from damage.

Troubleshooting Common Issues

Assembly manuals in PDF format often include troubleshooting sections! Common problems like missing parts, wobbles, or misalignment are addressed with clear solutions.

Refer to your installation guide for specific fixes and diagrams to resolve these issues efficiently.

Missing Parts

Discovering missing components during L-shaped desk assembly is frustrating, but your assembly manual’s PDF version is your first resource!
Carefully re-examine the parts list within the PDF to confirm what’s absent.

Most PDF manuals provide contact information for customer support or the retailer.
Utilize this to request replacement parts, referencing the part numbers from the installation guide.
Document everything – order numbers, dates, and communication – for a smoother resolution.

Don’t attempt to substitute parts, as this could compromise structural integrity.

Wobbly Desk

A wobbly L-shaped desk often indicates loose connections. Refer to your assembly manual’s PDF for a step-by-step review of all screw locations.
Systematically tighten every screw, but avoid over-tightening, which can strip threads.

The PDF installation guide may detail leveling adjustments.
Check if your desk has adjustable feet; these can compensate for uneven floors.
If the wobble persists, double-check the base structure assembly, referencing diagrams in the PDF.

Ensure all panels are correctly aligned.

Misaligned Panels

Misaligned panels during L-shaped desk assembly are common. Consult your assembly manual’s PDF for detailed diagrams illustrating correct panel alignment. Loosen the screws connecting the affected panels, allowing for adjustment.

Carefully reposition the panels, ensuring they fit flush against each other and the base structure, as shown in the PDF installation guide. Retighten the screws gradually and evenly.

If issues persist, review earlier assembly steps in the PDF to confirm proper base construction.

Finding Assembly Instructions Online

Locate your L-shaped desk’s assembly instructions as a PDF! Check the retailer’s website (like Amazon) or the manufacturer’s official site for downloads.

Checking the Retailer’s Website (Amazon, etc.)

Begin your search for the L-shaped desk assembly instructions PDF directly on the retailer’s website where you purchased the item. Amazon, for example, frequently provides downloadable manuals within the product details section.

Look for a tab labeled “Manuals,” “Guides,” or “Documentation.” If a direct PDF link isn’t visible, explore the “Help” or “Customer Support” areas. Retailers often host PDF versions to assist customers with installation. Unikito suggests contacting them online if you can’t find it!

Manufacturer’s Official Website

If the retailer’s website lacks the L-shaped desk assembly instructions PDF, head to the manufacturer’s official website. Locate the “Support,” “Downloads,” or “Resources” section. Search for your specific desk model number to filter results effectively.

Manufacturers typically provide comprehensive PDF manuals, including detailed diagrams and step-by-step guidance. Ensure you have the correct model number for an accurate search. Reading the entire manual before starting is crucial for a successful assembly!

PDF Manual Download & Access

Locating the PDF version of your L-shaped desk assembly instructions is often straightforward. Utilize a PDF reader to easily navigate and view the detailed diagrams!

Locating the PDF Version

Finding the PDF manual for your L-shaped desk typically begins with the retailer’s website, such as Amazon, where a download link is frequently provided on the product page. Alternatively, visit the manufacturer’s official website and search for your specific desk model.

If direct access proves difficult, don’t hesitate to contact the retailer or manufacturer’s customer support for assistance. They can often email you the PDF directly. Ensure you have your desk’s model number readily available to expedite the process and guarantee you receive the correct instructions!

Using PDF Reader Features

Maximize your PDF viewing experience with built-in features! Utilize the zoom function for detailed diagrams, and the search tool to quickly locate specific parts or steps within the L-shaped desk assembly instructions.

Many readers allow annotation – add notes or highlight crucial sections for clarity during installation. Consider using the ‘print’ option if you prefer a physical copy, ensuring you select the correct page scaling for readability. These features streamline the assembly process!

Safety Precautions During Assembly

Prioritize safety! Read the entire manual before starting. Proper lifting techniques are crucial, and protect both yourself and the furniture during installation.

Protecting Yourself and the Furniture

During assembly, wearing safety glasses is recommended to shield your eyes from potential debris. Protect your floors with a drop cloth or cardboard to prevent scratches.
Always lift with your legs, not your back, when moving heavier desk components – seek assistance if needed!

Carefully unpack all parts and avoid using sharp objects that could damage the finish. Refer to the PDF manual for specific warnings and cautions related to your L-shaped desk model. Protecting the furniture involves gentle handling and avoiding excessive force during screw tightening.

Proper Lifting Techniques

Lifting desk components safely is crucial to prevent injury. Always bend at your knees, keeping your back straight, and maintain a firm grip. Avoid twisting while lifting; pivot your feet instead.

For heavier panels, especially those of an L-shaped desk, seek assistance from another person. The PDF manual may indicate which parts require two-person lifting. Remember to keep the load close to your body for better balance and control, minimizing strain.

Post-Assembly Checks

Final checks, detailed in the PDF manual, are vital! Tighten all screws and ensure the desk is perfectly level for stability and safe use.

Tightening All Screws

Crucially, after completing the assembly guided by your L-shaped desk assembly instructions PDF, systematically revisit every screw. The manual emphasizes this step for structural integrity. Use the appropriate tool – often an Allen wrench or screwdriver – and apply firm, even pressure.

Don’t overtighten, as this can strip the screw holes! Check screws connecting the base, side panels, and top surfaces. A loose screw compromises stability and can lead to wobbling. Refer to diagrams within the PDF for screw locations.

Leveling the Desk

Following your L-shaped desk assembly instructions PDF, achieving a level surface is vital. Uneven floors cause instability and wobble. Many desks include adjustable feet; rotate these to raise or lower corners until the desk sits firmly without rocking.

Use a spirit level placed on the desktop to verify levelness in multiple directions. If adjustable feet aren’t sufficient, consider using shims underneath the legs. The PDF manual may illustrate this process for optimal stability.

Warranty Information & Support

Refer to your L-shaped desk’s assembly instructions PDF for warranty details.
Registration is often required to activate coverage, and contact information for customer support is provided.

Registering Your Desk

Locating the registration link is often found within the L-shaped desk’s assembly instructions PDF or on the manufacturer’s official website.
Registering your desk promptly is crucial for validating your warranty and ensuring access to dedicated customer support.

This process typically involves providing proof of purchase and completing a short online form.
Keep your registration confirmation for future reference, as it serves as documentation of your warranty activation.
Failure to register may limit your warranty benefits.

Contacting Customer Support

If the L-shaped desk assembly instructions PDF proves insufficient, don’t hesitate to reach out to customer support.
Many manufacturers provide contact details – email, phone, or online chat – within the manual itself or on their website.

Be prepared to provide your desk’s model number and purchase date.
Clearly articulate your issue, referencing specific steps from the PDF if possible.
Prompt and effective support can resolve assembly challenges quickly and efficiently.

ffxi clothcraft guide

Clothcraft in FFXI is a versatile crafting skill that creates essential items like lightweight armor, capes, and fletchings. It supports both adventurers and the crafting community, fostering prosperity in Vana’diel.

What is Clothcraft?

Clothcraft is a crafting skill in Final Fantasy XI that specializes in creating items from natural threads and fibers. It allows players to craft lightweight armor, capes, and fletchings, which are essential for magic-wielding classes and ranged weapons. This craft relies heavily on materials like wind crystals, beehive chips, and honey, often obtained through battling specific enemies. Clothcraft is known for its high cost and complexity, making it challenging to level up, especially beyond level 60. Despite the difficulty, mastering it offers significant rewards, including the ability to craft rare and high-demand items. It is a vital skill for both personal use and contributing to the in-game economy.

Importance of Clothcraft in FFXI

Clothcraft plays a vital role in FFXI, providing essential items for adventurers and fostering economic growth. It supports magic-wielding classes with lightweight armor and capes, while fletchings aid ranged attackers. High-demand items like these make Clothcraft a cornerstone of crafting, enabling players to contribute meaningfully to the economy. Despite its high cost and difficulty, mastering Clothcraft is rewarding, offering unique gear and profit opportunities. It also encourages community interaction, as crafters supply goods to other players. This craft is indispensable for both personal progression and supporting others, making it a cornerstone of FFXI’s crafting system and economy.

Benefits of Mastering Clothcraft

Mastering Clothcraft in FFXI offers numerous benefits, including the ability to craft high-demand items like capes and fletchings, which are essential for many classes; Crafters can create unique gear that enhances gameplay, providing a competitive edge. Additionally, skilled Clothcrafters can generate significant profits by selling their goods on the in-game market. The craft also supports other professions by supplying materials and equipment, fostering interdependence within the community. While leveling Clothcraft can be costly, the long-term rewards make it a valuable investment for dedicated players seeking to contribute to both their own success and the broader economy of Vana’diel.

Getting Started with Clothcraft

Embark on your Clothcraft journey by unlocking the craft, gathering essential tools, and understanding the synthesis process to create valuable items for yourself and others in Vana’diel.

How to Unlock Clothcraft

To unlock Clothcraft, reach level 1 and speak to the guild representative in the Republic of Bastok. This initial step grants access to the craft, allowing you to begin creating essential items like threads and fabrics. Ensure you have the necessary tools, such as a spinning wheel and elementary sewing needles, to start your crafting journey. This marks the beginning of your adventure in Clothcraft, enabling you to contribute to the world of Vana’diel through your creations.

Initial Setup and Tools

Starting Clothcraft requires essential tools like a spinning wheel and elementary sewing needles. These can be purchased from guild vendors or crafted using other skills. Ensure you have ample inventory space for materials and crafted items. Initial setup costs are moderate, but expenses rise as you progress. Organize your inventory to efficiently manage threads, crystals, and other resources. Consider investing in a crafting kit to enhance your early crafting experience. Proper tool maintenance and organization are key to a smooth start in Clothcraft, helping you focus on skill progression and item creation without unnecessary delays or expenses.

Understanding the Basics of Synthesis

Synthesis is the core of Clothcraft, combining materials to create items. It requires a spinning wheel and basic tools. Success depends on material quality, skill level, and crystal selection. Crystals align with elements, enhancing synthesis outcomes. Higher-quality materials increase item stats and success rates. Beginners should start with simple recipes, focusing on proper material ratios. Practice improves skill, reducing material waste. Keep an eye on durability and crafting timers. Experimenting with crystal combinations can yield unexpected results. Mastering synthesis basics is crucial for advancing in Clothcraft and creating high-demand items efficiently. Always prioritize material quality and crystal alignment for optimal outcomes.

Materials and Resources

Clothcraft relies on materials like wind crystals, beehive chips, and honey, obtained from enemies like bumblebees in Sarutabaruta; These resources are essential for crafting lightweight armor and capes.

Essential Materials for Clothcraft

Clothcraft requires specific materials to craft items effectively. Wind crystals, beehive chips, and honey are fundamental, often obtained from enemies like bumblebees in Sarutabaruta. Additional materials include flax, cotton, and silk, which become essential as you progress. These resources are used in various synthesis recipes to create lightweight armor, capes, and fletchings. Ensuring a steady supply of these materials is crucial for advancing your crafting skills and producing high-quality items. Proper material management helps minimize costs and optimize synthesis success rates, making it a cornerstone of mastering Clothcraft in FFXI.

Where to Obtain Materials

Obtaining materials for Clothcraft involves exploring various zones and defeating specific enemies. Sarutabaruta is a prime location for farming wind crystals, beehive chips, and honey by defeating bumblebees. Other zones like Tahrongi Canyon and Al Zahbi offer resources such as flax and cotton. Additionally, materials can be purchased from vendor NPCs or crafted using other skills. Farming during active times and participating in events can yield rare materials. The Auction House is also a convenient, though often costly, option for acquiring essential resources. Efficient material gathering is key to advancing your Clothcraft skills and crafting high-quality items.

Role of Crystals in Clothcraft

Crystals are fundamental in Clothcraft, serving as primary materials for synthesis. Wind crystals, often obtained by defeating bumblebees in Sarutabaruta, are essential for crafting lightweight armor and capes. Other crystals, like earth and water, are used in specific recipes. Crystals determine the elemental properties of crafted items, influencing their stats and usability. Farming enemies or purchasing from vendors are common methods to acquire crystals. They are indispensable for advancing in Clothcraft, as most recipes require them. Understanding crystal types and their sources is crucial for efficient crafting and creating high-quality items for magic-wielding classes and other adventurers.

Levelling Up Your Clothcraft

Levelling Clothcraft in FFXI requires patience and resources. Early stages focus on crafting basics, while higher levels demand rare materials and precise synthesis techniques to master.

Level 1-10: Early Game Strategy

Starting with Clothcraft, focus on crafting low-level items like wind crystals, beehive chips, and honey by defeating bumblebees in Sarutabaruta. These materials are essential for early synthesis. Craft simple items such as cloth and yarn to build your skill foundation. Avoid expensive materials initially, as they can lead to significant gil loss. Prioritize recipes with high success rates to minimize waste. Use this phase to accumulate basic resources and familiarize yourself with synthesis mechanics. Keep your inventory organized and sell unwanted items to maintain gil flow. This early stage sets the groundwork for efficient progression in Clothcraft.

Level 10-40: Mid-Game Progression

At levels 10-40, focus on crafting items like cotton and flax threads, which are in high demand. These materials can be obtained from monsters like ladybugs and puks. Craft hemp and ramie to progress efficiently, as these synths provide consistent skill-ups. Avoid crafting expensive items until you reach higher levels, as they often result in gil loss. Use Adv. Support to minimize material waste and ensure higher success rates. Sell unwanted items to maintain gil flow, as this phase can be costly. Prioritize recipes with an 8-10 level gap to optimize progression. This mid-game phase is crucial for building a strong foundation in Clothcraft.

Level 40-60: Advanced Techniques

From level 40 to 60, focus on refining your skills with high-demand materials like marrow and goat leathers. Crafting expert recipes becomes more accessible, allowing for the creation of rare items. Use Adv. Support to minimize material waste and ensure higher success rates. This phase emphasizes efficiency, as crafting losses can be significant. Prioritize recipes with consistent skill-ups, such as hemp and ramie crafts, to maintain progress. Experiment with high-quality materials to improve item stats, but avoid over-investing in expensive synths until necessary. This stage is critical for mastering advanced techniques and preparing for the challenges of high-level crafting.

Level 60-100: Expert Crafting

Reaching level 60 marks the transition to expert crafting, where precision and resource management are crucial. Focus on crafting high-tier items like rare capes and specialized armor. Utilize high-quality materials and expert recipes to maximize success rates and minimize losses. Advanced Support becomes indispensable for complex syntheses. Experiment with breaking high-level items to gain skill-ups efficiently. This phase requires significant gil investment, so prioritize cost-effective recipes. Crafting rare or unique items can yield high profits, making mastery rewarding. Consistency and patience are key to reaching the coveted level 100, where you’ll join the ranks of Vana’diel’s elite crafters.

Synthesis Techniques and Tips

Mastering synthesis requires optimizing success rates, using high-quality materials, and managing resources efficiently. Utilize the right equipment and crystals to enhance crafting outcomes and minimize failures.

Optimizing Synthesis Success Rates

Optimizing synthesis success rates in Clothcraft requires careful planning and resource management. Using high-quality materials and crystals, such as wind crystals and beehive chips, significantly improves outcomes. Ensuring your skill level aligns with the recipe difficulty is crucial, as mismatches can lead to frequent failures. Additionally, investing in advanced support abilities and crafting equipment enhances success rates. Experimenting with different crystal combinations and maintaining a well-stocked inventory of essential materials can also reduce synthesis failures. Regularly practicing and staying updated with the latest crafting guides helps refine techniques, ensuring efficient and successful crafting sessions.

Using the Right Equipment for Crafting

Using the right equipment for Clothcraft is essential for maximizing efficiency and success. Crafting gloves and tools, such as high-quality sewing needles, can significantly improve synthesis outcomes. Additionally, wearing gear that boosts crafting skills or provides additional inventory space can streamline the process. Investing in advanced support abilities and ensuring your equipment is well-maintained also plays a crucial role. Properly equipping yourself not only enhances your crafting experience but also reduces the likelihood of failures, making the process more enjoyable and profitable. Always prioritize upgrading your tools and gear as you progress in your Clothcraft journey.

Managing Resources Efficiently

Managing resources efficiently is crucial for successful Clothcraft. Always track your inventory to avoid waste and ensure you have enough materials for synthesis. Prioritize using crystals wisely, as they are essential for crafting. Plan ahead by stockpiling materials and crafting in bulk to minimize costs. Utilize guides to identify the most cost-effective synths for leveling up. Keep track of market demand to craft items that sell well, reducing financial losses. Remember, Clothcraft can be expensive, so balancing resource use and profit is key. Efficient management ensures you progress smoothly while maintaining a healthy inventory and gil reserves for advanced crafting.

Advanced Clothcraft Topics

Mastering expert recipes, crafting high-demand items, and optimizing profit are key to advancing in Clothcraft. These techniques enhance your crafting business and reputation in Vana’diel.

Crafting Expert Recipes

Crafting expert recipes in Clothcraft requires precision and high-quality materials. These recipes often yield rare or unique items, such as enchanted capes or specialized fletchings, which are in high demand. To master expert recipes, crafters must invest in rare materials and crystals, ensuring optimal synthesis success. Many expert recipes are unlocked at higher skill levels, making them accessible only to seasoned crafters. The process can be costly, but the rewards, both in terms of profit and reputation, are significant. Crafting expert recipes is a testament to skill and dedication, making it a cornerstone of advanced Clothcraft.

Creating High-Demand Items

Crafting high-demand items in Clothcraft is crucial for both profit and player satisfaction. Focus on creating capes, fletchings, and lightweight armor, which are essential for magic users and ranged classes. These items are consistently sought after due to their utility in combat and crafting. Rare materials and crystals play a significant role in producing high-quality versions of these items. Understanding market trends and timing your crafts can maximize profitability. Additionally, crafting items that are in short supply but high demand, such as enchanted capes, can set you apart as a skilled crafter. Quality and proper synthesis techniques ensure your items meet player expectations and sell quickly.

Crafting for Profit

Crafting for profit in Clothcraft requires a strategic approach to create high-demand items efficiently. Focus on crafting capes, fletchings, and lightweight armor, which are consistently sought after by players. Rare materials and crystals can elevate your creations, making them more valuable. Understanding market trends and timing your crafts can maximize profitability. Additionally, crafting items with low material costs but high demand, such as enchanted capes, can yield significant returns. Balancing material expenses with profit margins is key to sustainable income. By monitoring market trends and focusing on quality, you can establish yourself as a reliable crafter, enhancing your reputation and financial success in Vana’diel.

Challenges and Common Mistakes

Clothcraft’s high material costs and synthesis failures can be financially draining. Common mistakes include poor material management and insufficient skill-ups, leading to wasted resources and stalled progress.

Common Mistakes to Avoid

Clothcrafters often overlook the importance of material quality and proper synthesis techniques, leading to frequent failures. Neglecting to stockpile essential crystals and threads can halt progress. Many crafters also underestimate the cost of high-level synths, resulting in significant gil loss. Additionally, rushing through skill-ups without Adv. Support can lead to inefficient leveling. Crafting without the right equipment, such as crafting tools and gear, reduces success rates. Overlooking market demand when crafting items can also lead to unsold stock. Avoiding these mistakes requires careful planning, resource management, and a focus on optimization to ensure steady progress and profitability in Clothcraft.

Overcoming Crafting Challenges

Crafting challenges in Clothcraft can be daunting, but with the right strategies, they become manageable. Budgeting gil is crucial, as high-level synths can be costly. Stockpiling materials like crystals and threads ensures uninterrupted progress. Utilizing Adv. Support and crafting gear boosts success rates and efficiency. Joining the FFXI crafting community provides valuable insights and tips from experienced crafters. Regularly checking market demand helps avoid crafting unsellable items. Patience and persistence are key, as skill-ups require time and effort. By staying organized and resourceful, crafters can overcome obstacles and achieve mastery in Clothcraft, turning challenges into opportunities for growth and profit.

Resources and Community Support

Online forums like Reddit’s r/ffxi and crafting guides offer valuable insights. The Final Fantasy XI wiki provides detailed crafting information. Community support and expert tips help crafters succeed.

Recommended Guides and Forums

Several online resources are available to help crafters master Clothcraft. Reddit communities like r/ffxi and r/ffxiv offer valuable discussions and tips. The Final Fantasy XI wiki provides detailed crafting guides, including those by experienced crafters like Aranar and Abosherpa. These guides cover everything from leveling strategies to expert recipes. Additionally, forums like the FFXI AH forums and Gamer Escapes share insights on cost-effective crafting and high-demand items. Engaging with these communities can significantly enhance your crafting journey and provide solutions to common challenges. Explore these resources to refine your skills and stay updated on the latest crafting trends in Vana’diel.

Joining the FFXI Crafting Community

Engaging with the FFXI crafting community is essential for mastering Clothcraft. Joining forums like r/ffxi and r/ffxiv on Reddit provides access to expert advice, while platforms like Gamer Escapes and the FFXI AH forums offer detailed guides and strategies. These communities are hubs for sharing tips, resources, and experiences, helping crafters of all levels improve their skills. Participating in discussions allows you to learn from seasoned players, discover new techniques, and stay updated on crafting trends. Building connections within the community can also open opportunities for collaboration and resource sharing, making your crafting journey more enjoyable and rewarding. Active engagement fosters growth and camaraderie among crafters in Vana’diel.

Clothcraft in FFXI is a rewarding craft that offers both creative expression and practical benefits. With dedication and the right strategies, mastering it can greatly enhance your gameplay experience.

Final Thoughts on Clothcraft

Clothcraft in FFXI is a rewarding yet challenging craft that requires patience and strategy. It offers a unique way to contribute to the game’s economy and community. By mastering Clothcraft, players can create high-demand items, support their adventuring needs, and even turn a profit. The journey from level 1 to 100 is filled with opportunities to learn and grow, making it a fulfilling experience for dedicated crafters. With the right resources and a bit of persistence, anyone can excel in this craft and leave their mark on Vana’diel.

Encouragement for Aspiring Crafters

Embarking on the Clothcraft journey in FFXI can be daunting, but it’s incredibly rewarding. Don’t be discouraged by initial failures or high costs—every synthesis is a step forward. Joining the crafting community and seeking guidance from experienced players can provide valuable insights and tips. With persistence and dedication, you’ll unlock the full potential of Clothcraft, creating items that are in high demand and earning a reputation as a skilled crafter. Remember, every crafted item tells a story of effort and passion, contributing to the vibrant world of Vana’diel.

About the Author

The author is a seasoned FFXI player with extensive experience in Clothcraft, having guided numerous adventurers through the complexities of crafting; Their expertise stems from years of in-game practice, community engagement, and a passion for optimizing crafting strategies. By sharing insights and tips, the author aims to simplify the journey for aspiring crafters, ensuring they can master Clothcraft efficiently. This guide reflects their dedication to fostering growth within the FFXI crafting community, offering practical advice and expert knowledge to help players achieve their full potential in the world of Vana’diel.

dirty dozen and clean 15 pdf

The Dirty Dozen and Clean 15 lists, published annually by the Environmental Working Group (EWG), guide consumers on pesticide contamination in produce, helping them make informed choices for healthier, more sustainable diets.

Overview of the Dirty Dozen and Clean 15 Lists

The Dirty Dozen and Clean 15 lists rank fruits and vegetables based on pesticide contamination levels. The Dirty Dozen highlights produce with the highest residues, while the Clean 15 lists those with the lowest. Published annually by the Environmental Working Group (EWG), these rankings help consumers make informed choices to reduce pesticide exposure. The lists are based on extensive testing and analysis of pesticide levels in nonorganic produce. By understanding these rankings, shoppers can prioritize organic options for highly contaminated items and opt for conventional choices when contamination is minimal, promoting healthier and more sustainable diets.

Importance of Understanding Pesticide Contamination in Produce

Understanding pesticide contamination in produce is crucial for reducing exposure to harmful chemicals. The Dirty Dozen and Clean 15 lists provide insights into which fruits and vegetables are most and least contaminated. This knowledge helps consumers make informed decisions to minimize pesticide intake, particularly for vulnerable populations like children and pregnant individuals. By prioritizing organic options for highly contaminated items, shoppers can reduce health risks while supporting sustainable farming practices that promote environmental and human well-being.

The Dirty Dozen: Fruits and Vegetables with High Pesticide Contamination

The Dirty Dozen highlights produce with the highest pesticide residues, as identified by the EWG. Spinach tops the 2025 list, followed by strawberries and grapes, urging consumers to opt for organic options.

Top Contaminated Produce in the 2025 Dirty Dozen List

In 2025, spinach leads the Dirty Dozen list as the most contaminated produce, followed by strawberries, grapes, and pears. New entries like blackberries and sweet corn also rank high due to pesticide residues. The EWG’s analysis considers both pesticide concentration and toxicity, emphasizing the importance of choosing organic options for these items to minimize exposure. This list serves as a critical guide for consumers aiming to reduce their intake of harmful chemicals through informed grocery choices.

Spinach: The Most Contaminated Fruit or Vegetable in 2025

Spinach tops the 2025 Dirty Dozen list as the most contaminated produce, with alarming levels of pesticide residues. Testing revealed multiple pesticides on spinach samples, raising significant health concerns. The Environmental Working Group (EWG) highlights that consuming non-organic spinach regularly could expose individuals to a cocktail of harmful chemicals. This makes it crucial for consumers to opt for organic spinach to minimize pesticide intake. The findings underscore the importance of awareness and informed choices to reduce exposure to toxic substances in daily diets.

Other Notable Entries in the Dirty Dozen List

Beyond spinach, other produce on the 2025 Dirty Dozen list includes strawberries, blackberries, and sweet corn, with concerning pesticide levels. Blackberries and sweet corn are newcomers, highlighting growing contamination trends. Pears and grapes also rank high, with residues detected in nearly all samples. The EWG emphasizes that these findings underscore the importance of choosing organic options for these items to reduce pesticide exposure. Consumers are urged to prioritize organic purchases for these contaminated fruits and vegetables to safeguard their health and minimize environmental impact.

The Clean 15: Fruits and Vegetables with Low Pesticide Contamination

The Clean 15 list highlights produce with minimal pesticide residues, offering consumers a guide to safer, non-organic options. Avocados top the list as the cleanest fruit in 2025.

Top Clean Produce in the 2025 Clean 15 List

The 2025 Clean 15 list identifies produce with the lowest pesticide residues, offering consumers safer non-organic options. Avocados lead as the cleanest fruit, with minimal contamination. Sweet corn, pineapple, and frozen sweet peas also rank high, showing negligible pesticide traces. These fruits and vegetables are ideal for those seeking to reduce pesticide exposure without necessarily buying organic. The list is compiled by the EWG, ensuring transparency and helping shoppers make informed decisions for a healthier diet.

Avocados: The Cleanest Fruit in 2025

Avocados topped the 2025 Clean 15 list as the cleanest fruit, with minimal pesticide exposure. The EWG’s testing revealed that fewer than 2% of avocado samples contained detectable pesticide residues, making them a safe non-organic choice. Their thick skin protects the edible flesh from contamination, ensuring a healthy and nutritious option for consumers. This makes avocados an excellent addition to a balanced diet, offering both versatility and peace of mind for those prioritizing reduced pesticide intake without opting for organic produce.

Other Notable Entries in the Clean 15 List

Beyond avocados, the 2025 Clean 15 list highlights other produce with minimal pesticide residues. Sweet corn and pineapple are standout entries, with over 90% of samples showing no detectable pesticides. Kiwi and cabbage also rank highly, offering consumers affordable, non-organic options with low contamination risks. These fruits and vegetables are not only nutritious but also provide peace of mind for those seeking to minimize pesticide exposure without solely relying on organic choices.

Methodology Behind the Dirty Dozen and Clean 15 Rankings

EWG annually tests thousands of fruit and vegetable samples, analyzing pesticide residues and toxicity. Rankings are based on contamination levels, helping consumers prioritize organic choices effectively.

How the Environmental Working Group (EWG) Conducts Its Research

The EWG annually tests thousands of fruit and vegetable samples for pesticide residues, focusing on concentration and toxicity. Data is collected from USDA and FDA reports, ensuring accuracy. Samples are analyzed for over 200 pesticides, and results are ranked to determine contamination levels. The EWG considers both the amount of pesticides and their potential harm to human health. This rigorous process helps consumers identify which produce items are safest to buy conventionally and which should be purchased organic to minimize exposure.

Factors Considered in Pesticide Contamination Analysis

The EWG’s analysis considers pesticide concentration, toxicity, and the number of different pesticides found on produce. They also evaluate the percentage of samples contaminated and the effectiveness of washing or peeling in reducing residues. This comprehensive approach ensures the rankings reflect both the level and potential harm of pesticide exposure, helping consumers prioritize which fruits and vegetables to buy organic to minimize health risks.

Trends in Pesticide Use and Contamination

Recent trends show increasing pesticide toxicity in produce, with newcomers like blackberries and sweet corn joining the Dirty Dozen list, highlighting the growing need for organic choices.

Changes in the Dirty Dozen and Clean 15 Lists Over the Years

Over the years, the Dirty Dozen and Clean 15 lists have seen notable changes, reflecting shifts in pesticide use and testing methodologies. In 2025, spinach topped the Dirty Dozen, while avocados remained the cleanest in the Clean 15. New entries like blackberries and sweet corn joined the Dirty Dozen, highlighting growing pesticide concerns. These annual updates underscore the importance of staying informed about produce contamination to make healthier choices and support sustainable farming practices.

Newcomers to the Dirty Dozen List in 2025

In 2025, the Dirty Dozen list saw significant updates, with blackberries and sweet corn making their debut. These additions reflect the Environmental Working Group’s (EWG) enhanced criteria, which now consider both pesticide concentration and toxicity. The inclusion of these items highlights growing concerns over pesticide exposure. Consumers are encouraged to opt for organic options when purchasing these newcomers to minimize potential health risks associated with pesticide residues.

Health Implications of Pesticide Exposure

Pesticide residues on produce may pose health risks, including potential links to chronic diseases and developmental issues, especially in children and during pregnancy, emphasizing the need for awareness.

How Pesticide Residues Affect Human Health

Pesticide residues on fruits and vegetables can pose health risks, particularly for vulnerable populations like children and pregnant individuals. Exposure to these chemicals has been linked to potential developmental issues and chronic diseases.

The Dirty Dozen list highlights produce with higher contamination levels, urging consumers to opt for organic options to minimize exposure and protect long-term health. Awareness of these risks empowers individuals to make informed dietary choices.

Special Considerations for Vulnerable Populations

Children, pregnant women, and the elderly are particularly vulnerable to pesticide exposure due to their developing bodies or weaker immune systems. Even low levels of pesticide residues can pose risks to their health and development.

These groups should prioritize purchasing organic options for produce listed on the Dirty Dozen to minimize exposure. Additionally, thorough washing of fruits and vegetables, even those on the Clean 15 list, is recommended to further reduce pesticide residue intake.

Expert Opinions and Recommendations

Health experts emphasize the importance of the Dirty Dozen and Clean 15 lists, urging consumers to choose organic for high-contamination items and conventional for low-risk produce.

What Health Experts Say About the Dirty Dozen and Clean 15

Health experts widely endorse the Dirty Dozen and Clean 15 lists, emphasizing their role in reducing pesticide exposure. They highlight the importance of choosing organic for items like spinach and strawberries, which top the contamination list. The EWG’s 2025 report reveals new entries, such as blackberries and sweet corn, urging consumers to opt for organic versions due to higher toxicity risks. Experts also stress the benefits of the Clean 15, like avocados, which show minimal pesticide residues, making conventional options a safe choice.

By following these guidelines, consumers can make informed decisions to protect their health and the environment, aligning with expert recommendations for a safer diet.

Practical Tips for Reducing Pesticide Exposure

To minimize pesticide exposure, prioritize buying organic for fruits and vegetables on the Dirty Dozen list, such as spinach and strawberries. For produce on the Clean 15, like avocados, conventional options are generally safe. Wash all fruits and vegetables thoroughly, even if you plan to peel them, using cool tap water or a vinegar rinse. Scrub firm-skinned produce like apples and potatoes to remove surface residues. Supporting sustainable farming practices by choosing organic when possible can also help reduce overall pesticide use in agriculture.

Environmental Impact of Pesticide Use

Pesticide use disrupts ecosystems, harms biodiversity, and contaminates soil and water. Reducing pesticide reliance through sustainable farming practices can mitigate these environmental impacts and promote ecological balance.

How Pesticides Affect Ecosystems and Biodiversity

Pesticides disrupt ecosystems by contaminating soil, water, and air, leading to bioaccumulation in wildlife. This harms biodiversity, particularly pollinators like bees, and affects beneficial insects. The loss of these species weakens ecosystem services, including pollination and pest control. Pesticide runoff also impacts aquatic life, causing declines in fish populations and altering food chains. Such environmental damage underscores the need for sustainable farming practices to reduce chemical use and protect biodiversity, aligning with the principles of the Dirty Dozen and Clean 15 lists.

Sustainable Farming Practices to Reduce Pesticide Use

Sustainable farming practices, such as crop rotation, organic farming, and integrated pest management, significantly reduce pesticide use. These methods promote soil health, biodiversity, and natural pest control. Organic farming avoids synthetic chemicals, relying instead on natural fertilizers and biological pest deterrents. Cover cropping and agroforestry also enhance ecosystem services, reducing the need for pesticides. By adopting these practices, farmers can produce cleaner, healthier food while protecting ecosystems and biodiversity, aligning with the goals of the Dirty Dozen and Clean 15 lists to minimize chemical contamination in produce.

Using the Dirty Dozen and Clean 15 Guide

Use the Dirty Dozen and Clean 15 guide to make informed shopping decisions. Check the lists before grocery shopping to prioritize organic for high-contamination items and save on low-contamination produce, reducing pesticide exposure and supporting sustainable farming practices.

How to Incorporate the Guide into Your Shopping Routine

Start by referencing the Dirty Dozen and Clean 15 guide before grocery shopping. Prioritize buying organic for fruits and vegetables on the Dirty Dozen list, while opting for conventional options from the Clean 15. Check for updates annually, as rankings may change. When shopping, keep the list handy or use a mobile app for quick reference. This simple practice helps reduce pesticide exposure and supports sustainable farming practices, promoting a healthier diet and environment.

Benefits of Choosing Organic for the Dirty Dozen

Choosing organic for the Dirty Dozen significantly reduces pesticide exposure, as these fruits and vegetables often have the highest contamination levels. Organic farming avoids synthetic pesticides, lowering health risks, especially for vulnerable populations like children and pregnant women. By opting for organic, consumers support sustainable agriculture, reducing environmental pollution and protecting biodiversity. This choice aligns with promoting healthier diets and ecosystems, making it a practical step toward a more sustainable lifestyle.

The Dirty Dozen and Clean 15 lists empower consumers to make informed choices, reducing pesticide exposure and promoting healthier, sustainable diets while supporting eco-friendly farming practices.

Key Takeaways from the Dirty Dozen and Clean 15 Lists

The Dirty Dozen and Clean 15 lists highlight produce with high and low pesticide contamination, respectively. Spinach tops the 2025 Dirty Dozen, while avocados lead the Clean 15. New entries like blackberries and sweet corn emphasize shifting pesticide trends. The EWG’s research now considers both pesticide concentration and toxicity, offering consumers clearer guidance. By prioritizing organic for the Dirty Dozen and opting for Clean 15 items, shoppers can reduce exposure and support sustainable farming. These lists empower informed decisions for a healthier, eco-friendly diet.

Encouraging a Healthier and More Sustainable Diet

Adopting the Dirty Dozen and Clean 15 lists promotes healthier eating by minimizing pesticide exposure and supports eco-friendly farming. Choosing organic for high-contamination items like spinach and strawberries, while opting for Clean 15 produce like avocados, reduces chemical intake. This approach aligns with sustainable practices, benefiting both personal health and the environment. By making informed choices, consumers can foster a diet that prioritizes wellness and environmental stewardship, encouraging a cleaner, greener food system for future generations.